High Fidelity
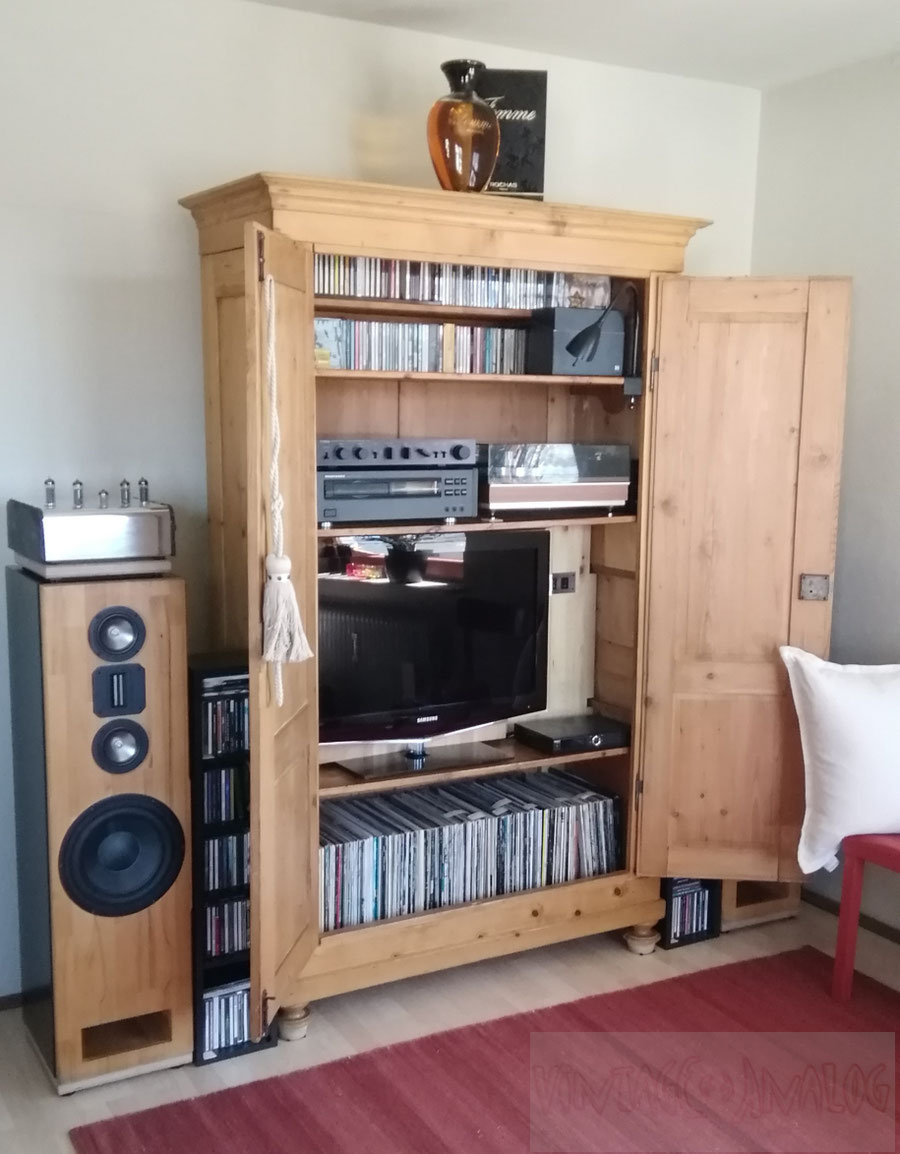
As you can see ... this isn't High-End, but it's definitely a great source of relaxing fun for me. I like to build, improve or modify the Hifi-Equipment, as long as it fit my own needs ... or as long as I think I'ts interresting to work on it :o)
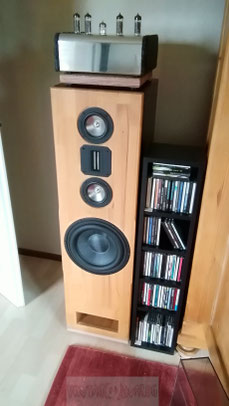
Power Amp, DIY ... based on Elrad Quadriga
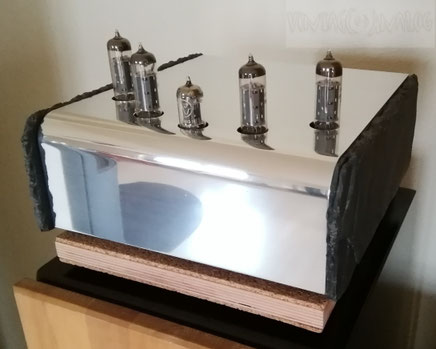
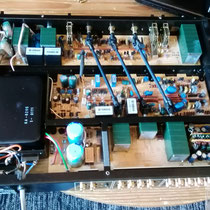
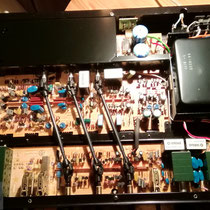
This Amplifier DIY Project from 1992 is based on ELRAD Quadriga, which is described in the ELRAD magazine 3/92. After a first positive approach with a tube-amplifier for Hifi purposes in 1986, it's also a ELRAD Project called RÖH2, I decided to modify the board layout and the appearance as two Mono-Amplifiers with separate housings.
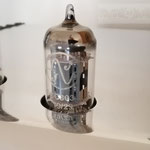
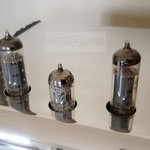
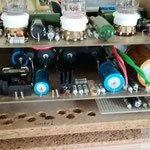
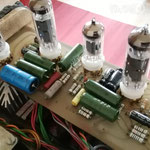
Basically this design consists of a ECC83 double triode, one half for the preamp stage, the other half for the phase-shifter. The fixed biased Power output stages are realized originally with 4 x EL84 pentodes. After nearly 20 years I switched over to the russian 6P15P pentodes ... and I don't regret this until now. In this design the Tube heating is done with DC- instead of AC-Voltage which excludes one possible source of Hum. In addition the heating voltage has a soft-start feature which protect the tube-heaters during startup.
If you look at the pictures you may realize the handmade printed boards. Hmmmm ... creating transparencies, exposure process and etching with iron-3-chloride ... Really, I don't miss it today ;o)
Over the years I changed a lot here. At the moment I prefer the russian Paper in oil K42Y-2 as coupling capacitors ... but maybe I'm going back to the Siemens MKH B32231. This is a matter of taste I think.
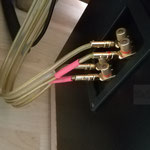
Maybe you realize that Amp and Speakers are connected through bi-wiring ... what means there are two pairs of cables running from the amp to the separated inputs (bass and treble) of the speaker. At my opinion this a cost effective method to improve the impulse response of your audio chain, especially if your Amp has only a low power-output.
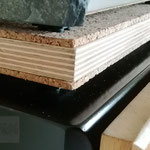
The Sandwich between the Amplifier and the speaker is a vibration damper. Tubes are microphonic so it is a good idea to damp vibrations especially if the amplifier sits direct on top of the speaker. My damping construction consists of rubber feets, cork mats and a birch plywood core. It helps to improve the natural acoustic image of your audio chain.
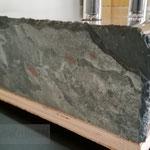
The Housing itself consists of a wooden core for easy and safe mounting of the power- and output transformers. The sides are veneered with slate slabs with only roughly broken edges. The top plate is made from aluminium, bent to 90 degree with a radius of 25mm. The extreme polishing work gives you that shiny, heavy reflecting appearance which increases nicely the soft glowing light of the tubes during operation :o)
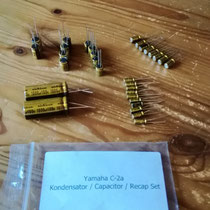
Pre-Amp, Yamaha C2-a
This Preamp really rocks ... !!!
Built like a tank, with a lot of high quality components this preamp will last another 40 years. I got a fine Recap Kit especially for the C2-a with Nichicon Caps that replaced the old ones.
A very good example of perfect design ... it looks great and sound great too. Especially it's Phono Inputs are top of the notch ... and really versatile (MM/MC and switchable input impedance).

Visaton Vox 253 MTI
This is a DIY-Kit from Visaton, a german company that sells single Chassis and complete loudspeaker Kit's without housings.
This Kit, the Vox 253 MTI, is the highlight of Visaton's Vox Series. It features a first class magnetostatic tweeter, two 4'' low-mid-range drivers with diaphragm cone's made of pure titanium and one 10'' woofer with a diaphragm made as a sandwich construction of fibreglass and polyester layers.
The cabinet is from a previous DIY project and was adapted for the Visaton kit.
So much precision, so much truth ... it needs a while to find this cool ! In between I like it very much :o)
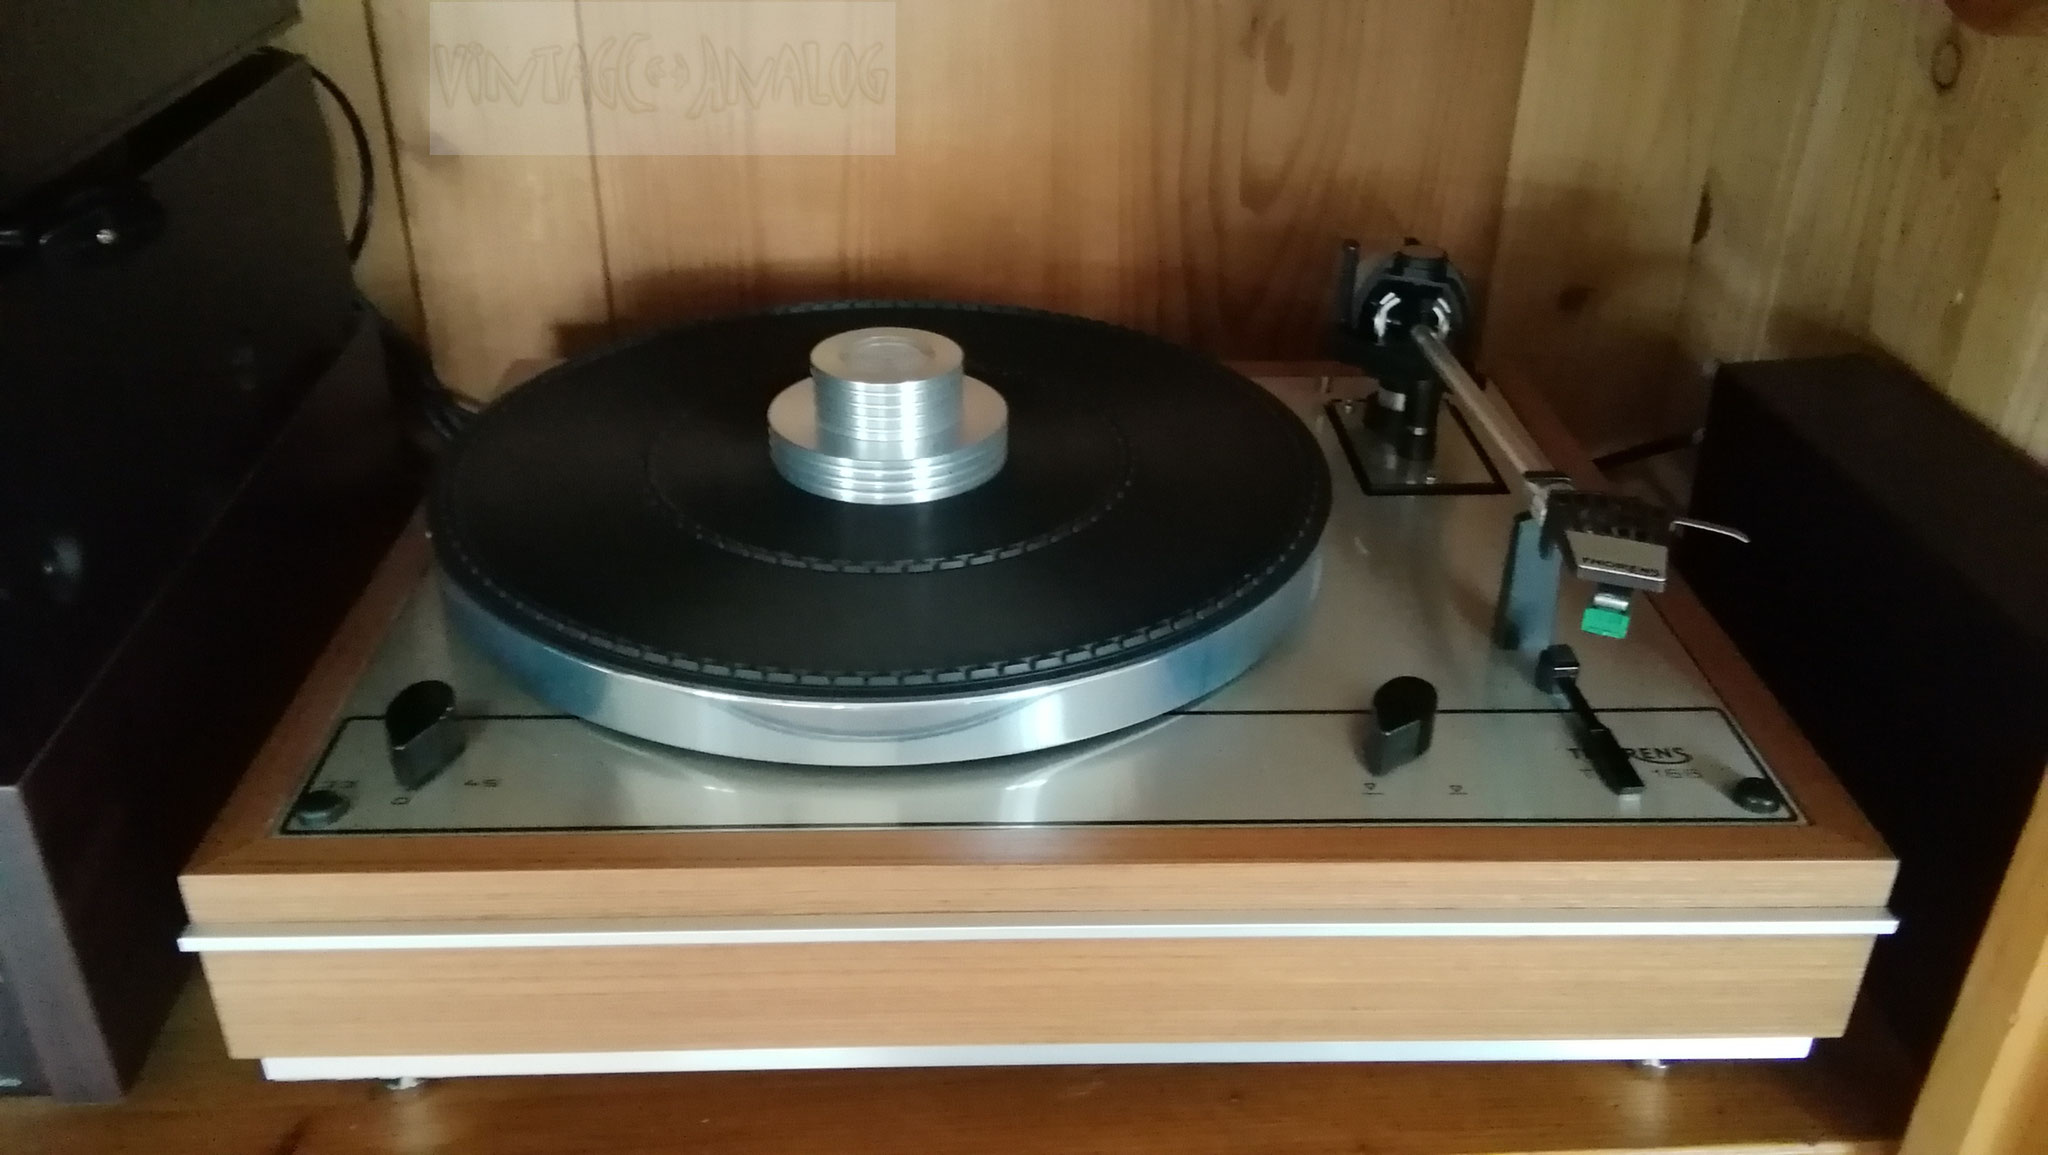
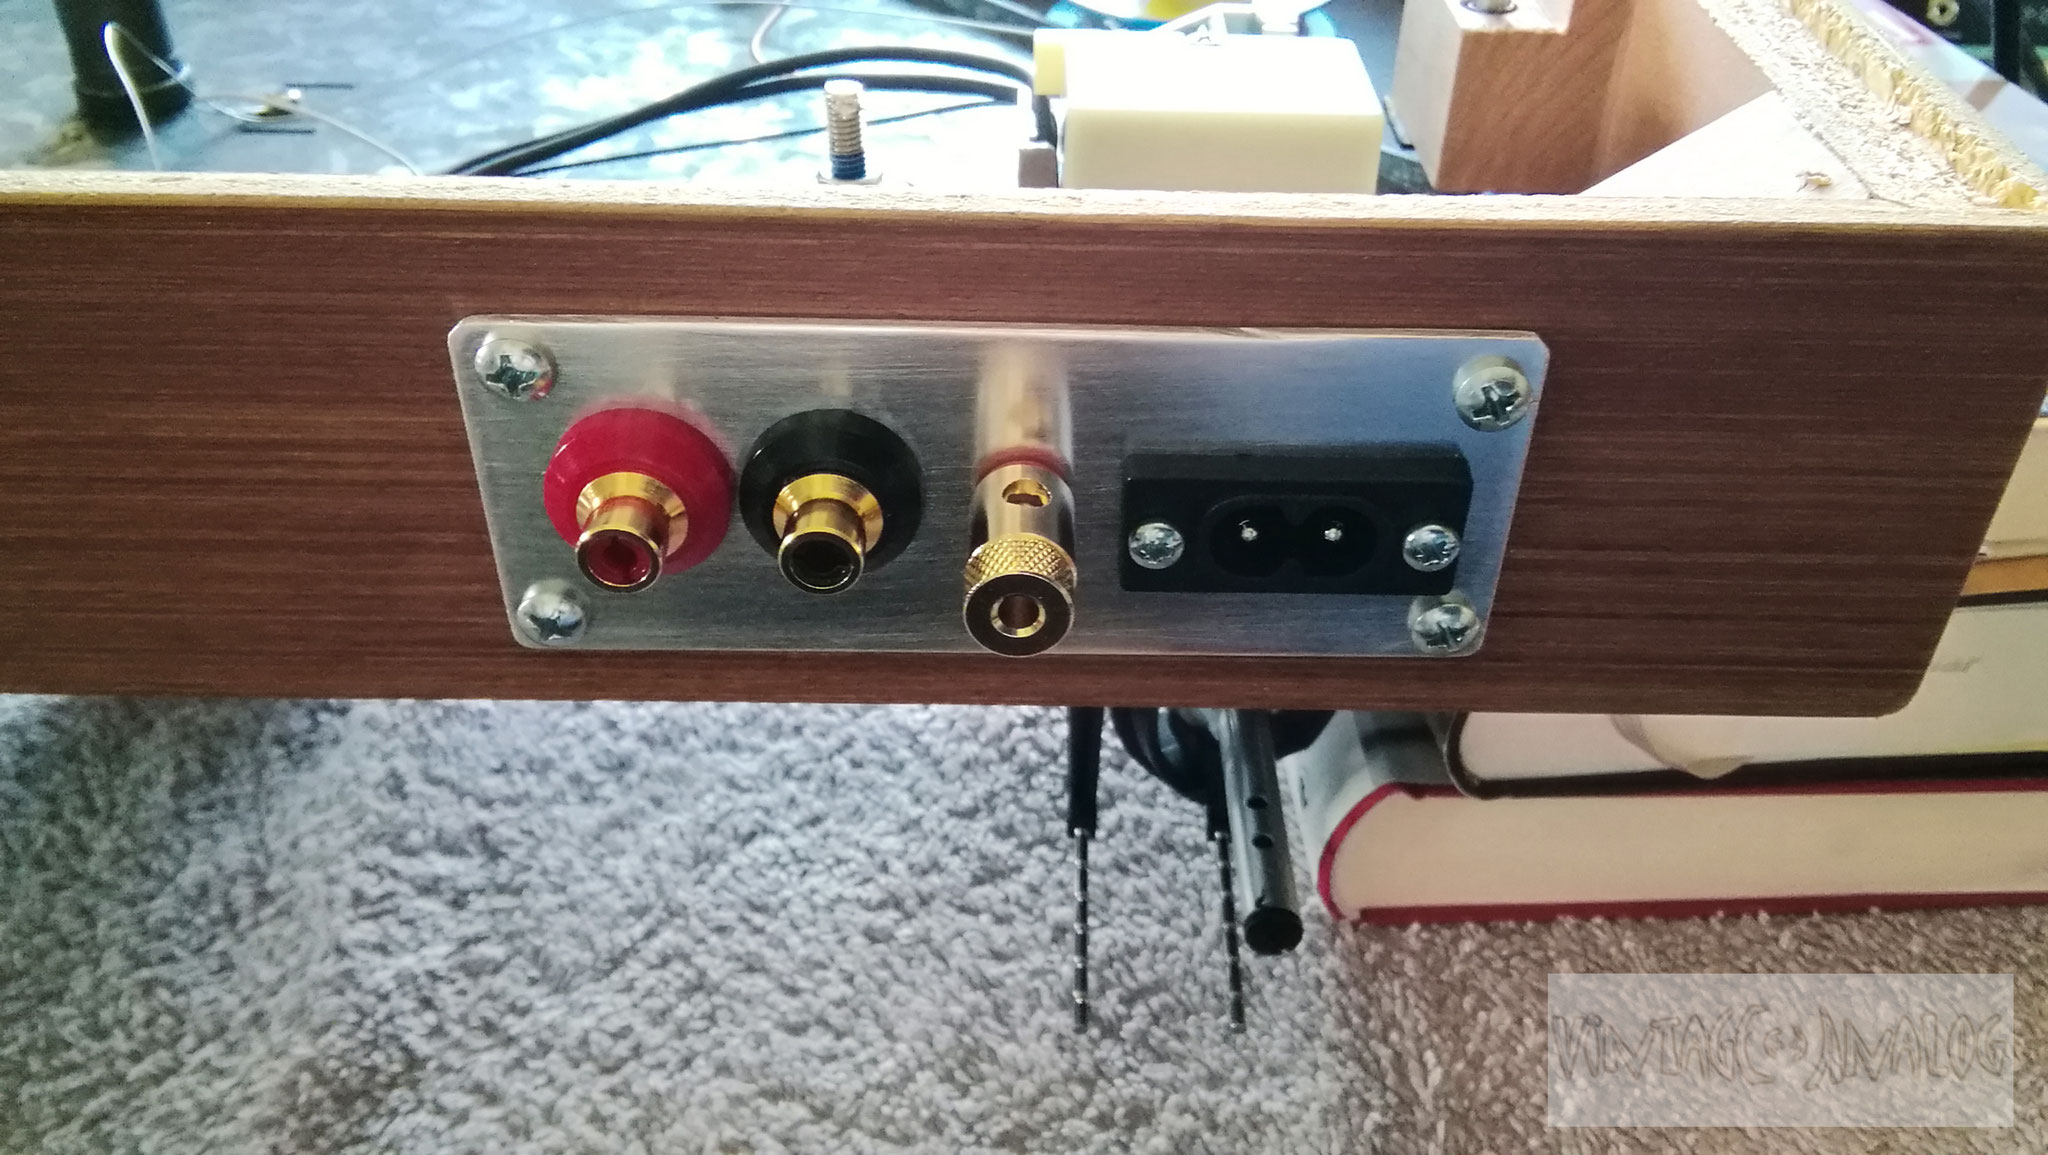
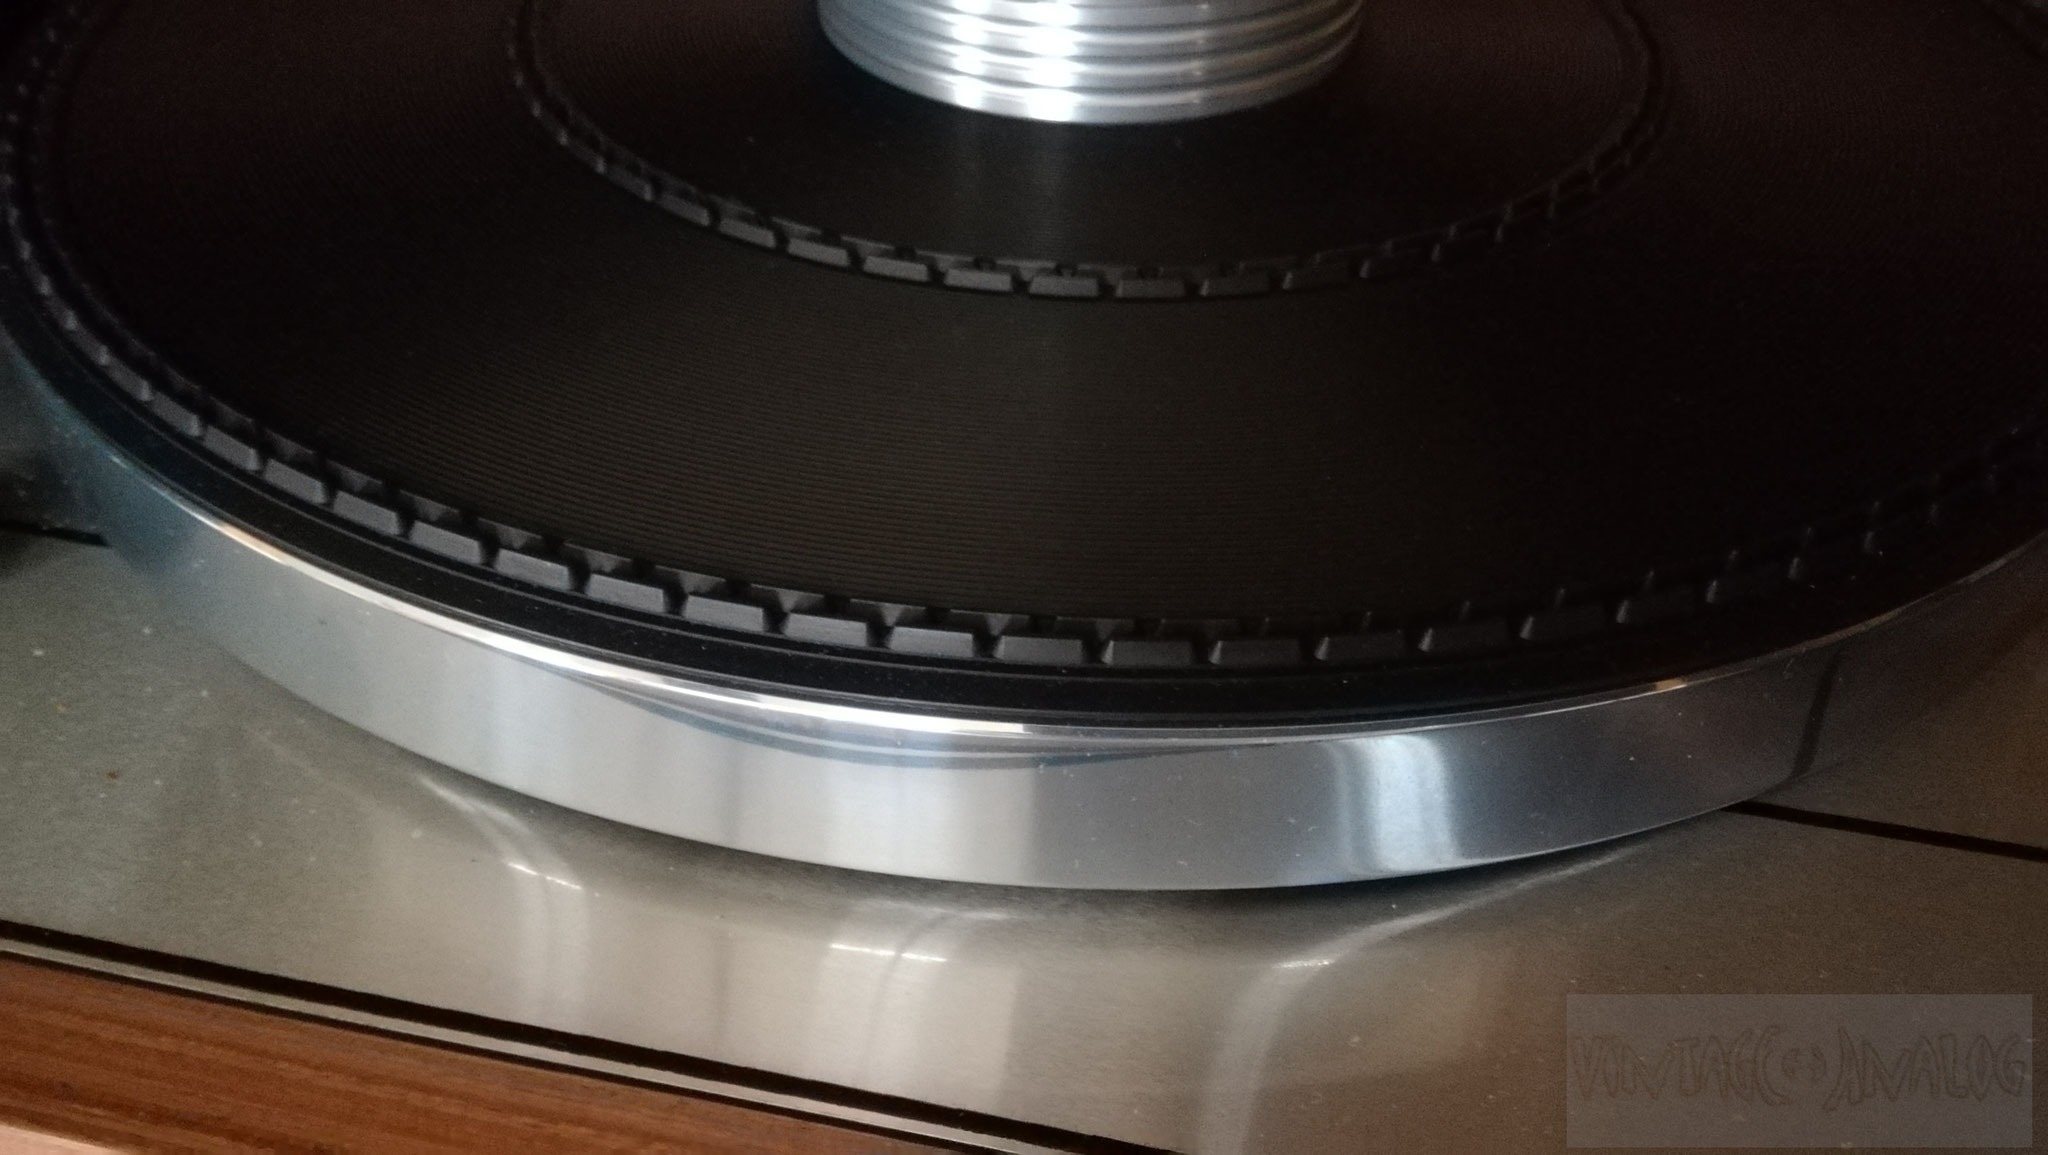
Thorens TD-166
I like it simple ... this one is simple, but ones more a quality product. Even after 45 years ... this thing is working like a charm.
There are some easy modifications that increases fun and usability :
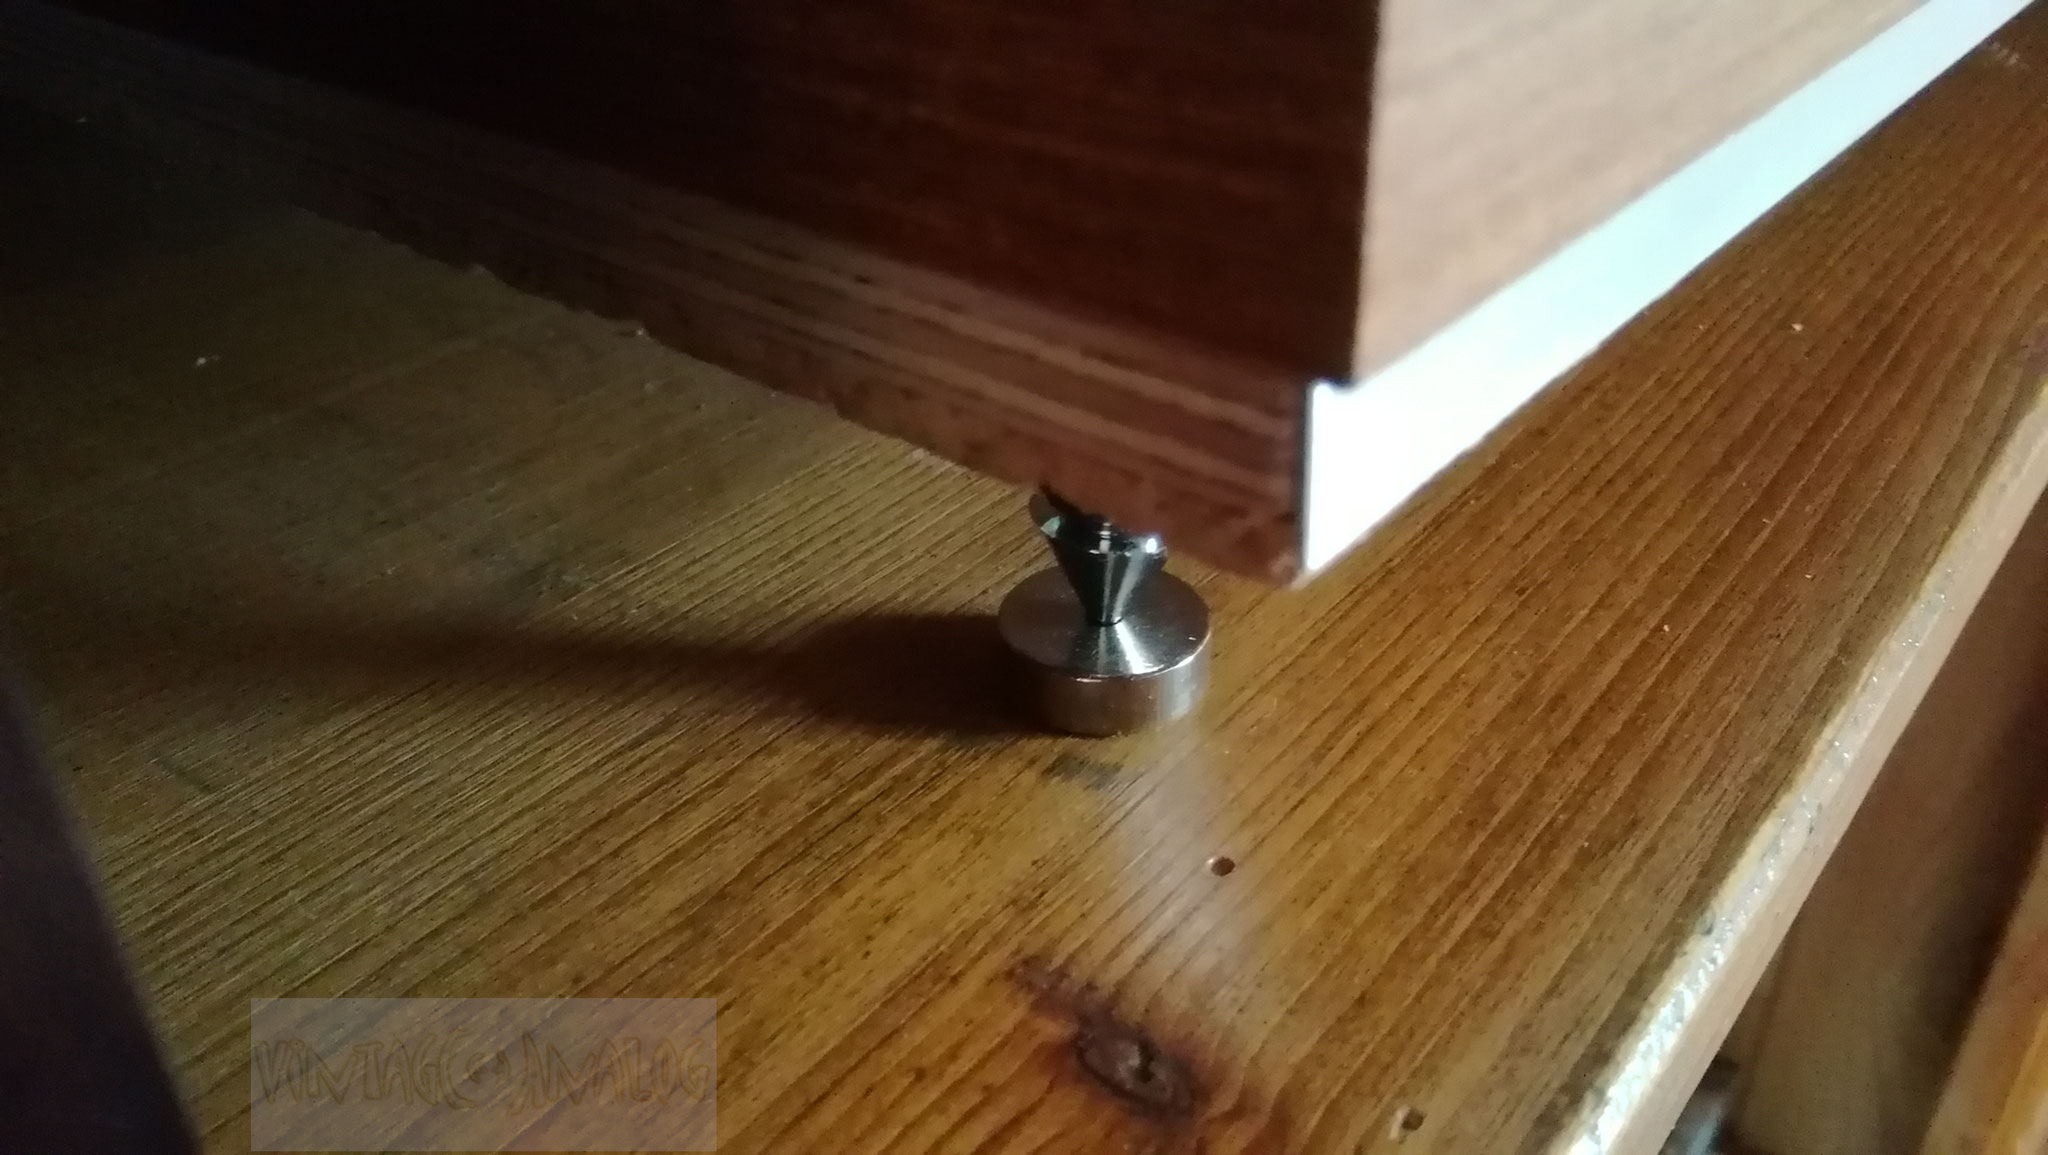
- Change the baseplate
- Add Spikes
- Add a Connection Board
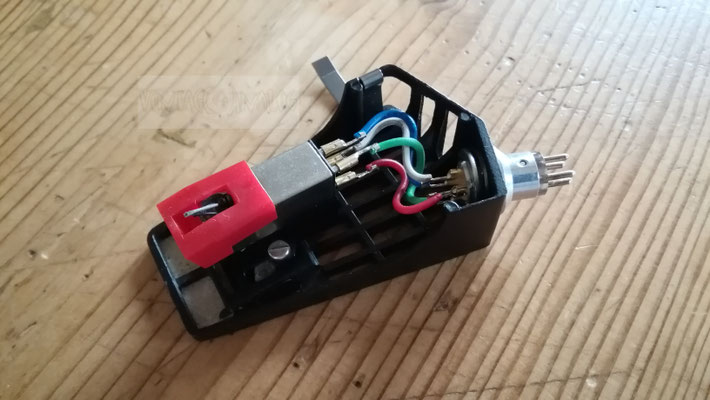
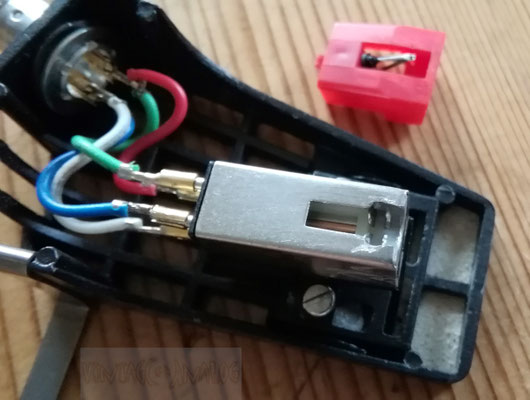
- Change the Pickup Wiring
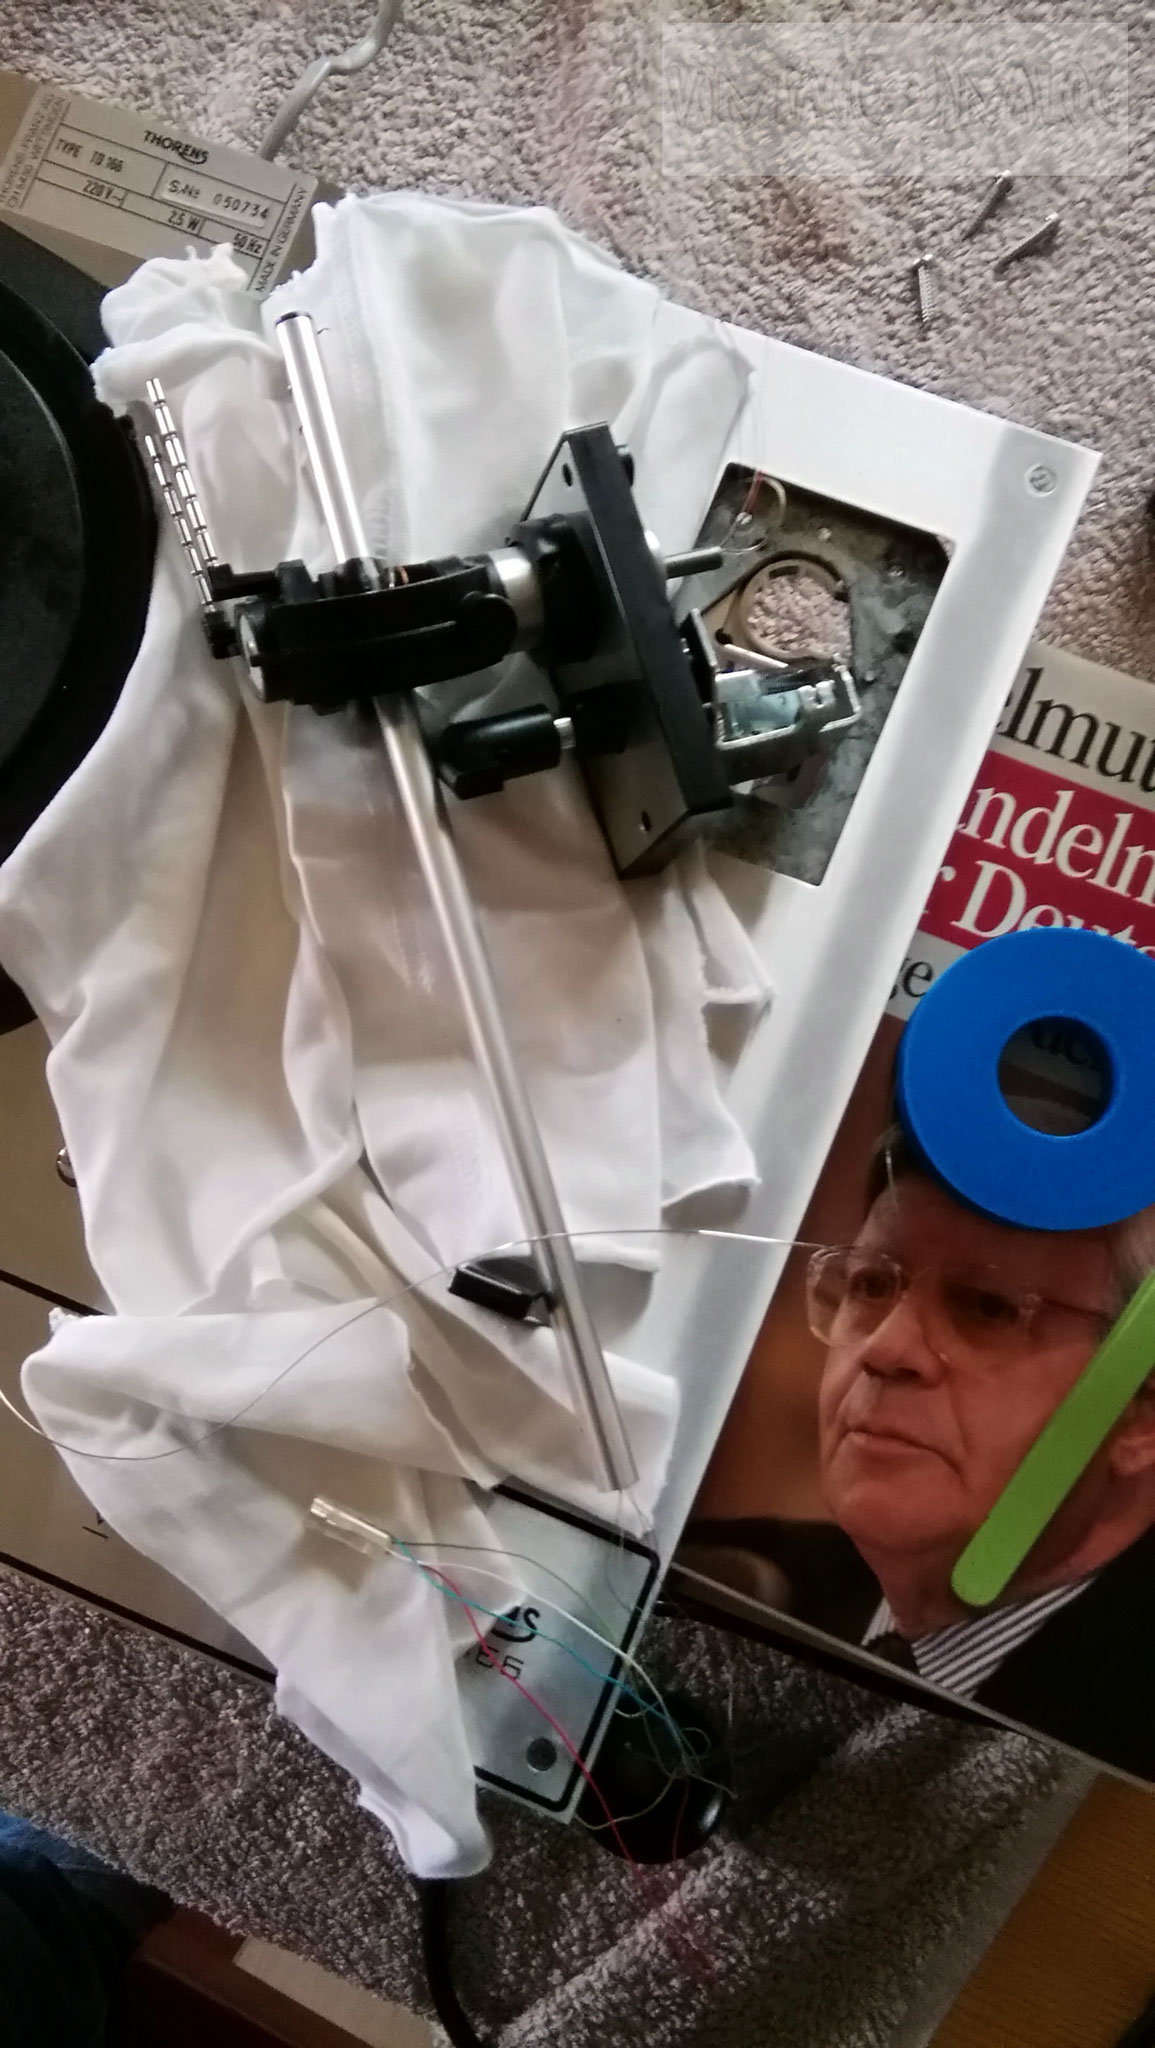


Raumnadel modification MK2
It looks strange, and truly it is a strange modification. I first read about this on Jochen Soppa's Website, he called it the "Raumnadel" modification, and I'm really impressed about the
mechanical precision. I'm not a precision engineer, mostly I'm shifting Bit's and Bytes and working on electronic stuff, so I asked me ... is this possible for me too ?
Beside the extreme mechanical precision and the needed manual skills, I can't see a really roadblock so I decided to give it a try. I ordered the components and start with the modification of two
DUAL MM-Systems that I already owned in the past. What should I say ... it is possible to do it by your own ... but you need these manual skills :o)
Is it worth the trouble ? ... At my opinion ... definitely yes. I realized that listening to records become much more interresting again for me ... like in the old days. And it is a eyecatcher
for each Hifi-Fan, if you supply good magnifying glasses ;o)

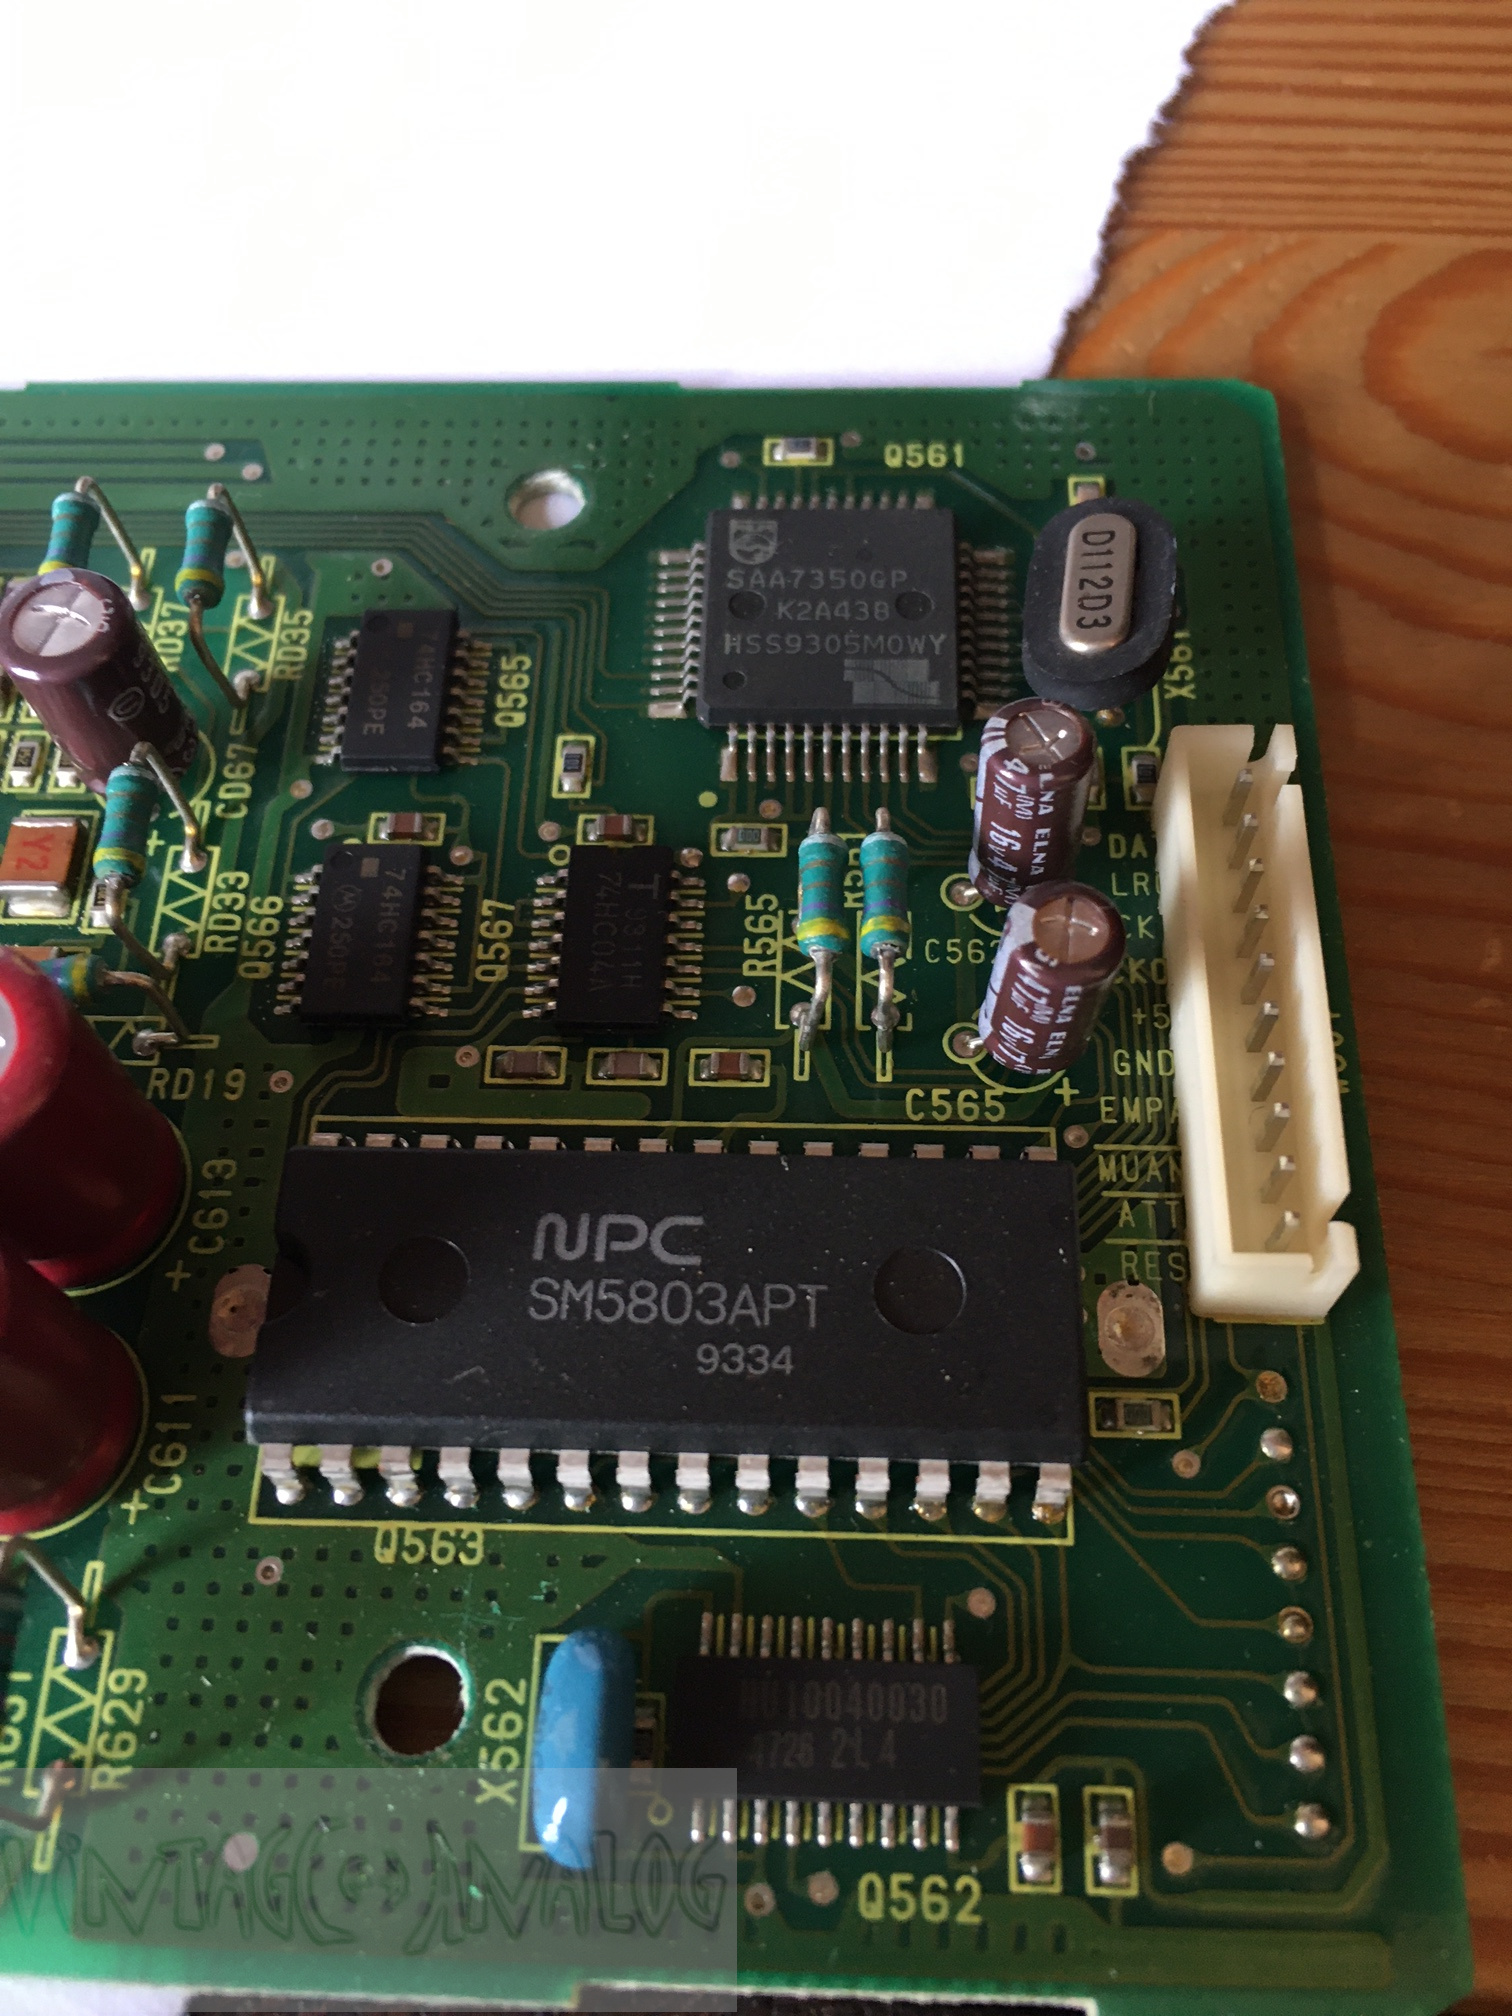
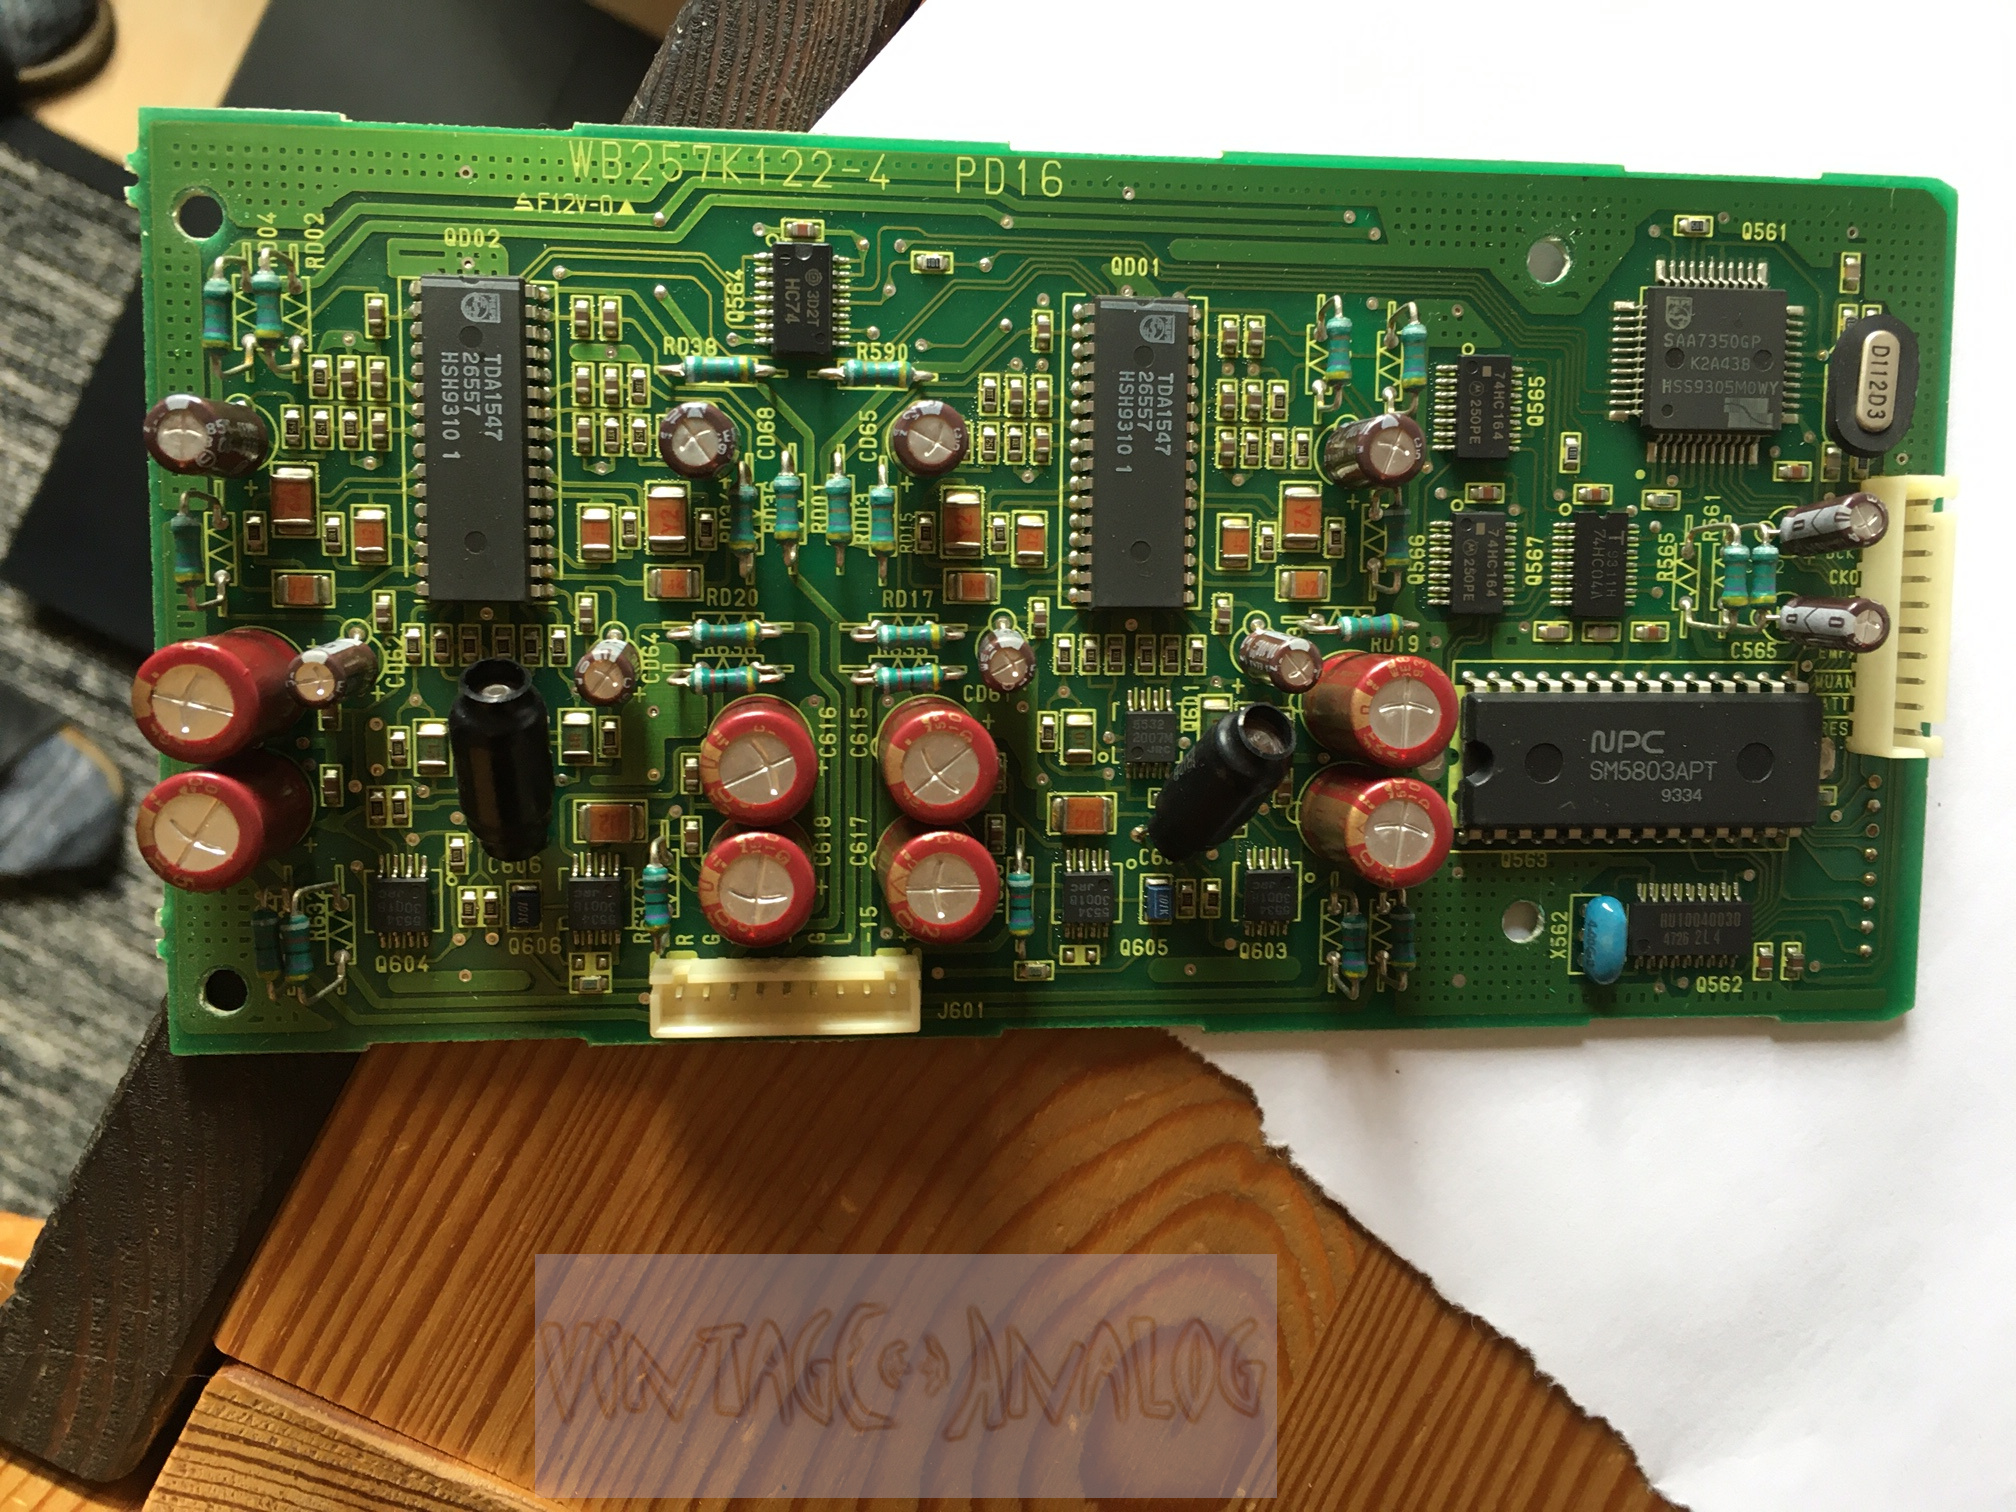
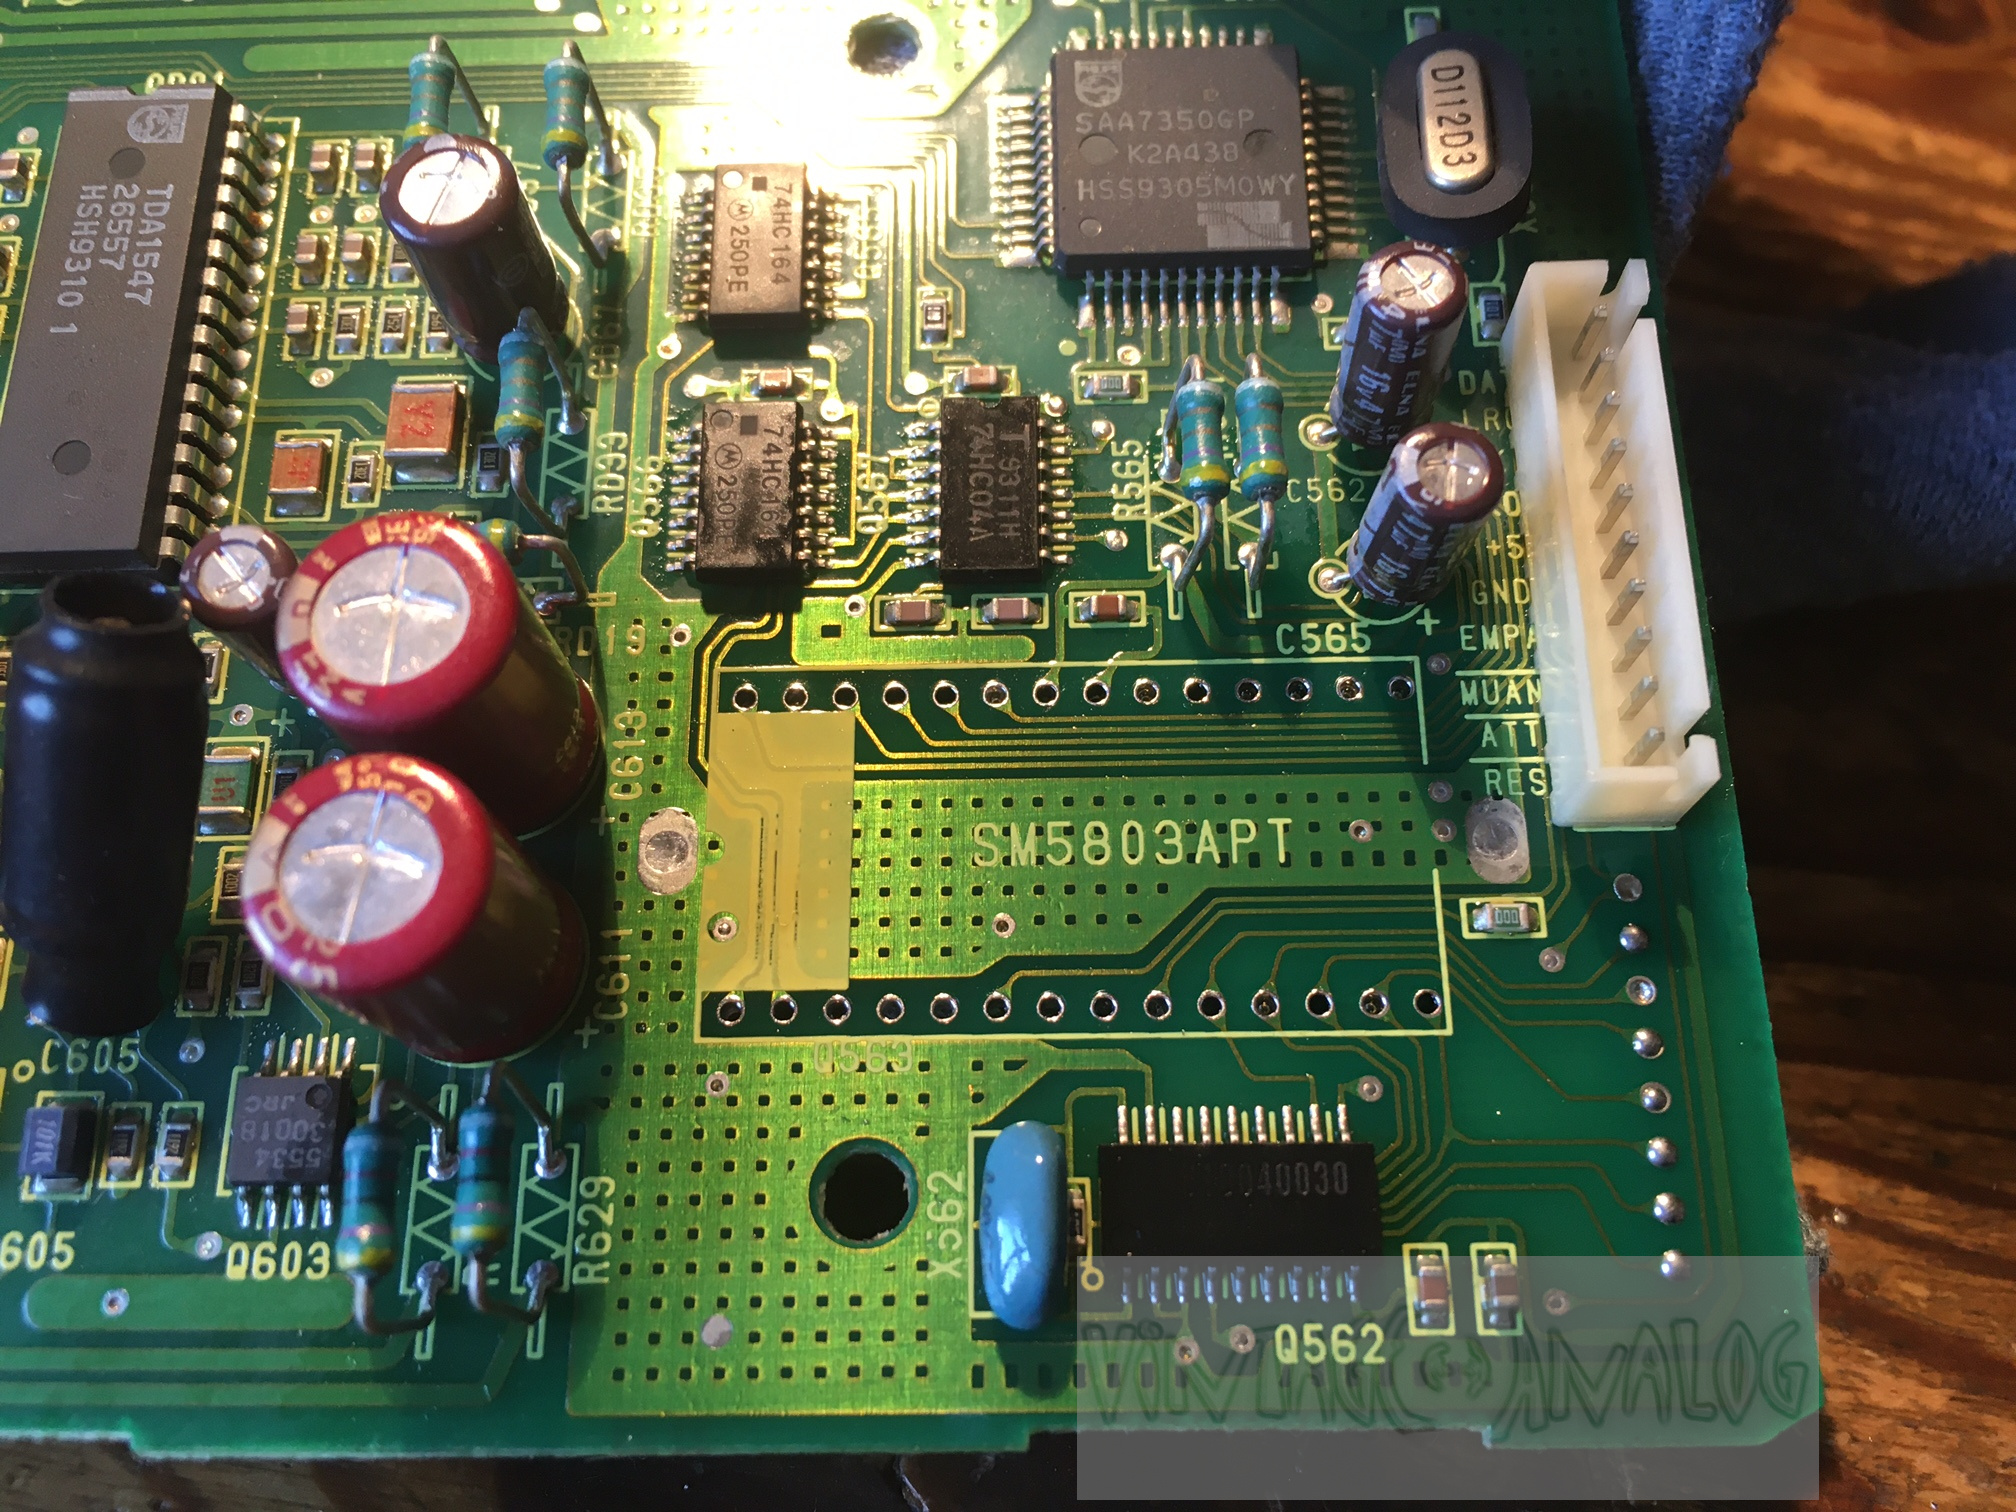
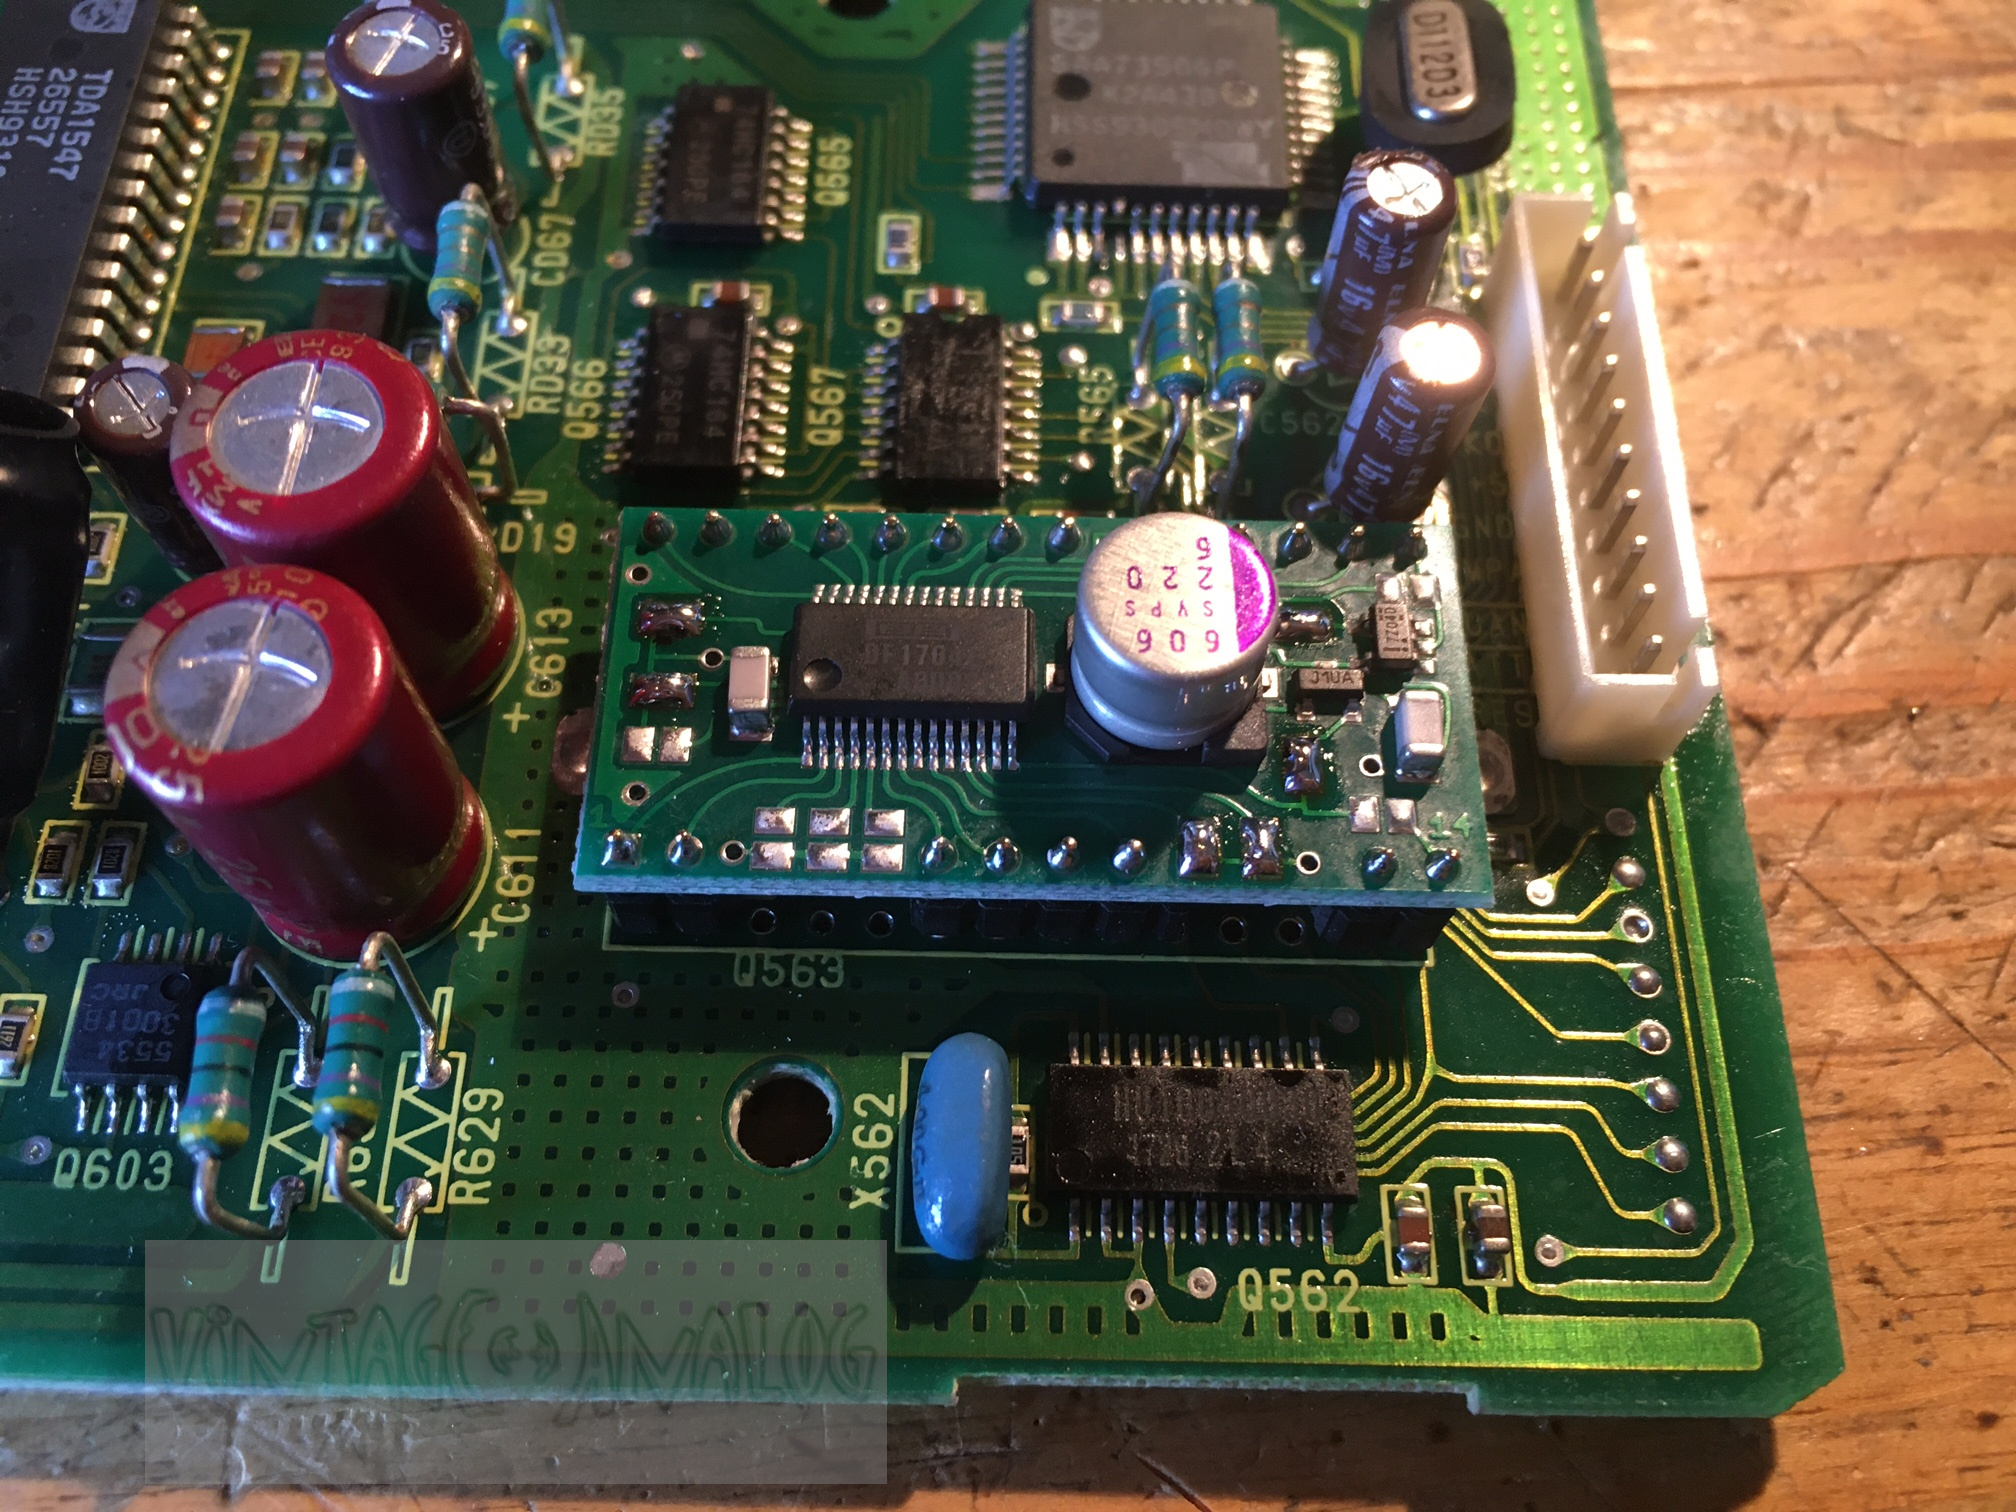
Marantz CD-10
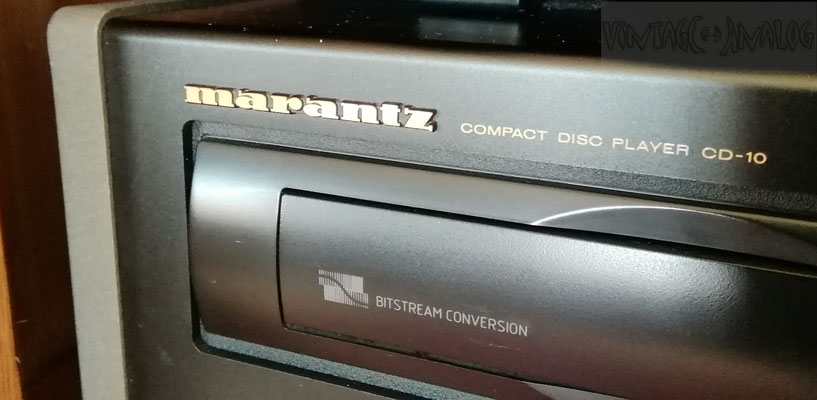
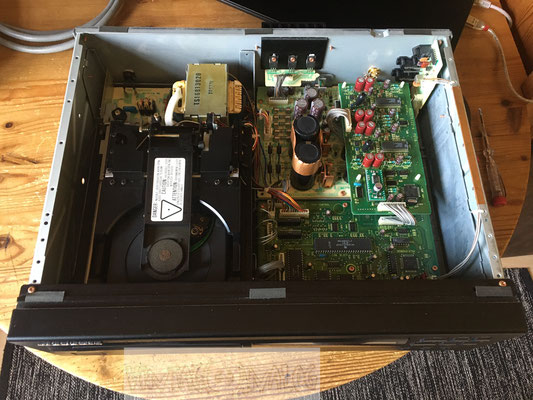
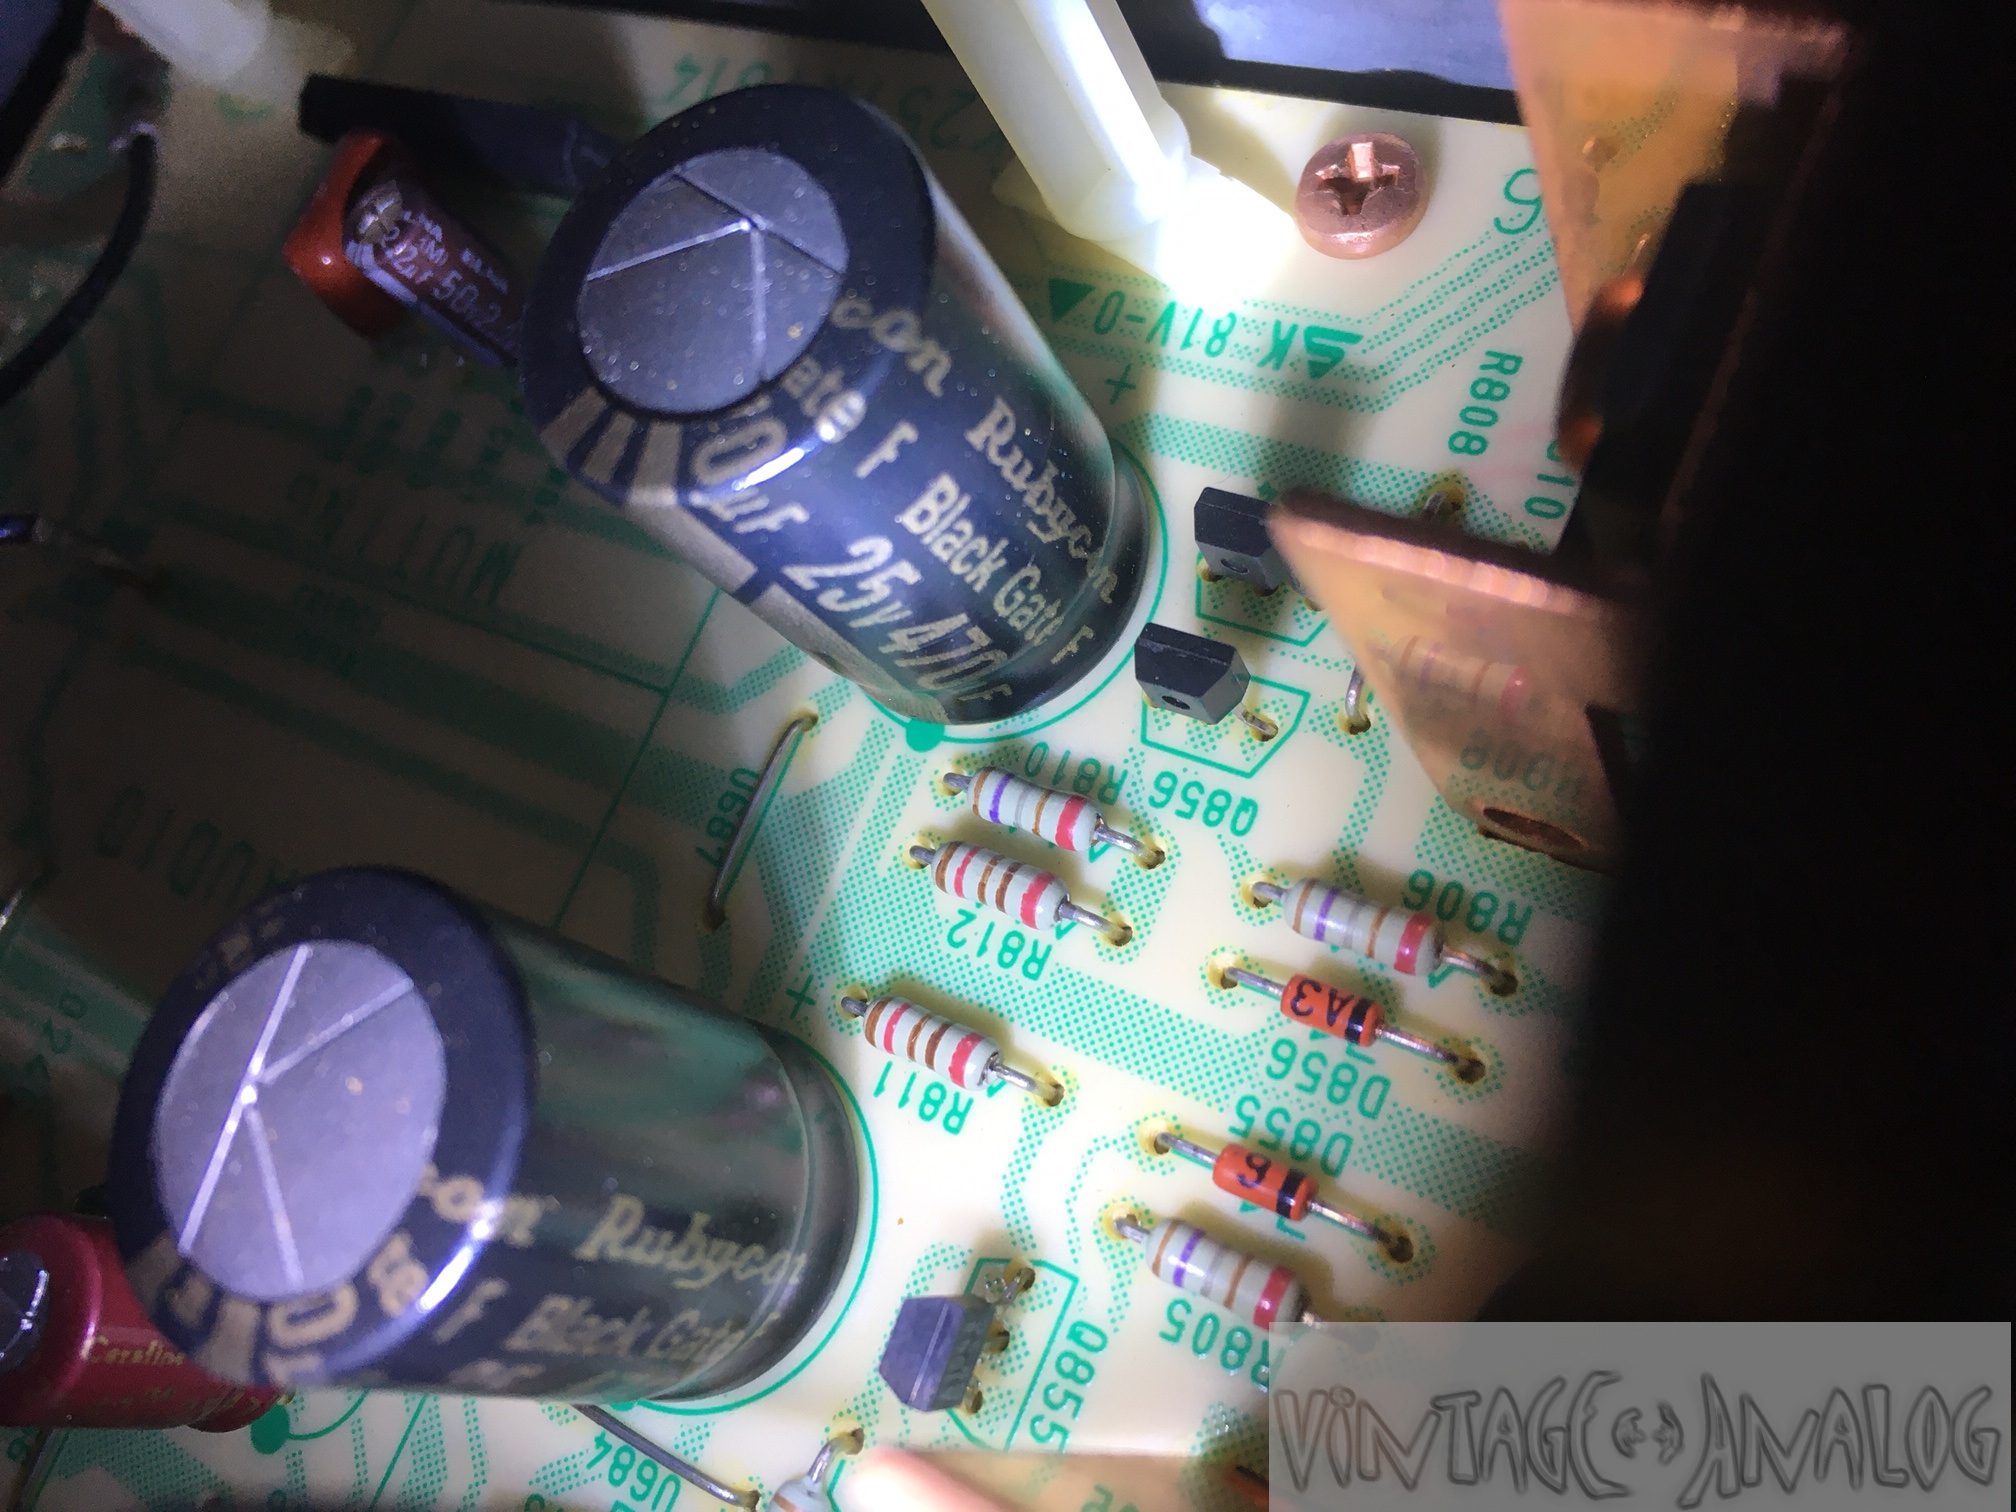
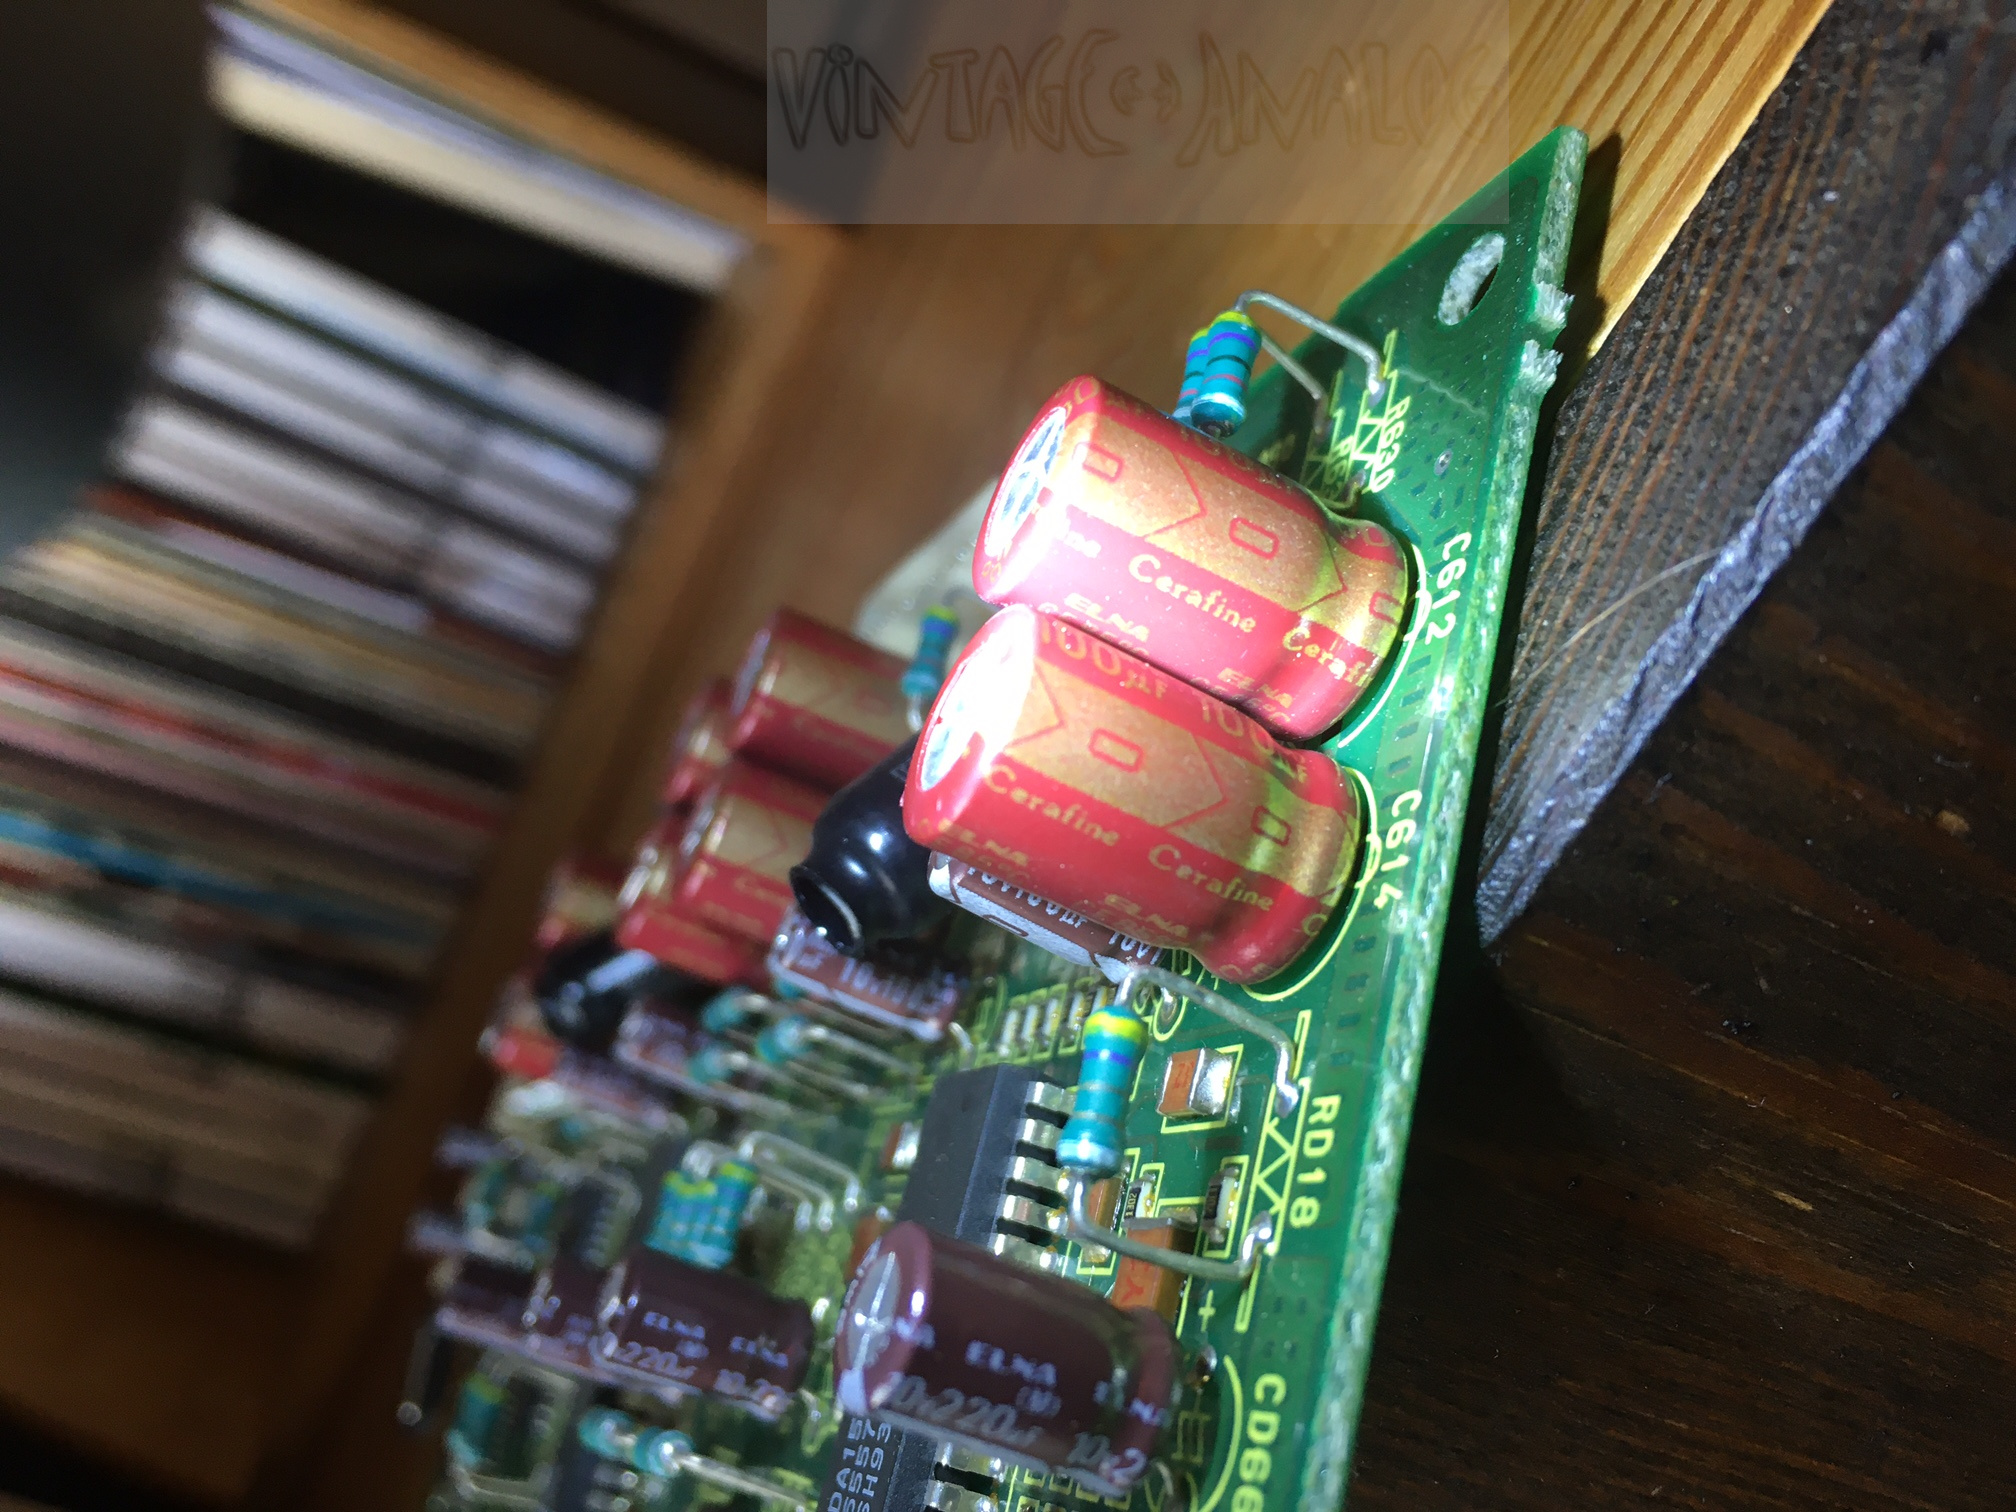
As the drive of my old Harman Kardon HD-750 comes to the end of it's lifetime it was the right time to look for a proper replacement. I remember that the Marantz was very popular in the mid 90ies and one of my favorites at this time. It's overall build quality is outstanding ... It starts with housing and mechanic components that will lead to a weight from round about 16kg. A weight, that really no one expect from a CD-Player ... and goes once more to the design and used components on the electronic-side. Best capacitors like ELNA's Cerafine series, and of course the very famous and quite a bit "mystical" Black Gate's ! Even if the DA-Conversion is a child of it's time, it is still a wonderful sounding machine ...
Maybe after a while I will check it's internal DA-Converter against my Sony DAT DTC-55ES. I remember that I perform this shootout with the HD-750 ... and, what should I say ... no chance for the HD-750. This old DAT machine blows him away without any effort.
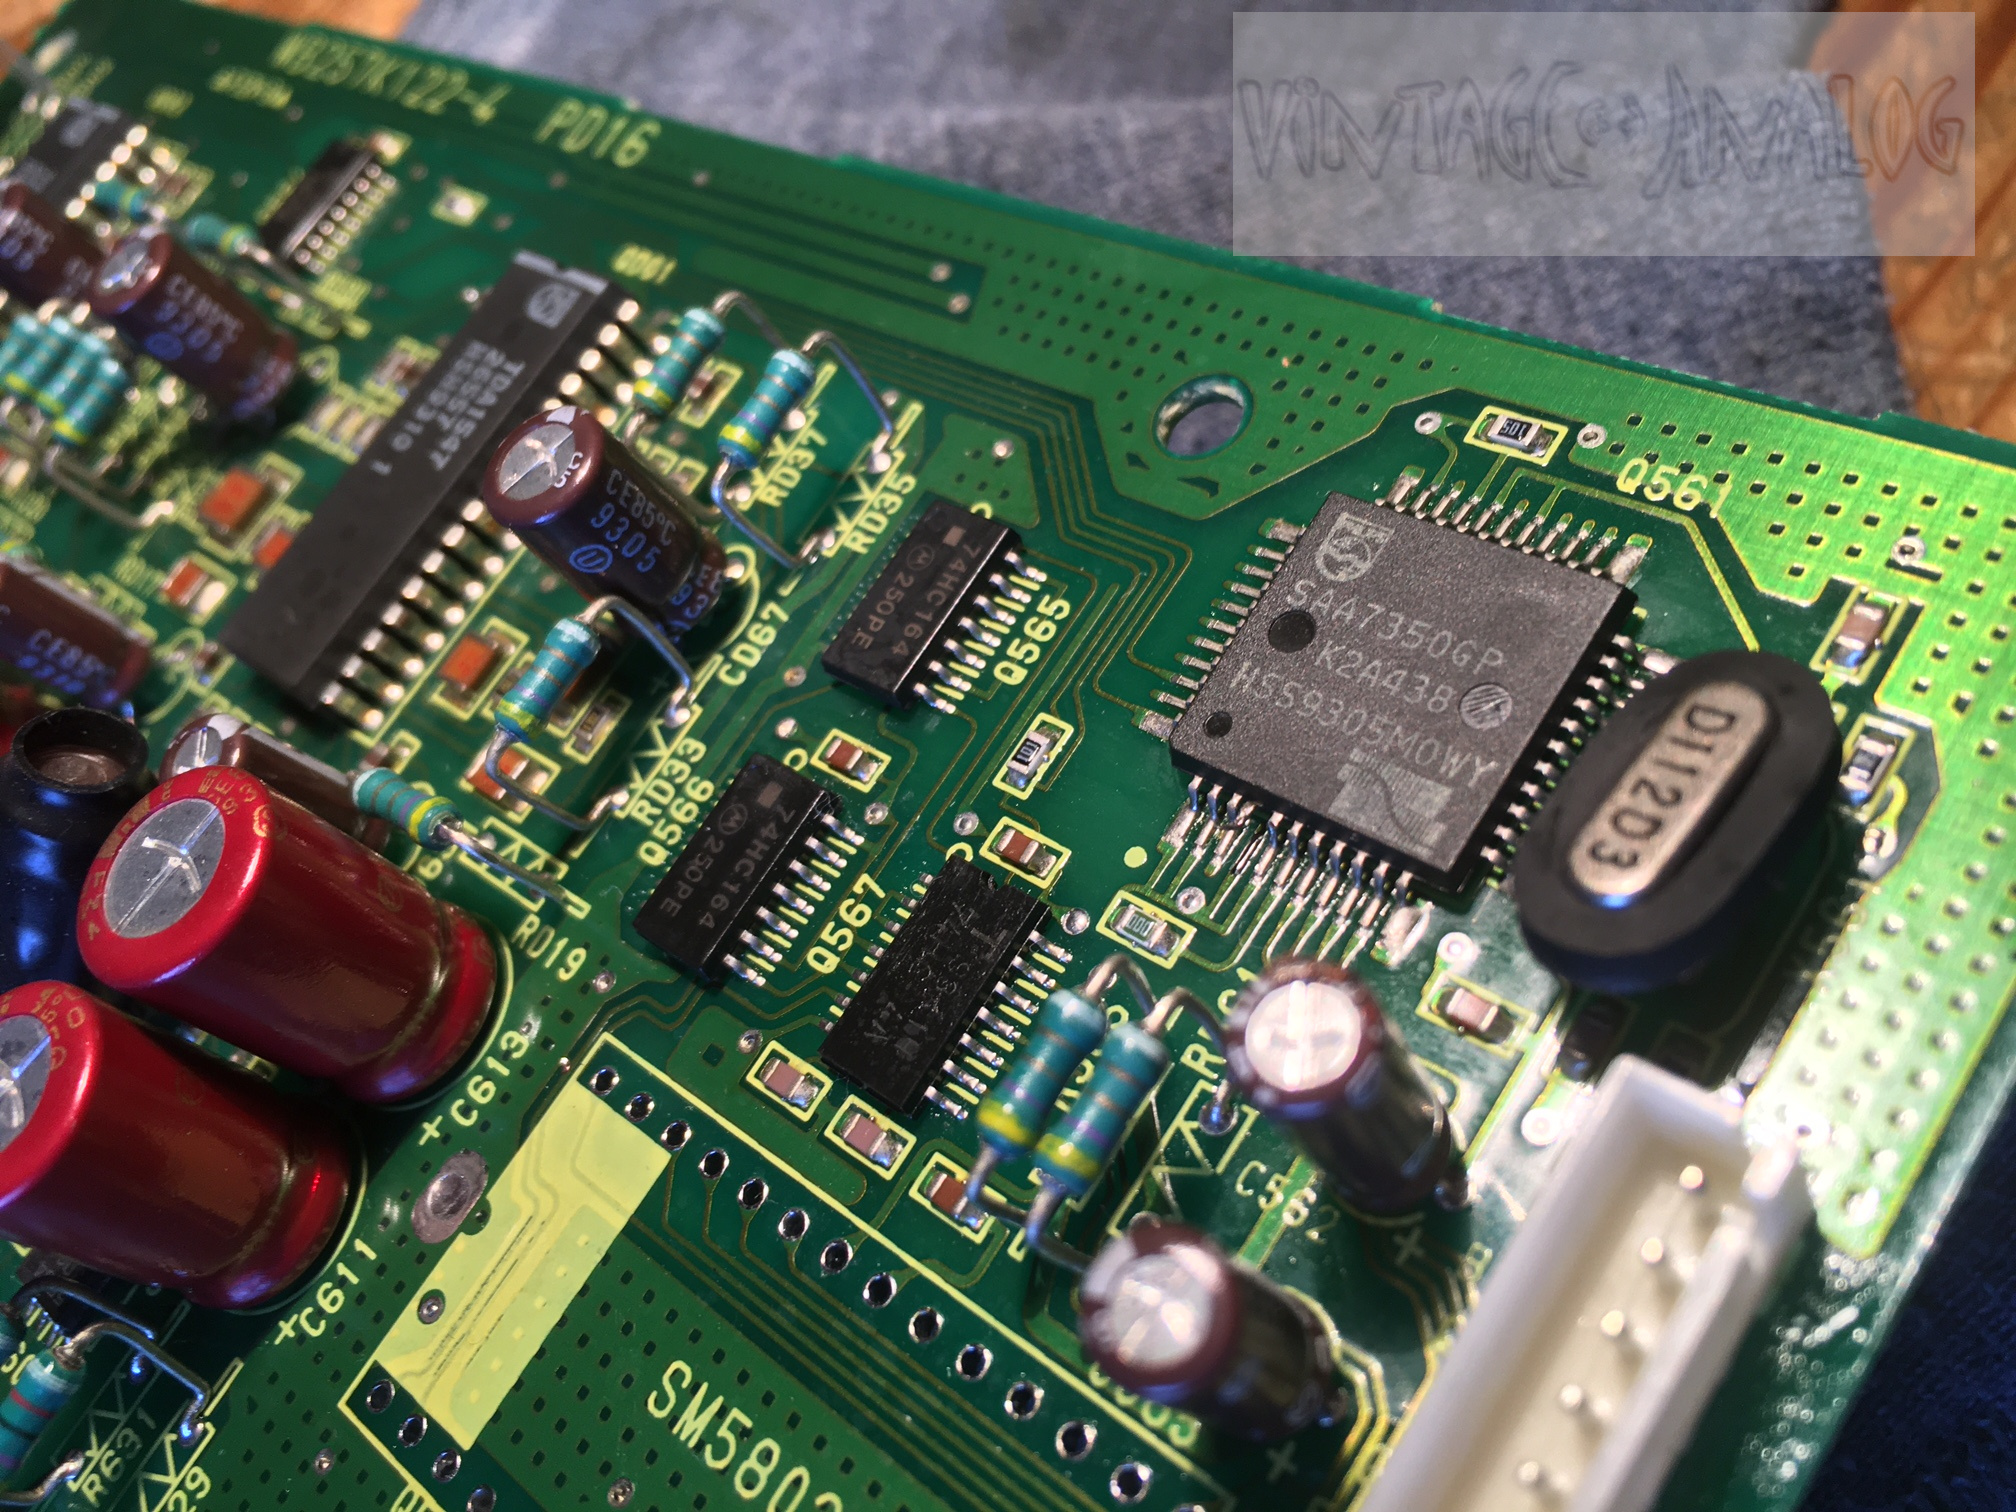


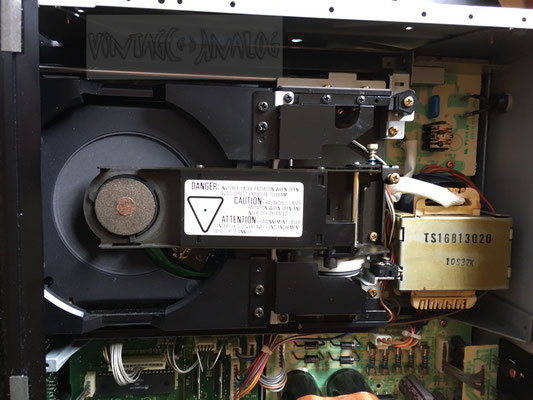
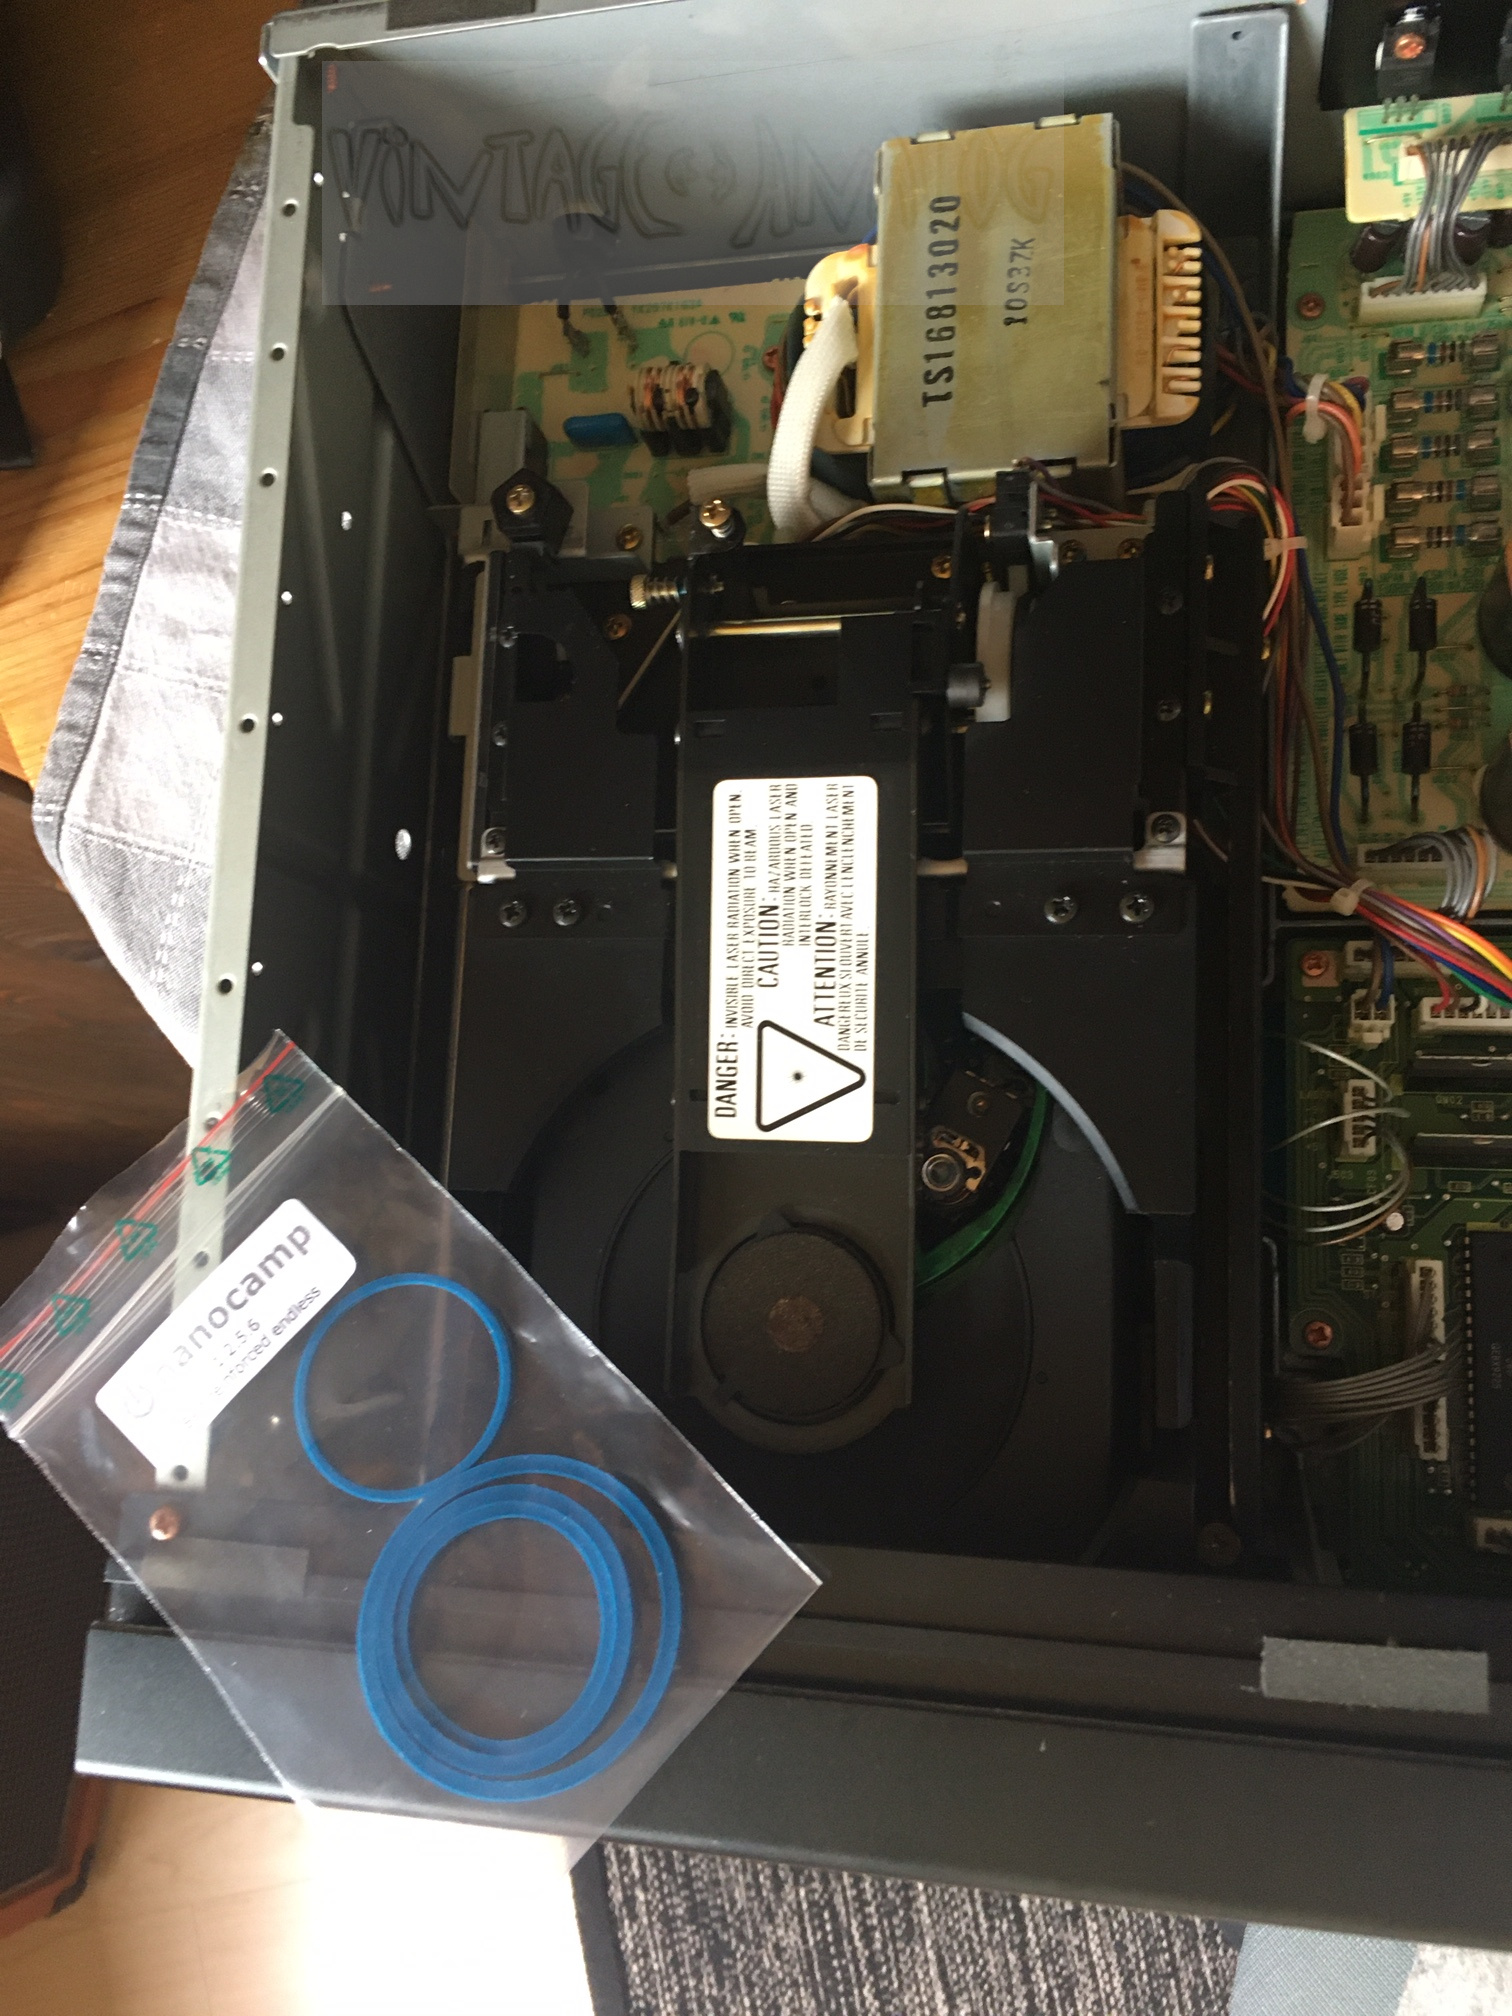
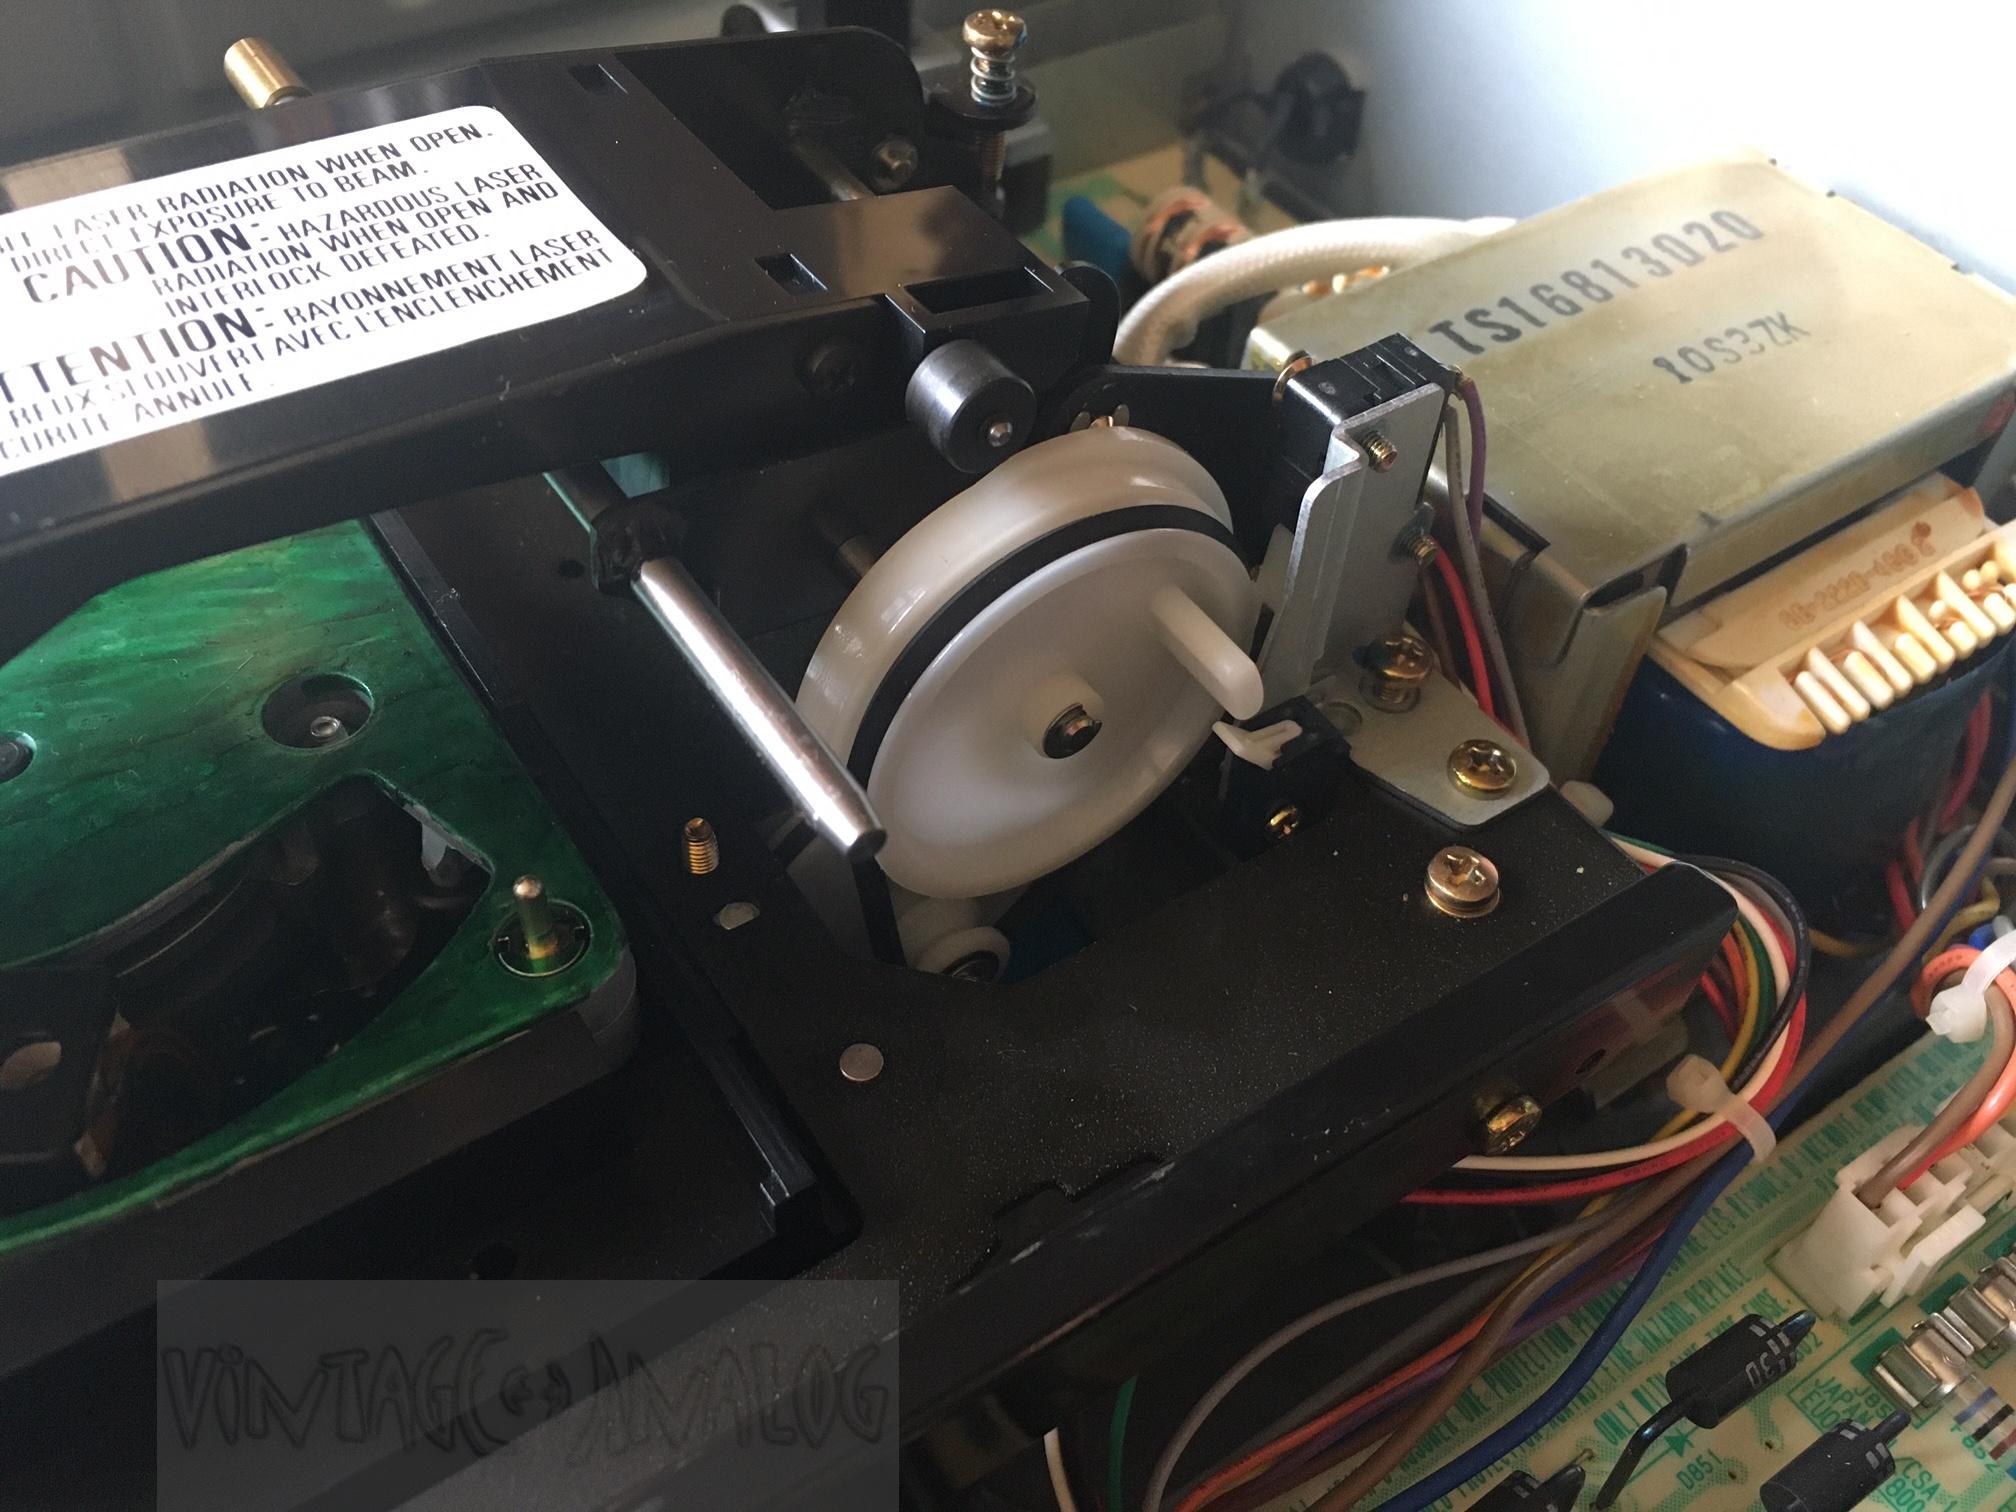
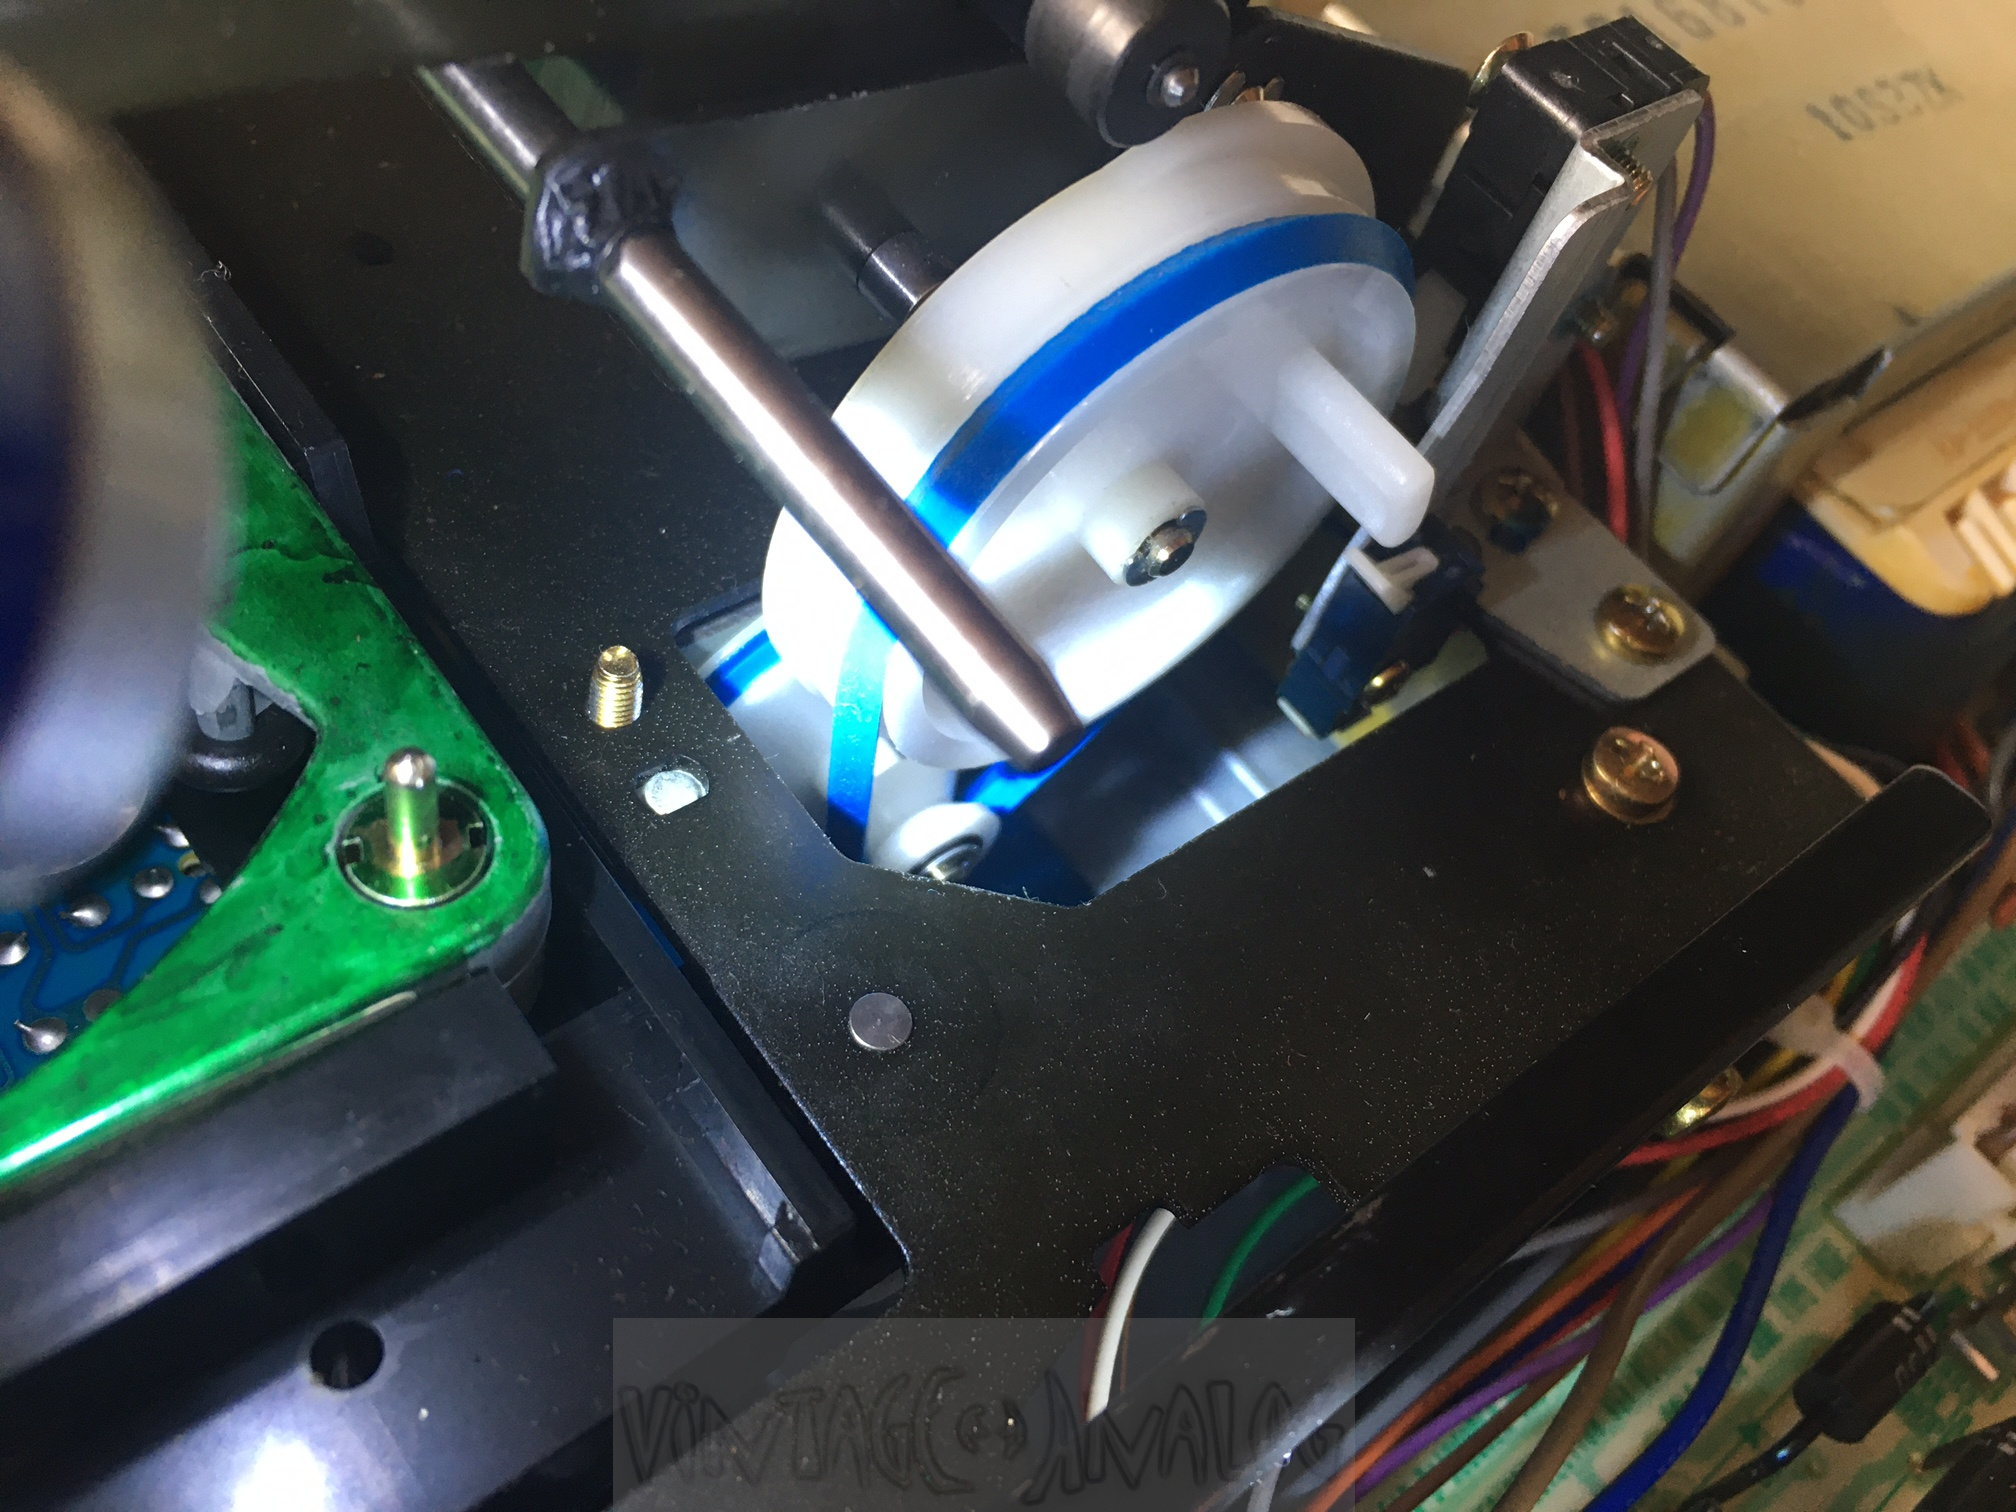
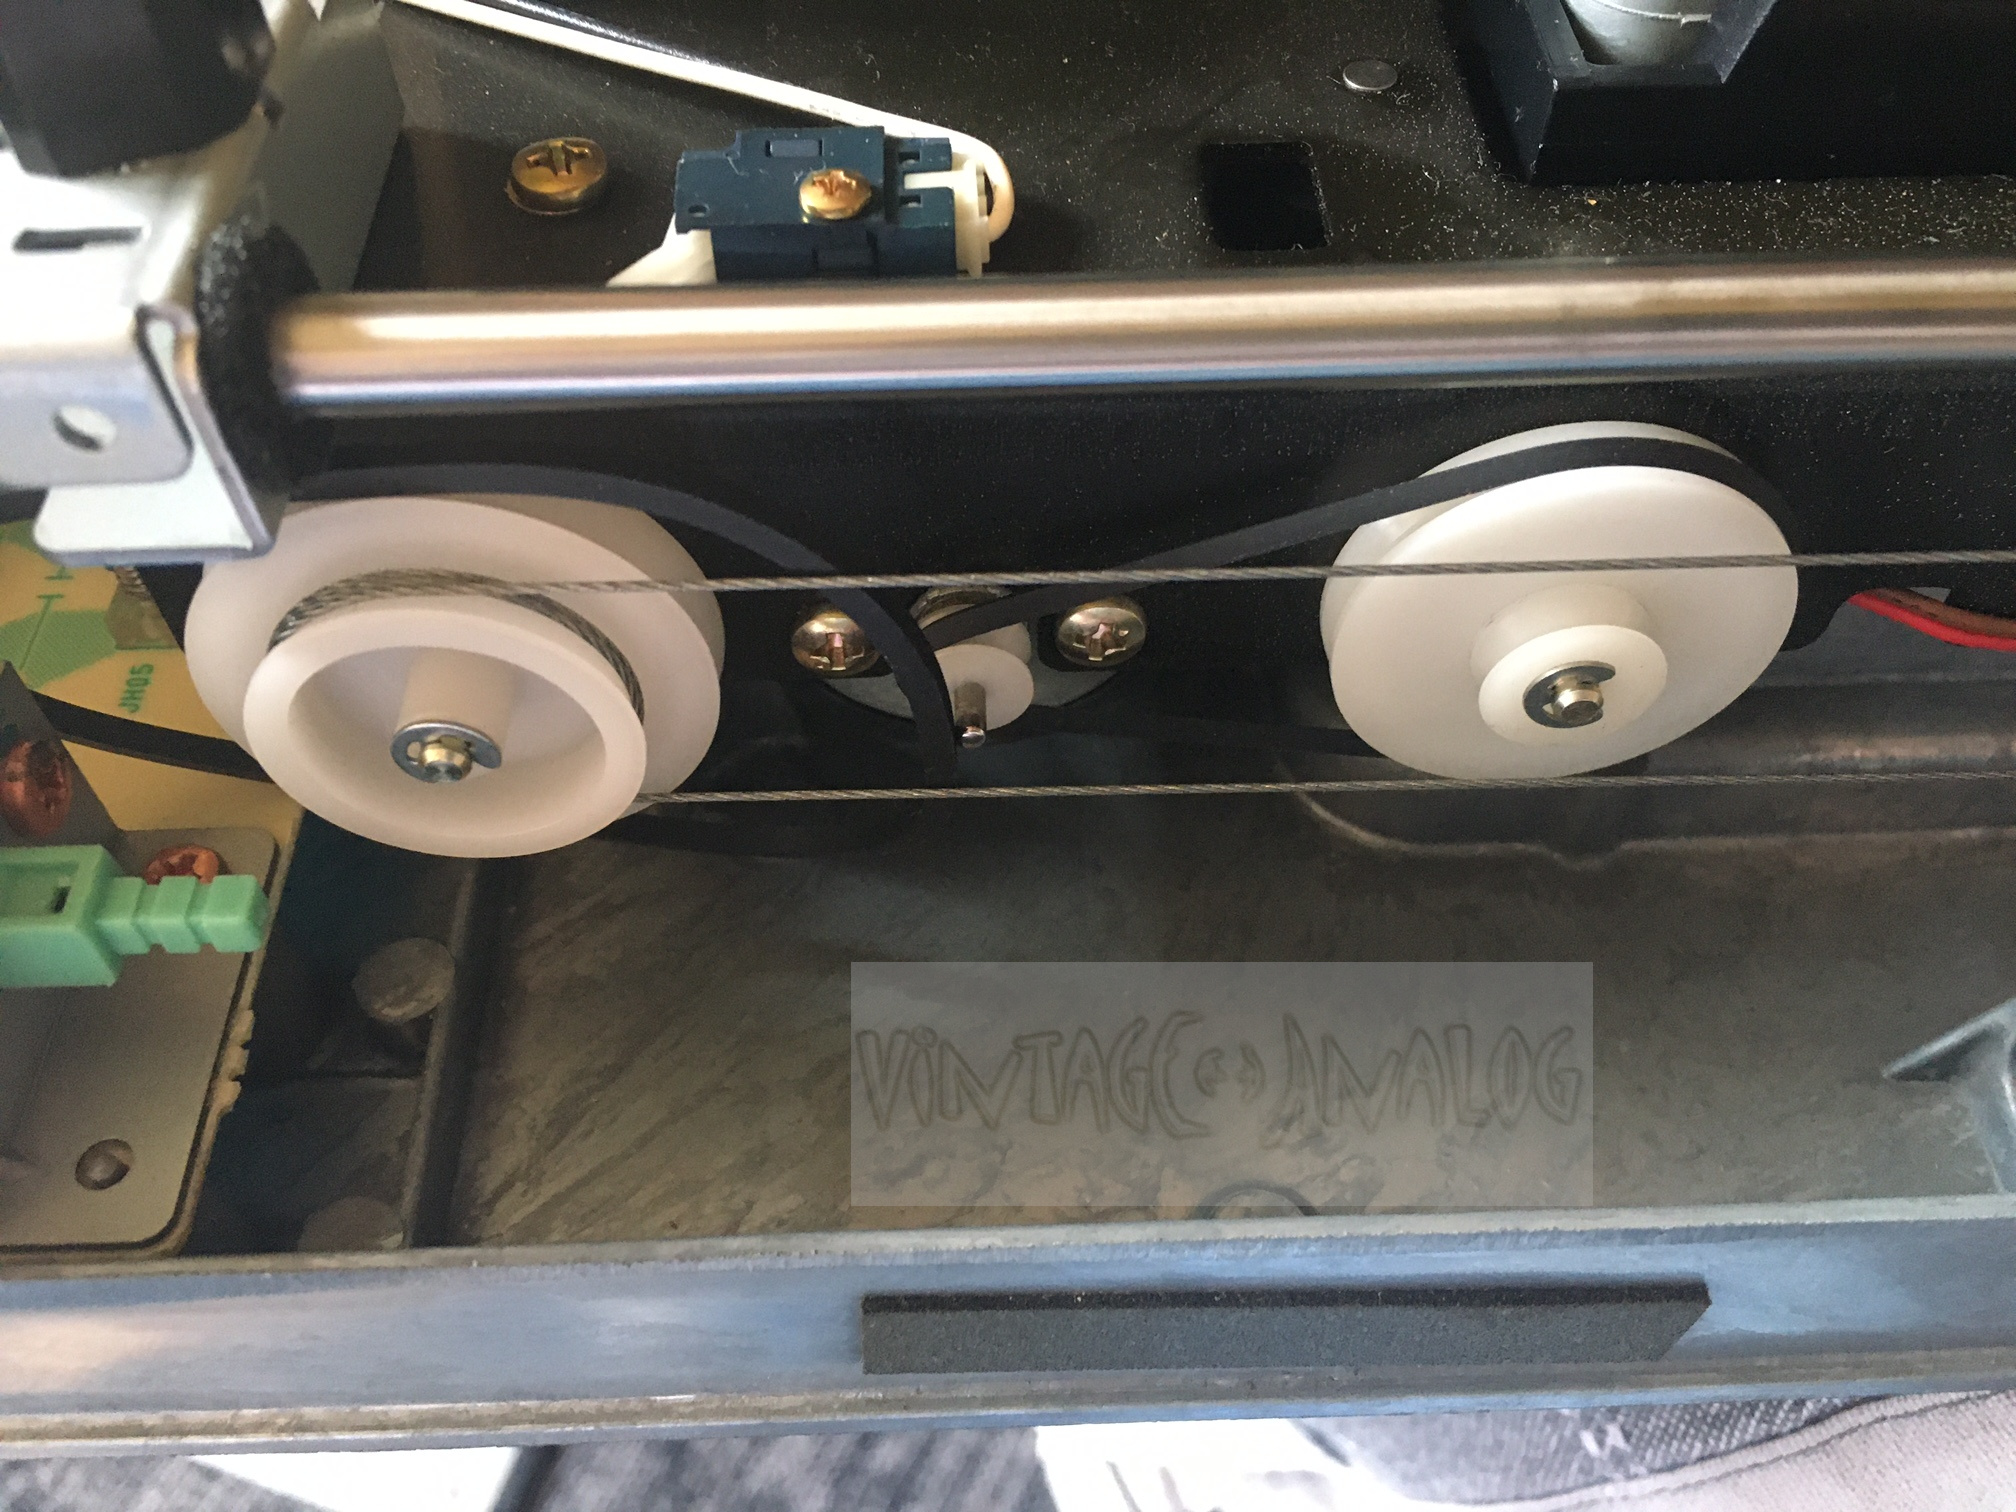
This unit has become some upgrades from it's first owner like Cinch connectors from WBT, and a better power cord. In addition he had changed the drive after 20 years of usage and change the belts before he decided to sell it.
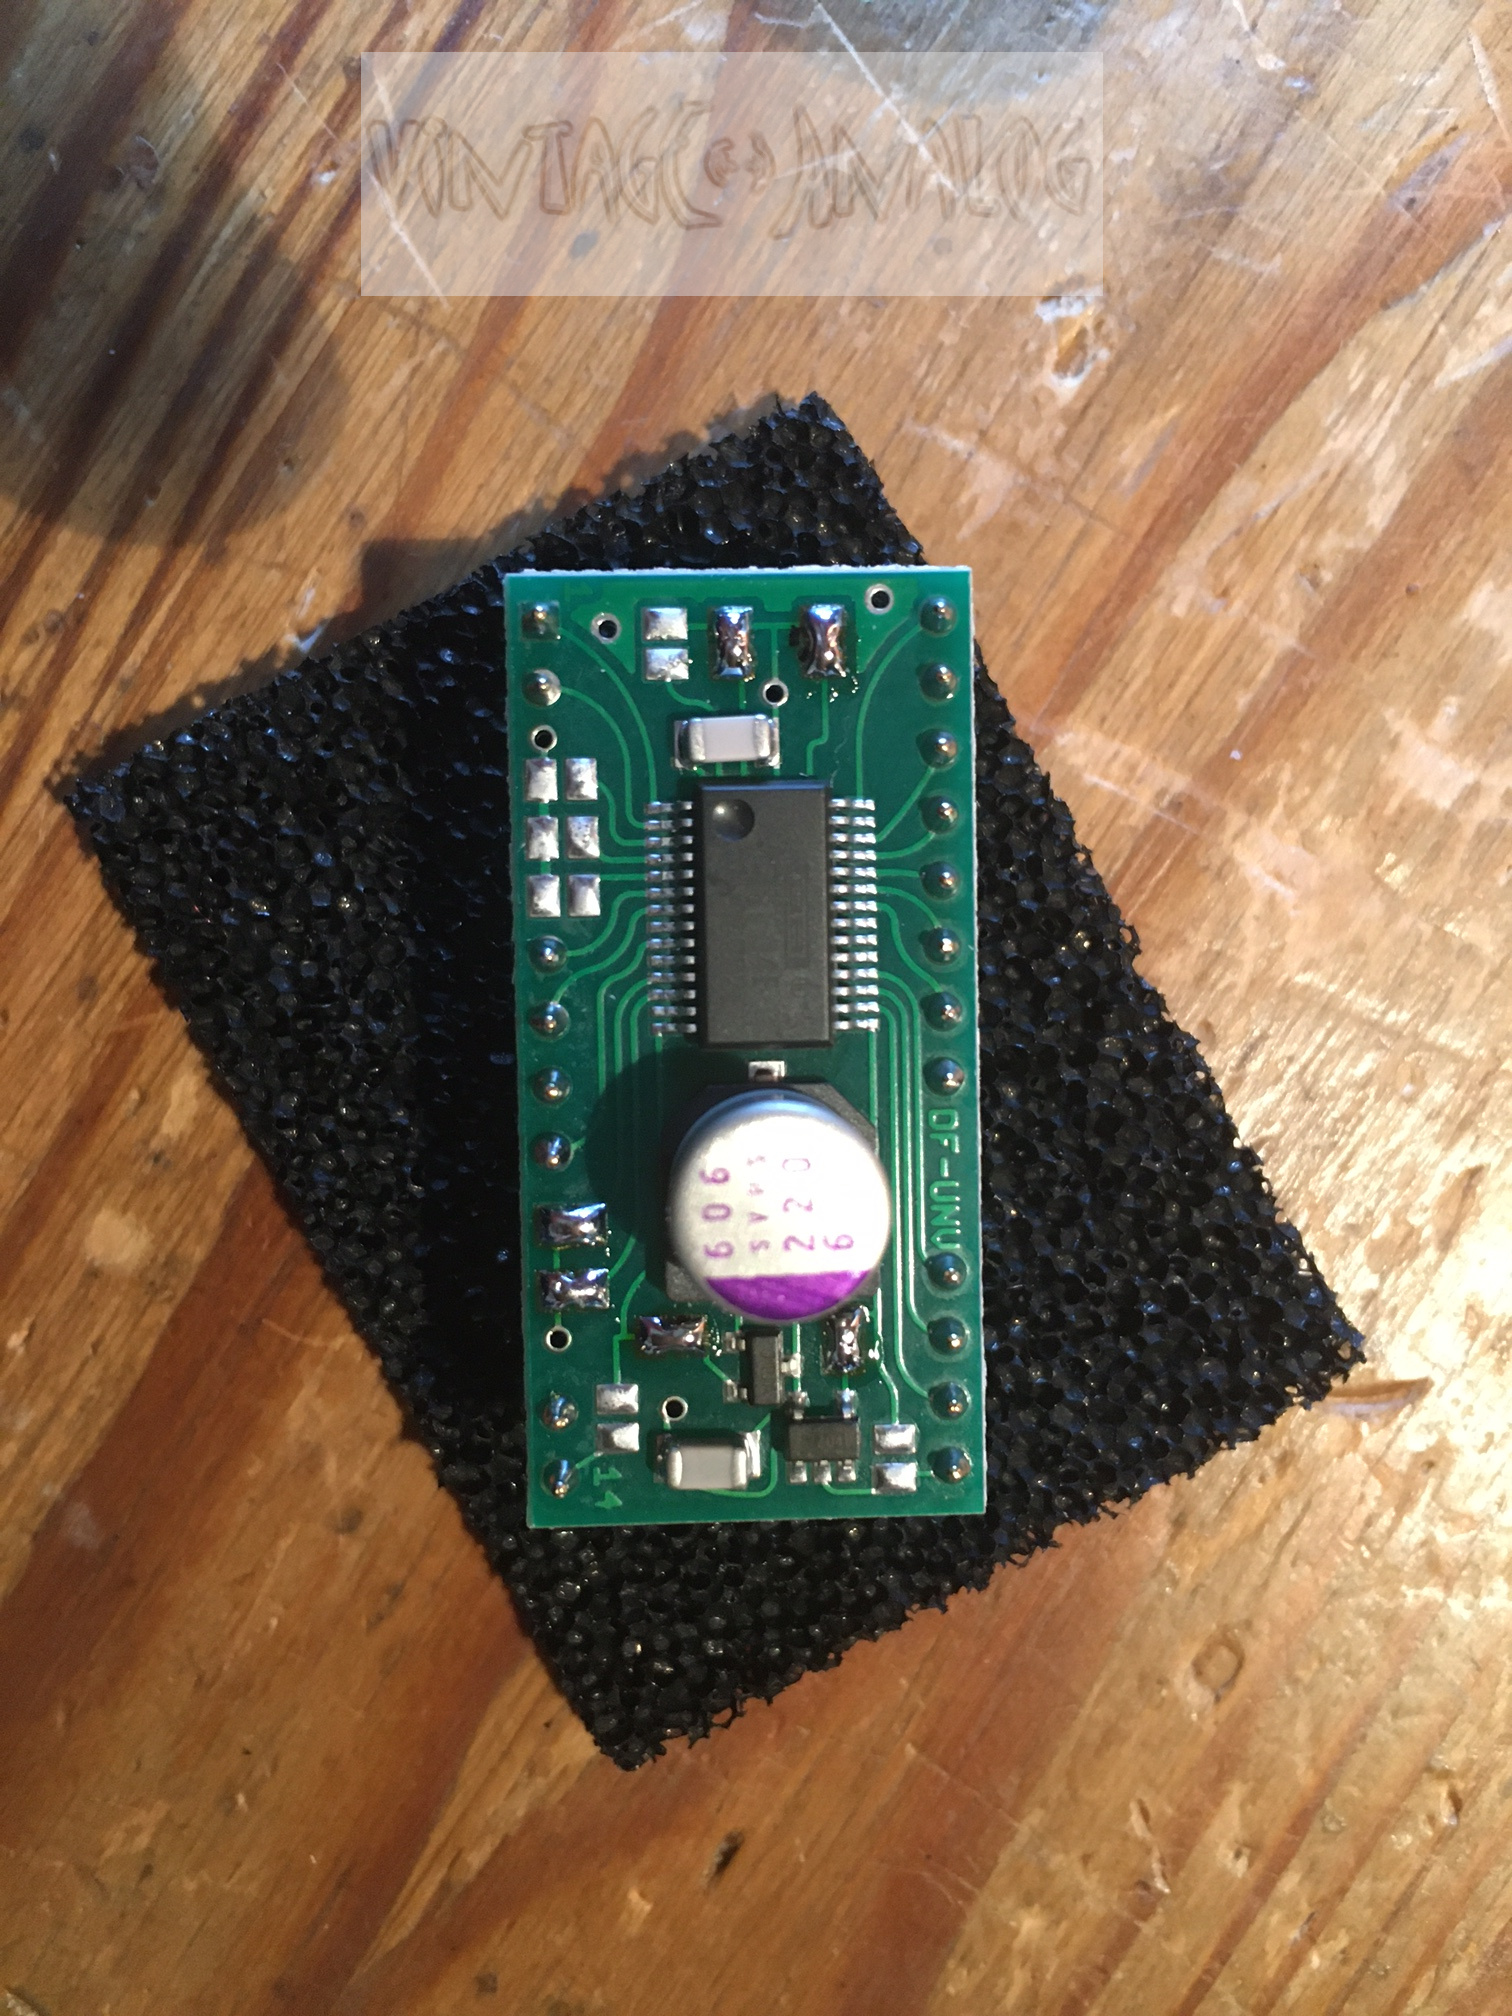
Im really happy with this and only upgrade the digital filter from the standard type (NCP-SM5803) used in CD10, CD16 and CD23 to a Burr Brown DF1704. Even with or without this filter upgrade ...
it always sound really good :o)
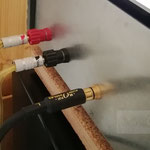
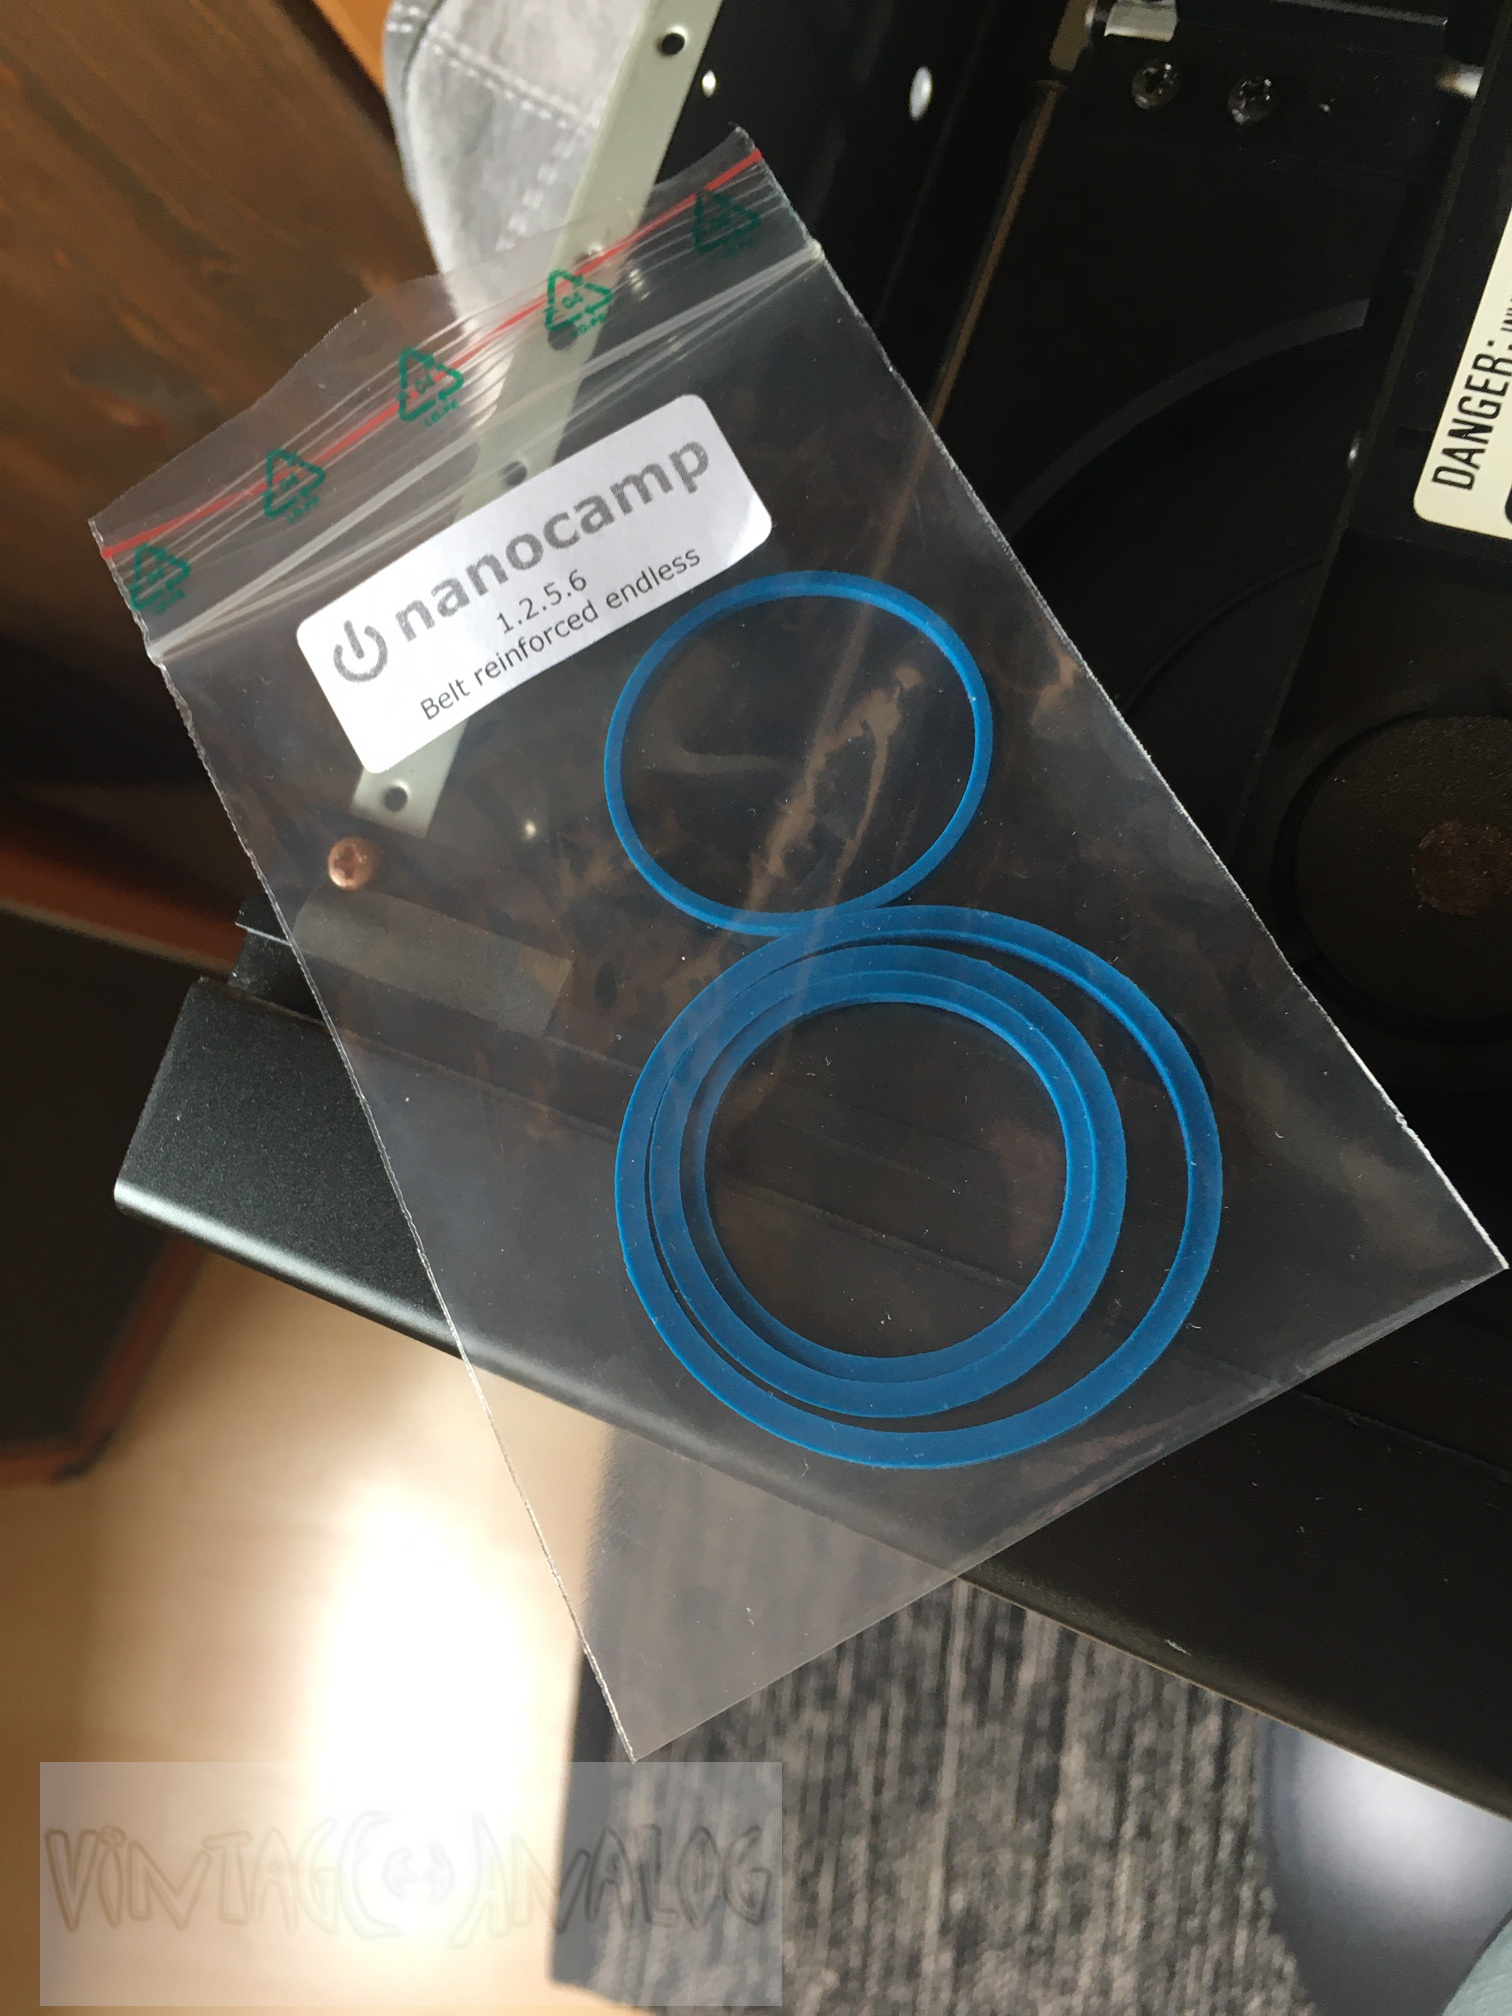
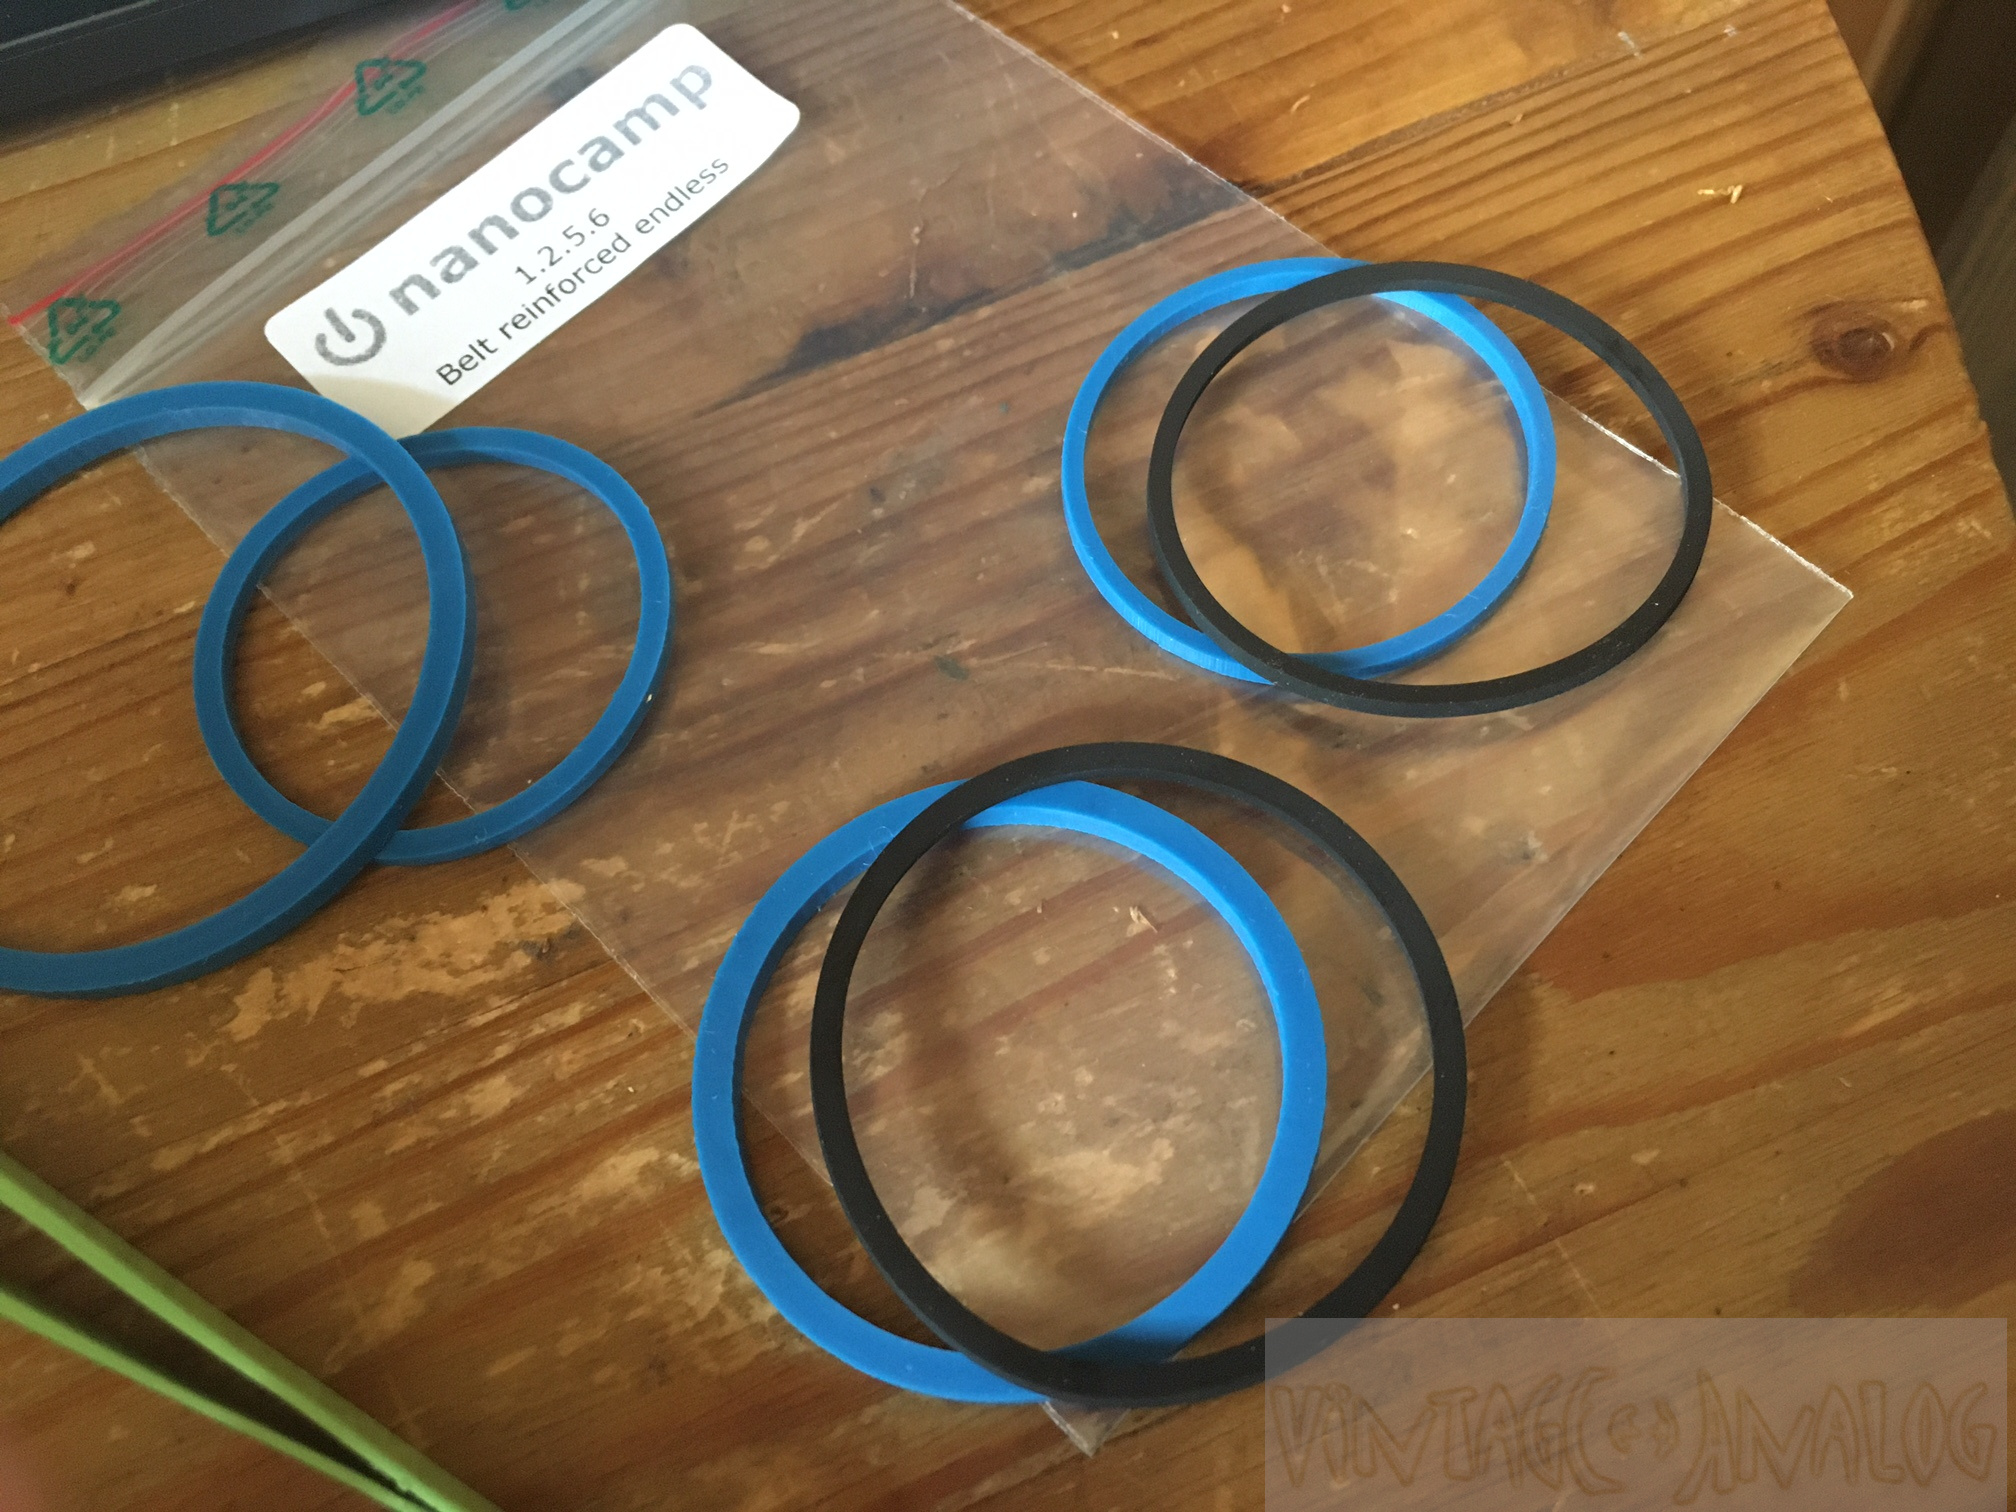
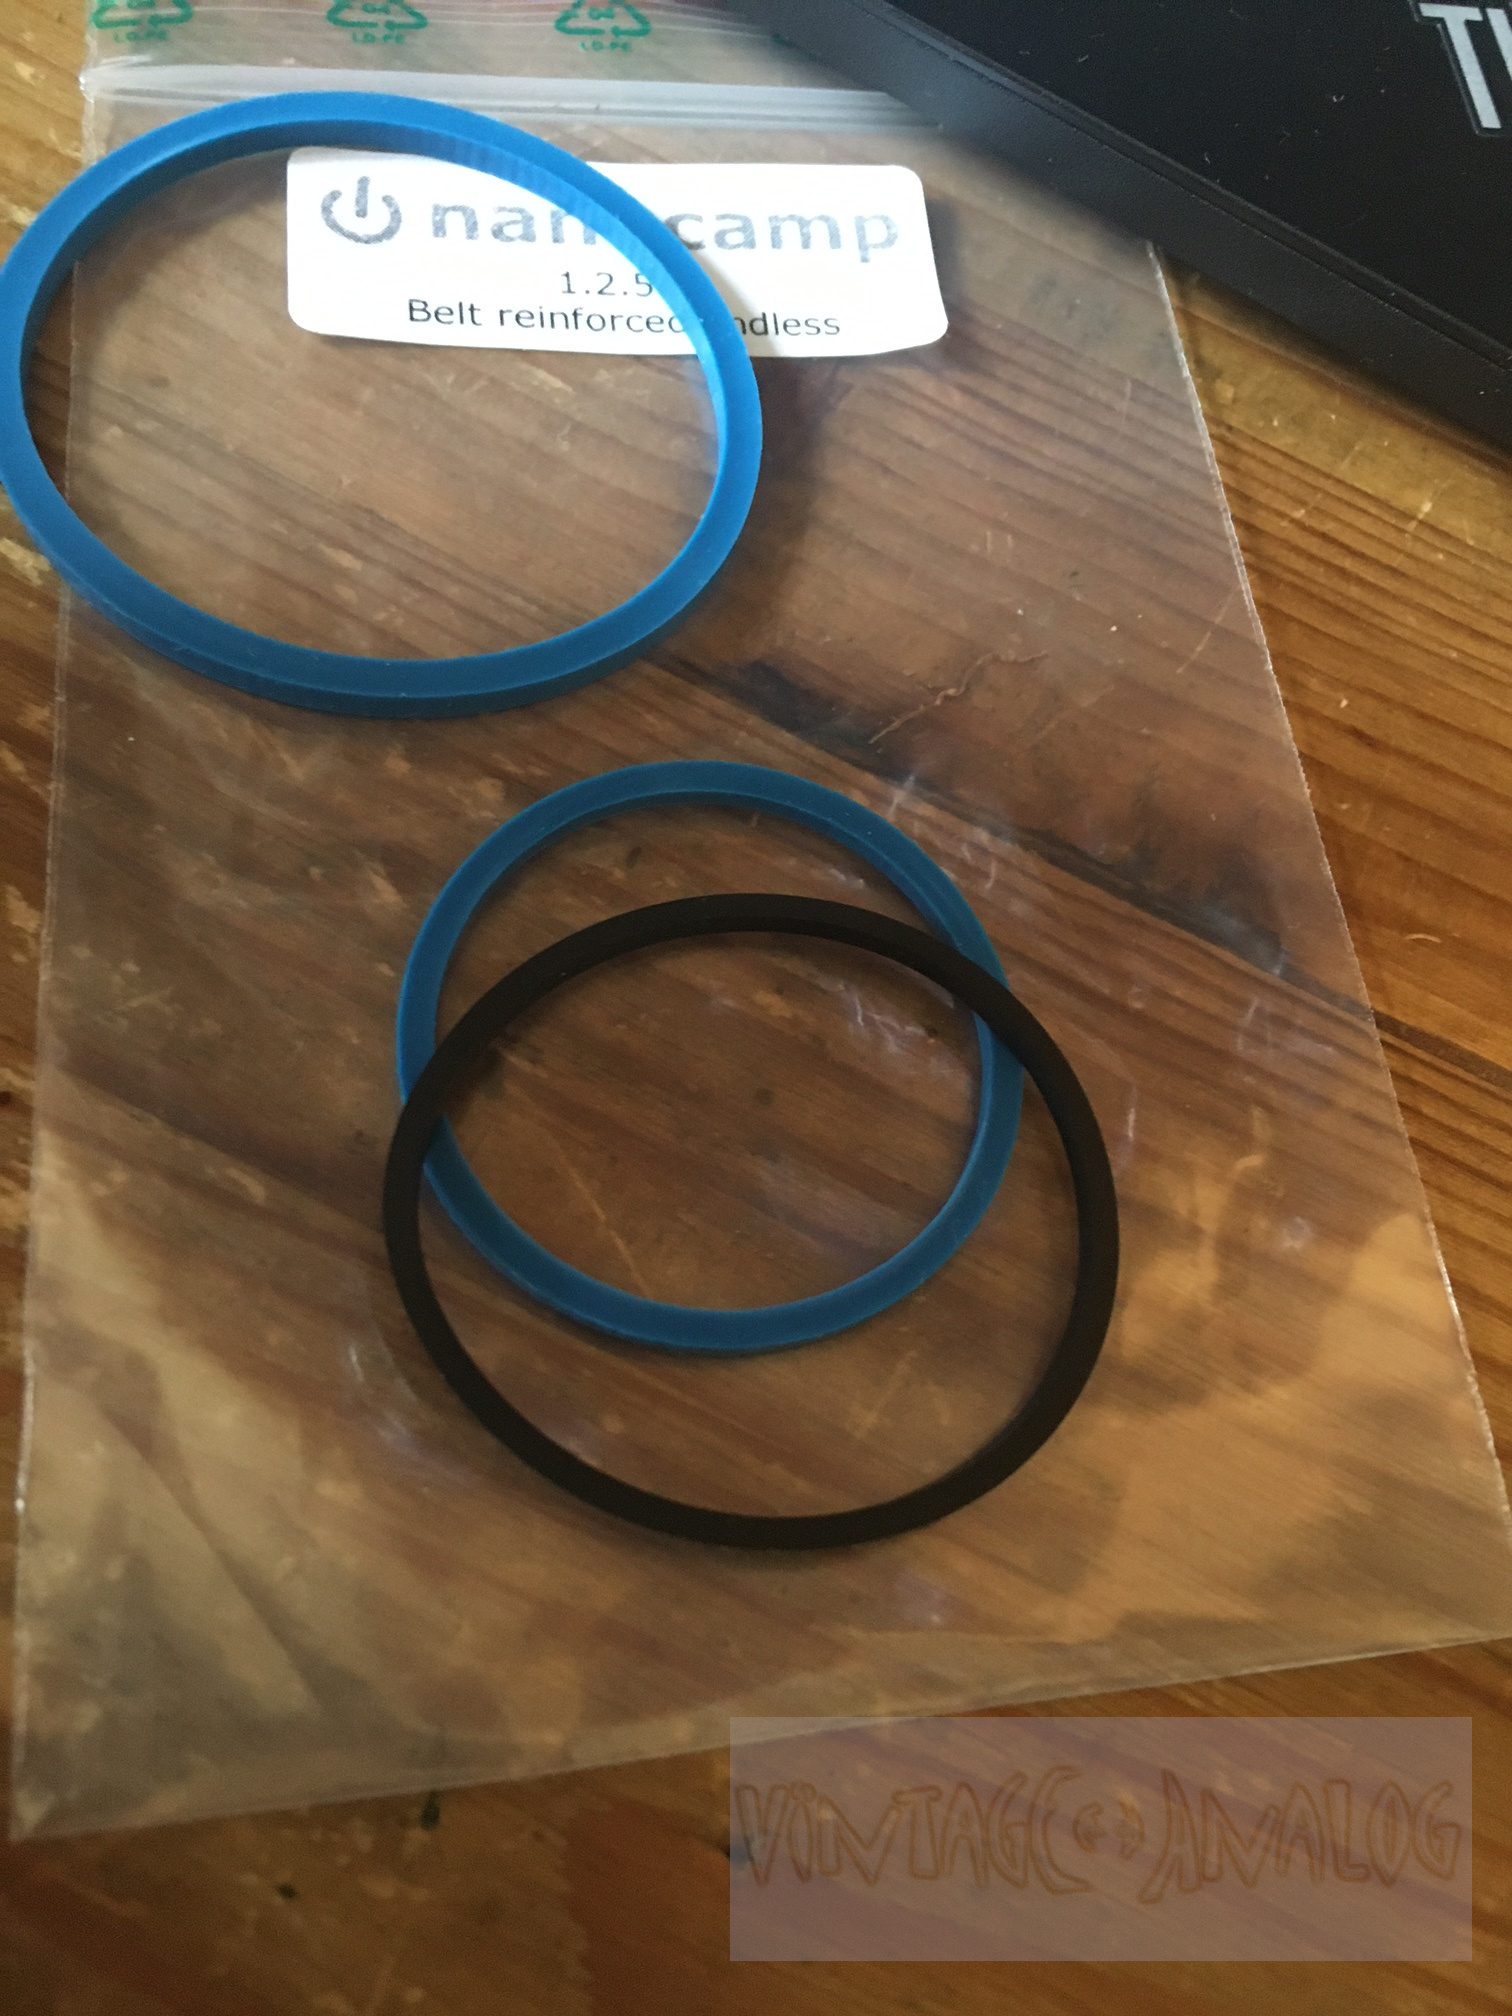
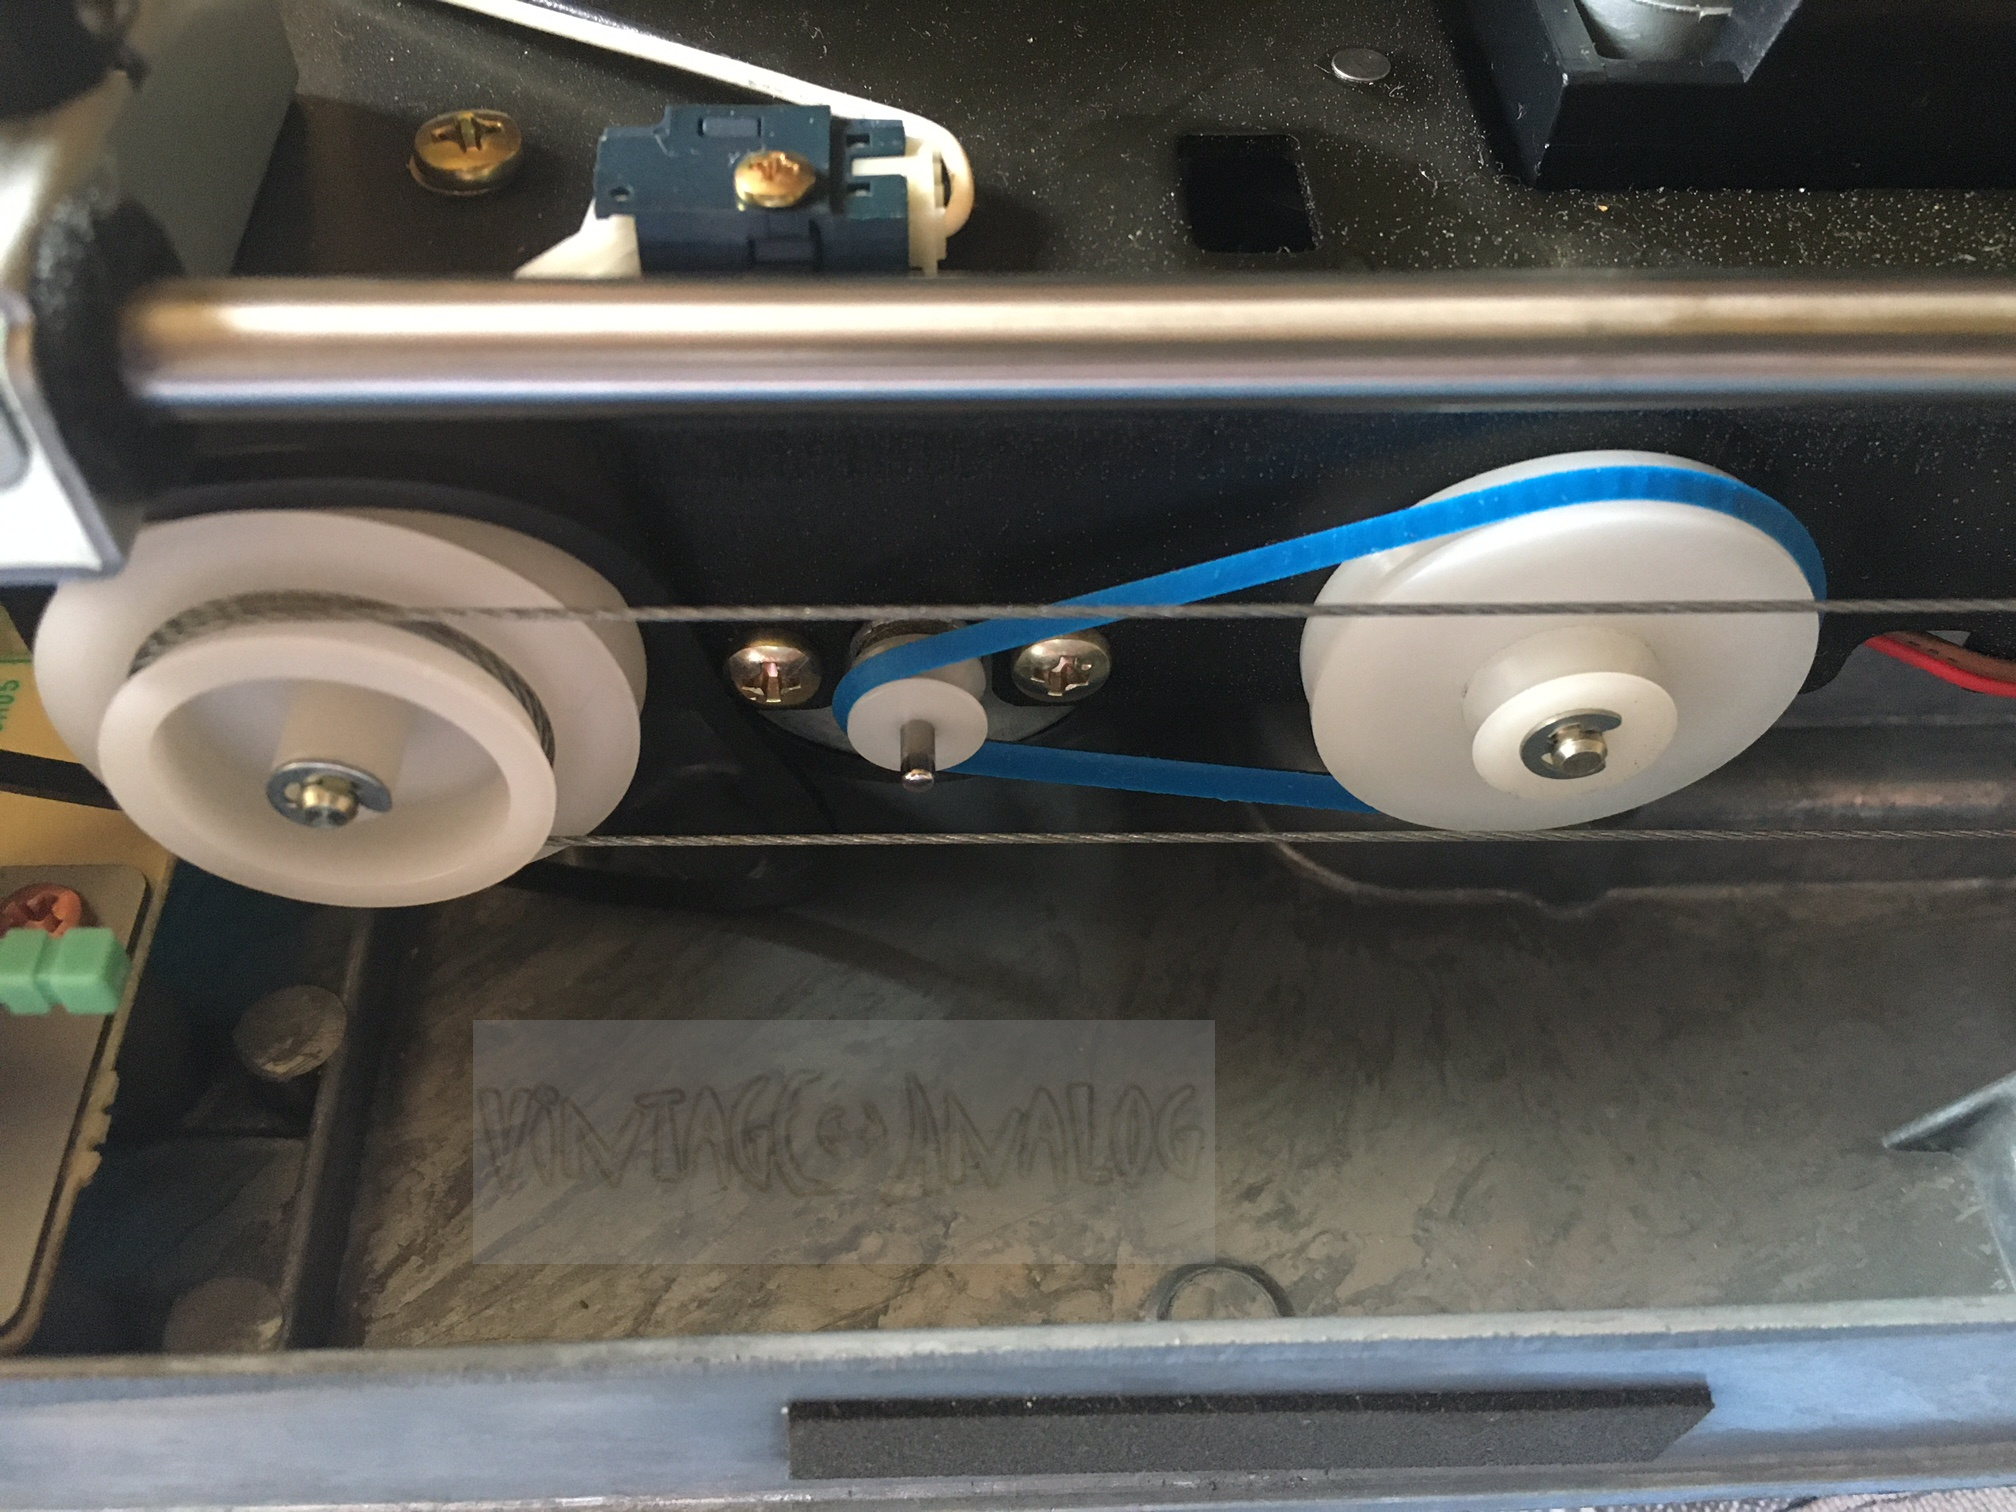
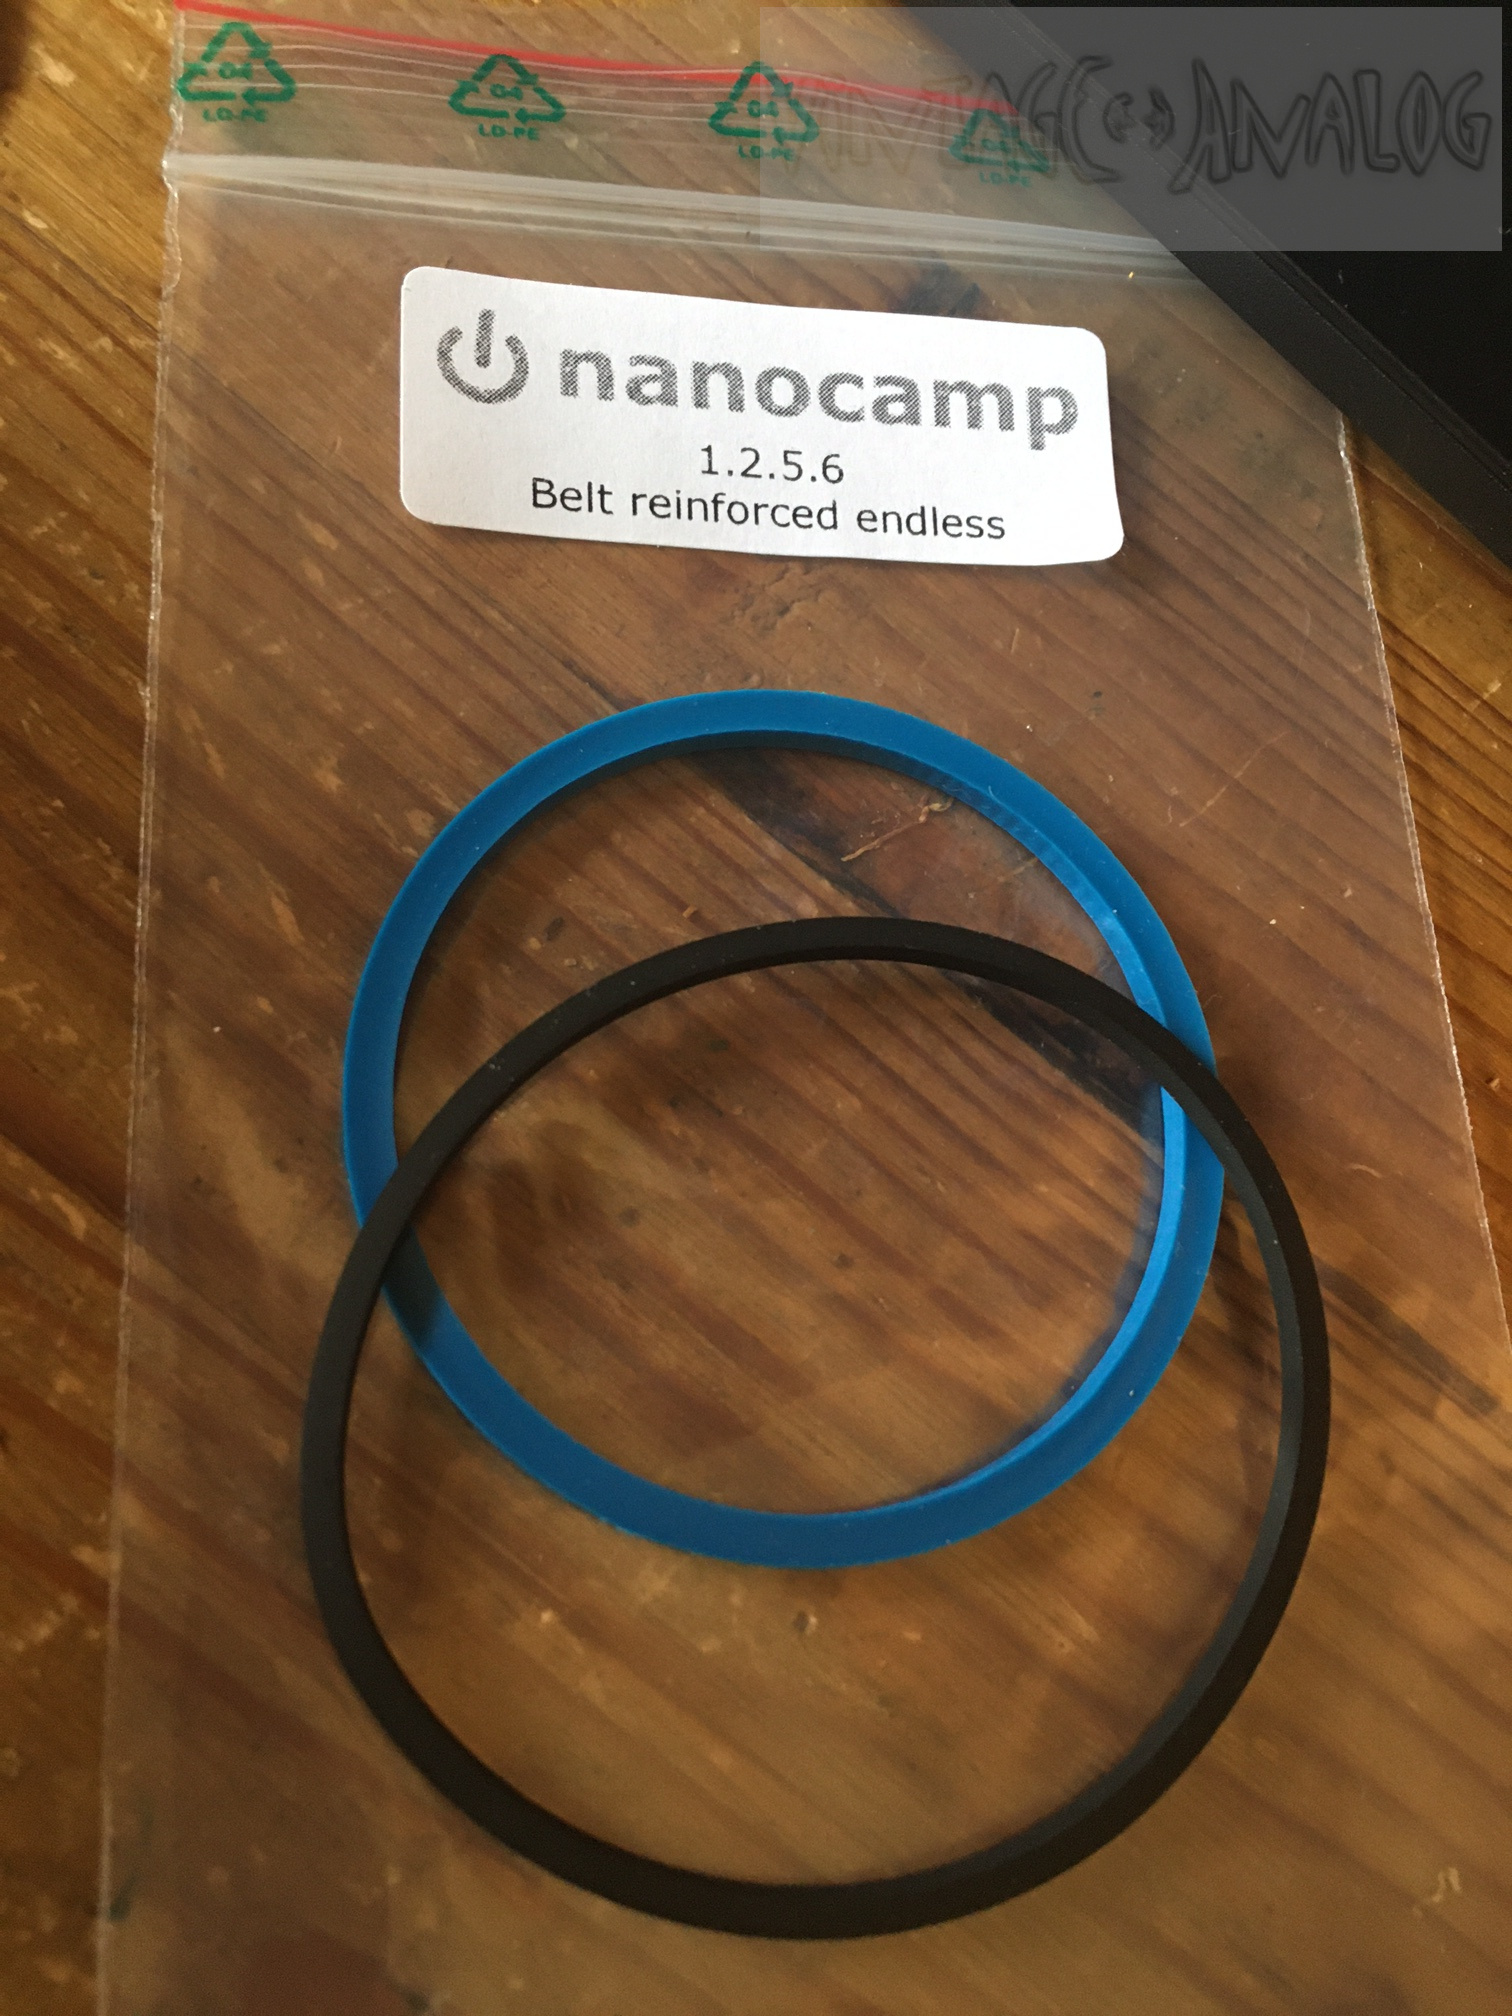
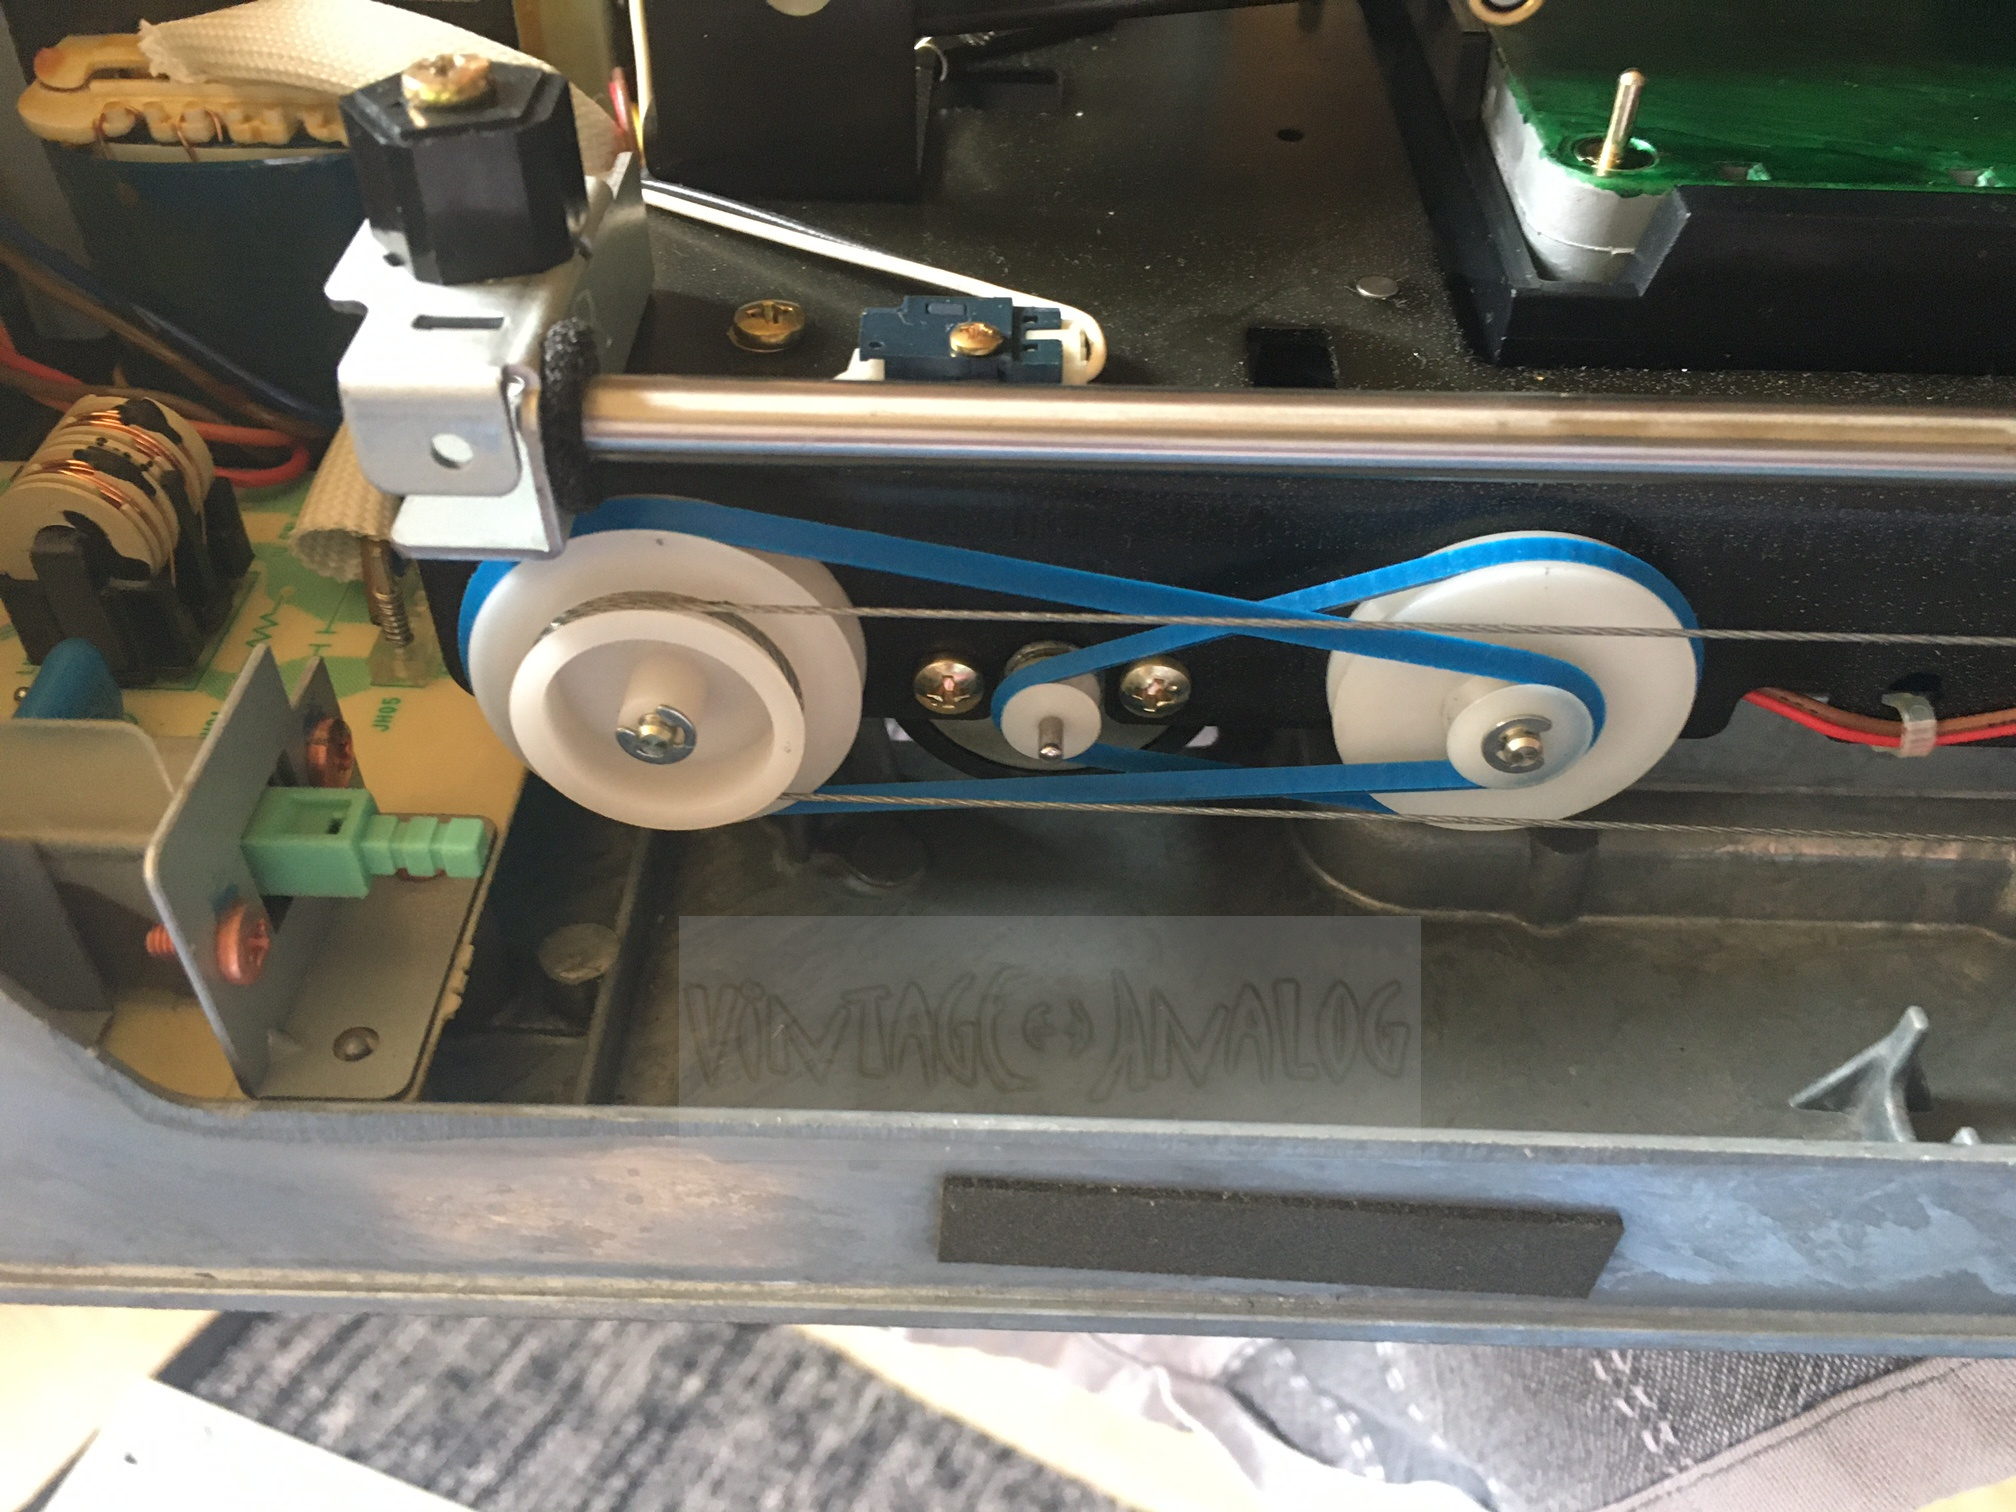
Blue Belts ... it's not only the color :o)
During my research to the Class-A Power Supply (see next article ) I noticed this wonderful new belts from
nanocamp for nearly every model of Tape-Recorder or CD-Player. Beside their pleasing color, their improved stability and increased durability ... they are completely manufactured in
Germany !
Extremly useful is the special assembly tool, a form of spacer that prevent the wire rope from slipping away. Really cool :o)
Take a look at the belt-compare pictures, and the upgrade of my Marantz CD-10 Player.


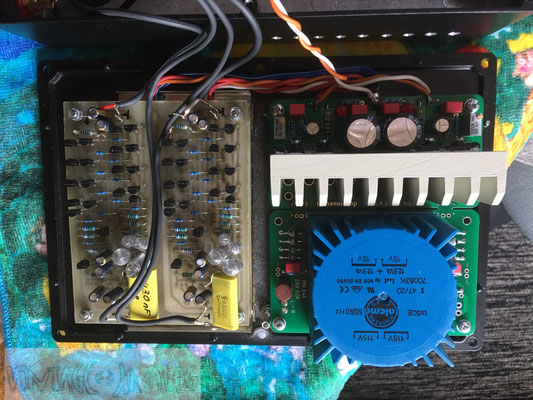
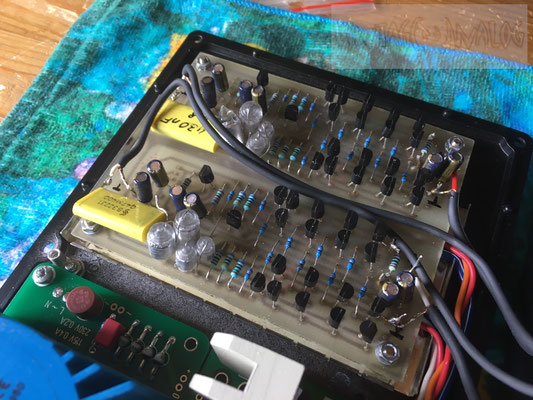
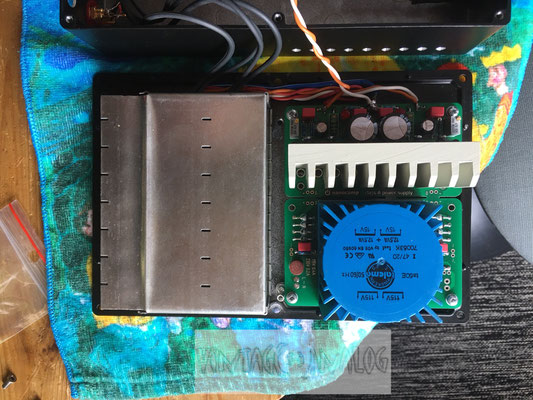
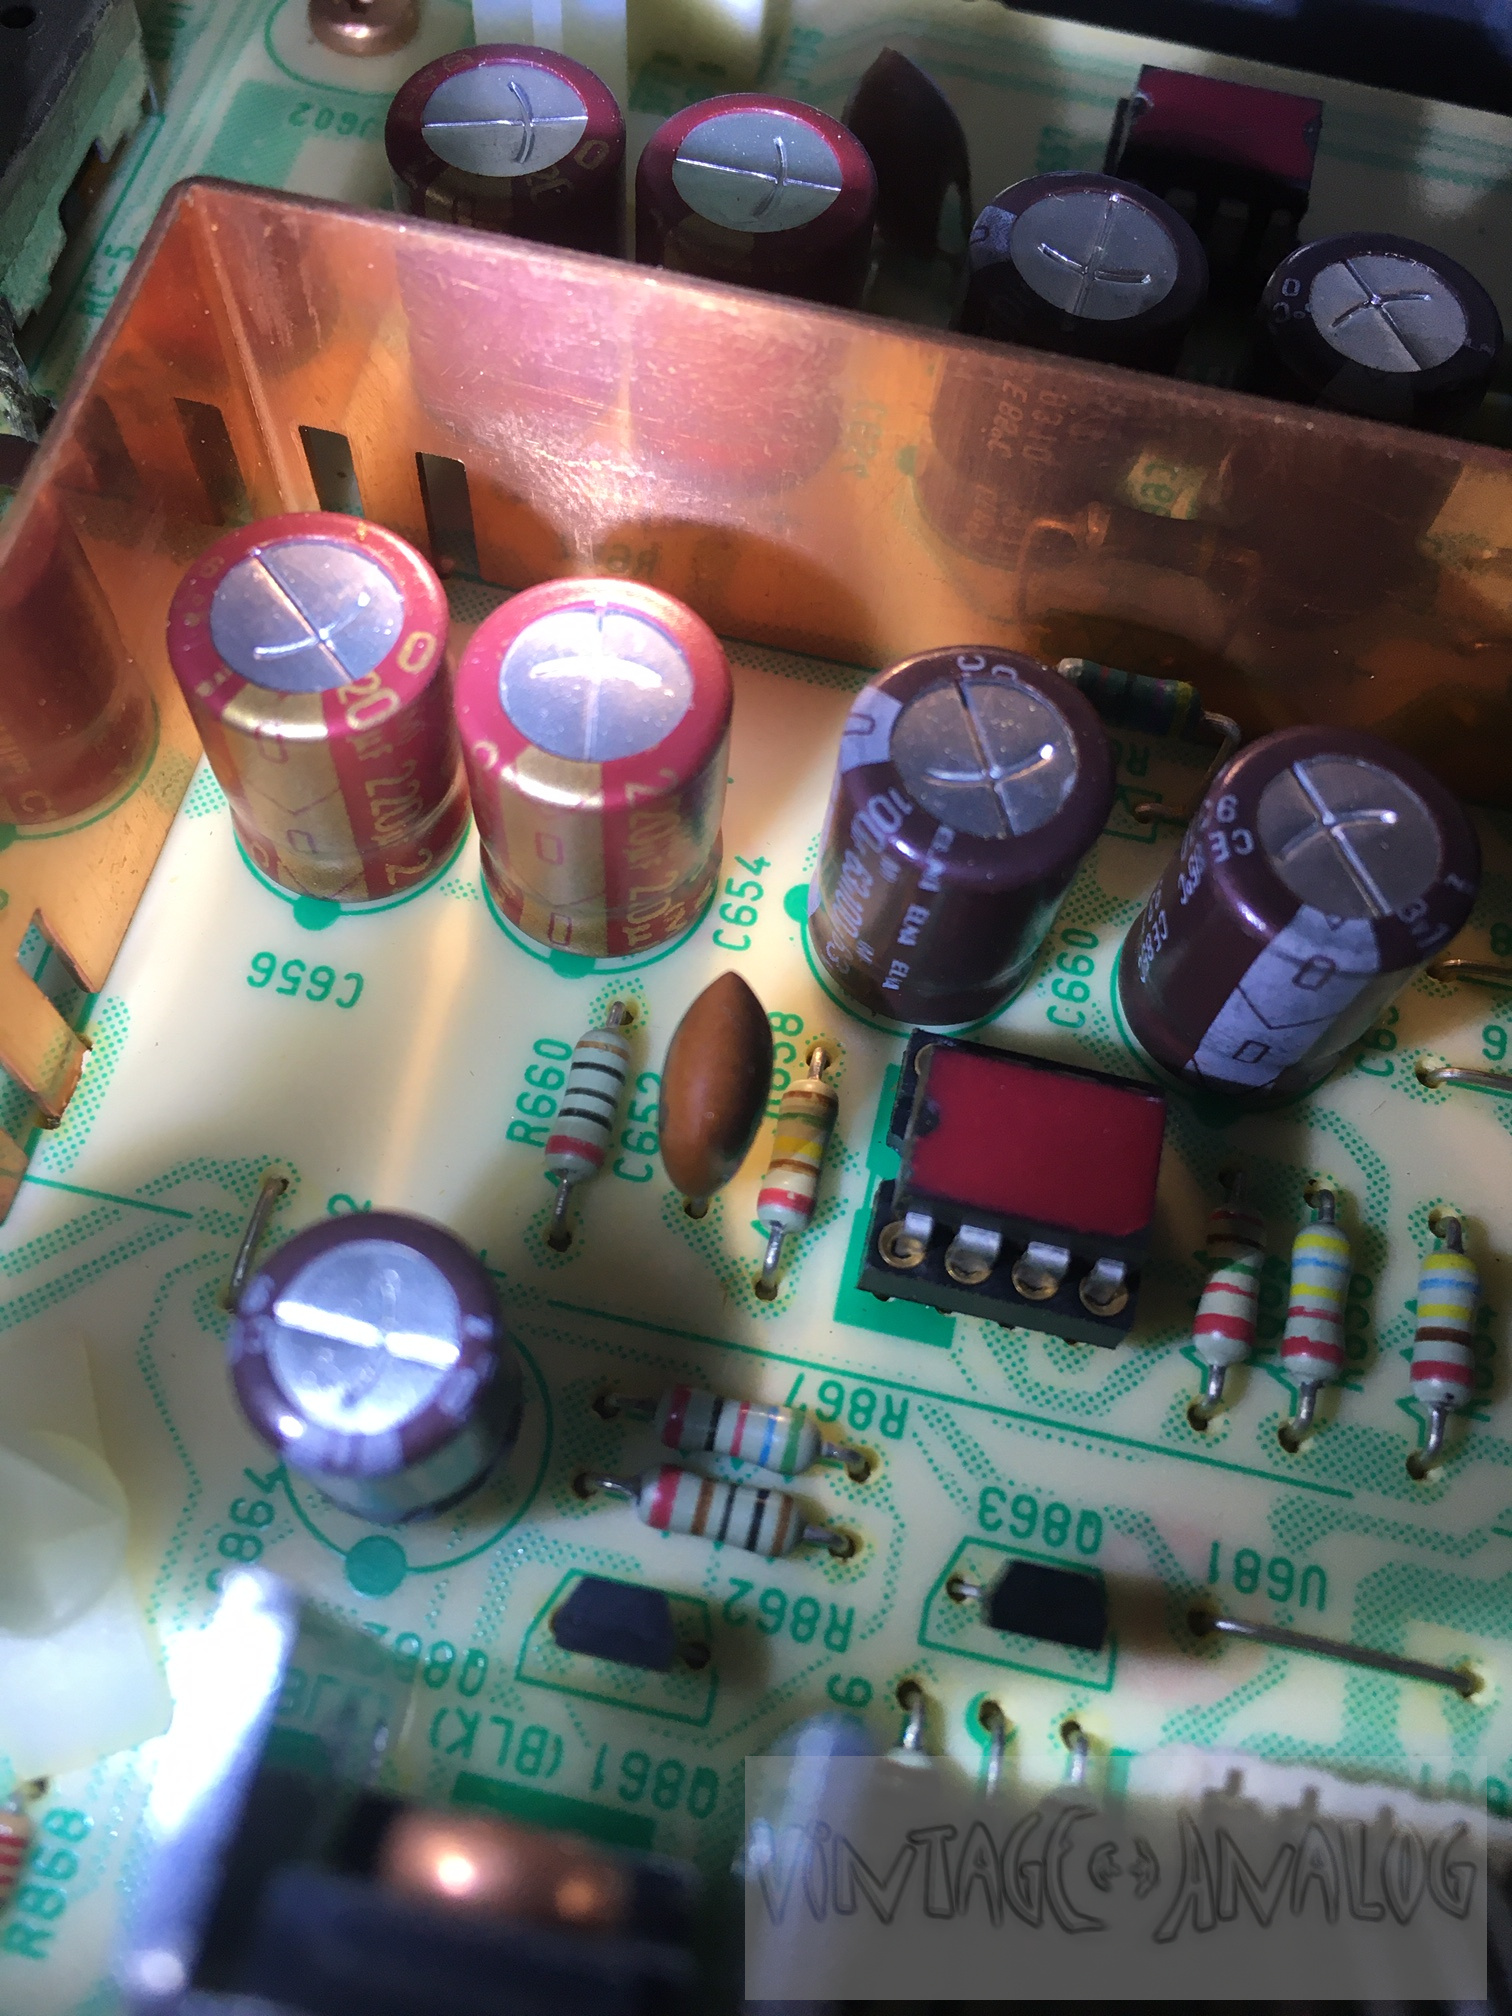
SUPRA, DIY 80's Phono-Preamp with nanocamp Class-A Power Supply
The german magazine Elektor introduced this super-low-noise Phono-Preamp in 1982. I remember that I was really impressed by it's design at these days, and I started to make the PCB for this
project. But nothing else happened after that ... 37 years long :o)
After I had rediscovered my love to music on Vinyl, it was time to finally finish this project. I found the old PCB, order all parts and finished it in 2017 :o) In direct comparison to the world
class Phono stage of my Yamaha C2a it sounds a little bit muddy, with less dynamics, precision and image. In one word unspectacular ... but ... then I read the first time about something that was
called a "Class-A Power Supply". in opposite to a standard supply that works as a constant-voltage source, this one is designed as a constant-current source. It always delivers it's maximum
current, that will be sinked and converted to heat if the load (in this case the Phono PreAmp) doesn't need it. In the case the PreAmp needs the current, nearly no time consuming regulation is
necessary to react to this current-request. Admittedly ... this approach really misses all efficiency goals :o) I decided to give it a try and ordered at "NANOCAMP Audio manufaktur" in Weimar. They offer ready to use units or only a PCB with the
appropriate heatsink. Perfect for DIY lovers like me !
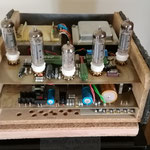
I changed the old standard Power-Supply against this cool Class-A type. As you can see in the pictures I decided to implement a second small housing inside, to improve the shielding of the Preamp
against the Power Supply. I prefer this solution with a common housing, because the wires are short without any need of a additional connector between Power Supply and Phono Preamp. After some
mechanical work it fitted perfect.
Then ... Tataaaaa ... the first test ... How cool was that !!! I can't believe my ears, and I repeated this test a whole week long before I realized that this was really true. The overall
impression had changed so much, that I searched for other reasons. But nothing else had changed ! Much more details, the dynamics are greatly improved ... but the greatest benefit was the
resulting stage and depth of the audio image ... breathtaking !!!
Im really excited about this result, and I'm now enjoying my old and rusty SUPRA in it's full glory ! Thank you very much ... nanocamp :o)